

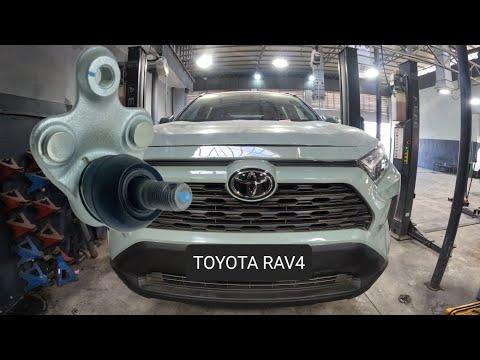







How to Replace Front Lower Ball Joints on a 2019-2025 Toyota RAV4
Step-by-step lower control arm guide with tools, parts, torque specs, and safety tips for 2019, 2020, 2021, 2022, 2023, 2024, 2025
How to Replace Front Lower Ball Joints on a 2019-2025 Toyota RAV4
Step-by-step lower control arm guide with tools, parts, torque specs, and safety tips for 2019, 2020, 2021, 2022, 2023, 2024, 2025


🔧 RAV4 - Front Lower Ball Joint Replacement
The front lower ball joints connect the steering knuckle to the lower control arms and let the front wheels steer and move with the suspension. On your RAV4, the front lower ball joint is serviced as part of the lower control arm assembly, not as a simple press-in joint.
Difficulty Level: Advanced | Estimated Time: 3-5 hours for both sides
Assumption: This guide covers front lower ball joint/lower control arm replacement. Rear suspension does not use serviceable ball joints.
⚠️ Safety & Precautions
- ⚠️ Support your RAV4 only with jack stands. Never work under a vehicle supported by a jack alone.
- ⚠️ The hybrid system does not need high-voltage service for this repair, but do not touch orange high-voltage cables.
- ⚠️ Disconnecting the 12V battery is not required unless you are working near electrical connectors, but keep the ignition fully OFF and key away from the vehicle.
- ⚠️ Suspension parts can move suddenly when separated. Keep your hands clear when using the ball joint separator.
- ⚠️ Always replace cotter pins and any damaged or one-time-use fasteners.
- ⚠️ A wheel alignment is required after this repair.
🔧 Required Tools
You'll need the following tools for this repair:
- Floor jack rated 3-ton minimum
- Jack stands rated 3-ton minimum
- Wheel chocks
- 21mm lug nut socket
- 1/2-inch drive breaker bar
- 1/2-inch drive torque wrench rated to 200 ft-lbs
- 3/8-inch drive ratchet
- 1/2-inch drive ratchet
- 14mm socket
- 17mm socket
- 19mm socket
- 22mm socket
- 14mm wrench
- 17mm wrench
- 19mm wrench
- 22mm wrench
- Ball joint separator tool (specialty)
- Needle-nose pliers
- Flat pry bar
- Rubber mallet
- Paint marker
- Safety glasses
- Mechanic gloves
🔩 Required Parts
HowToo sells all the parts you need for this repair:
- Front lower control arm assembly with ball joint - Left side - Qty: 1
- Front lower control arm assembly with ball joint - Right side - Qty: 1
- Front lower ball joint castle nut - Qty: 2
- Cotter pins - Qty: 2
- Stabilizer bar link nuts - Qty: 2
- Lower control arm mounting bolts and nuts - Replace if corroded or damaged - Qty: As needed
📋 Before You Begin
- Park your RAV4 on level ground.
- Set the parking brake and place wheel chocks behind the rear wheels.
- Turn the ignition OFF and keep the smart key away from the vehicle.
- Loosen the front lug nuts slightly before lifting the vehicle.
- Plan for a professional wheel alignment immediately after the repair.
- A ball joint separator is a tool that pops the tapered ball joint stud loose from the steering knuckle without hammering directly on the joint.
🔨 Step-by-Step Instructions
Follow these steps in order:
Step 1: Loosen the Front Wheel Lug Nuts
- Use a 21mm lug nut socket and 1/2-inch drive breaker bar to loosen the front wheel lug nuts one turn.
- Do not remove the lug nuts yet.
- Break them loose on the ground.
Step 2: Raise and Support the Front of the Vehicle
- Use a floor jack rated 3-ton minimum to lift the front of your RAV4 at the front center jacking point.
- Place jack stands rated 3-ton minimum under the proper front side support points.
- Lower the vehicle gently onto the stands.
- Use your hands to shake the vehicle lightly and confirm it is stable before working underneath.
Step 3: Remove the Front Wheels
- Use the 21mm lug nut socket to remove the lug nuts.
- Remove both front wheels and set them flat on the ground.
Step 4: Mark the Lower Control Arm Position
- Use a paint marker to mark the position of the lower control arm mounting points before removal.
- This helps you install the new arm close to the original position.
- Alignment is still required afterward.
Step 5: Disconnect the Stabilizer Bar Link from the Lower Control Arm
- Use a 17mm socket and 17mm wrench to remove the stabilizer bar link nut at the lower control arm.
- If the stud spins, hold the stud with the correct wrench while turning the nut with the 17mm socket.
- Move the stabilizer link out of the way.
Step 6: Remove the Ball Joint Cotter Pin and Nut
- Use needle-nose pliers to straighten and pull out the cotter pin from the lower ball joint stud.
- Use a 19mm socket or 19mm wrench to loosen and remove the lower ball joint castle nut.
- A castle nut is a nut with slots that allow a cotter pin to lock it in place.
Step 7: Separate the Ball Joint from the Steering Knuckle
- Install the ball joint separator tool (specialty) between the lower control arm ball joint and steering knuckle.
- Tighten the separator tool slowly with the correct socket or wrench until the ball joint stud pops free.
- Use a rubber mallet only for light tapping if needed.
- Do not strike the steering knuckle hard with a steel hammer.
Step 8: Remove the Lower Control Arm Mounting Bolts
- Support the lower control arm by hand so it does not drop suddenly.
- Use a 19mm socket, 22mm socket, 19mm wrench, or 22mm wrench as needed to remove the front and rear lower control arm mounting bolts and nuts.
- Use a flat pry bar to gently move the control arm out of the mounting brackets.
- Remove the lower control arm assembly from the vehicle.
Step 9: Install the New Lower Control Arm Assembly
- Position the new front lower control arm assembly with ball joint into the subframe brackets.
- Install the mounting bolts and nuts by hand first to avoid cross-threading.
- Use a 19mm socket, 22mm socket, 19mm wrench, or 22mm wrench to snug the bolts, but do not fully torque them yet.
- Final torque happens at ride height.
Step 10: Connect the Ball Joint to the Steering Knuckle
- Guide the new ball joint stud into the steering knuckle by hand.
- Install the new castle nut by hand.
- Use a 19mm socket and 1/2-inch drive torque wrench to tighten the ball joint nut to Torque to 98 Nm (72 ft-lbs).
- Line up the castle nut slot with the hole in the stud, then install a new cotter pin using needle-nose pliers.
- If the slot does not line up, tighten the nut slightly more. Do not loosen it to fit the cotter pin.
Step 11: Reconnect the Stabilizer Bar Link
- Insert the stabilizer bar link stud into the lower control arm.
- Install a new stabilizer bar link nut by hand.
- Use a 17mm socket, 17mm wrench, and 1/2-inch drive torque wrench to tighten the nut to Torque to 74 Nm (55 ft-lbs).
Step 12: Preload the Suspension Before Final Torque
- Use the floor jack rated 3-ton minimum under the outer end of the lower control arm.
- Raise the control arm until the suspension is near normal ride height.
- This prevents the rubber bushings from twisting at rest.
Step 13: Torque the Lower Control Arm Mounting Bolts
- Use the correct 19mm socket, 22mm socket, 19mm wrench, or 22mm wrench with the 1/2-inch drive torque wrench.
- Tighten the front lower control arm mounting fastener to Torque to 137 Nm (101 ft-lbs).
- Tighten the rear lower control arm mounting fastener to Torque to 137 Nm (101 ft-lbs).
- Lower and remove the jack from under the control arm.
Step 14: Repeat on the Other Side
- Use the same tools and steps to replace the lower control arm assembly on the opposite side.
- Replace front suspension parts in pairs when possible for even handling.
Step 15: Reinstall the Front Wheels
- Place each wheel back onto the hub.
- Install the lug nuts by hand.
- Use a 21mm lug nut socket to snug the lug nuts in a star pattern.
Step 16: Lower the Vehicle and Torque the Lug Nuts
- Use the floor jack rated 3-ton minimum to raise the vehicle slightly off the jack stands.
- Remove the jack stands rated 3-ton minimum.
- Lower your RAV4 to the ground.
- Use a 21mm lug nut socket and 1/2-inch drive torque wrench to tighten the wheel lug nuts to Torque to 103 Nm (76 ft-lbs).
✅ After Repair
- ✅ Turn the steering wheel slowly left and right while parked. Listen for binding, popping, or scraping.
- ✅ Test drive slowly at first. Confirm the steering feels normal and the vehicle tracks straight.
- ✅ Recheck that the cotter pins are installed and all visible fasteners are seated.
- ✅ Have a four-wheel alignment performed as soon as possible.
- ✅ After 50-100 miles, recheck the lug nut torque to 103 Nm (76 ft-lbs).
💰 DIY vs Shop Cost
Shop Cost: $700-$1,200 (parts + labor, both front sides)
DIY Cost: $250-$500 (parts only)
You Save: $450-$700 by doing it yourself!
Shop labor rates vary but typically run $100-$150/hour. This repair takes a shop approximately 3-4 hours.
🎯 Ready to get started?
HowToo makes it easy: same-day/2-day shipping on every part, plus all the tools and specialty tools you need! Check out the parts and tools sections below to add everything to your cart.