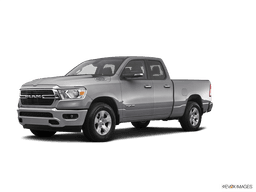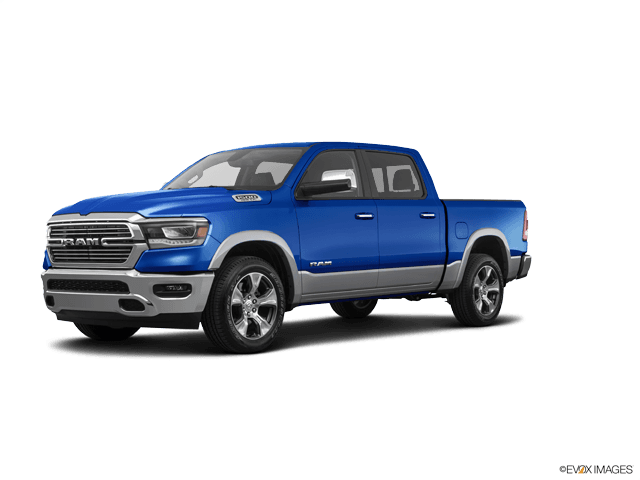

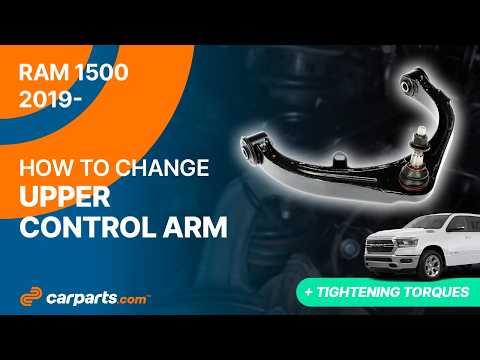







How to Replace Front Control Arms on a 2019-2021 Ram 1500 (Engine: V8 5.7L)
Step-by-step DIY guide with tools, parts, torque specs, safety tips, and alignment notes for 2019, 2020, 2021
How to Replace Front Control Arms on a 2019-2021 Ram 1500 (Engine: V8 5.7L)
Step-by-step DIY guide with tools, parts, torque specs, safety tips, and alignment notes for 2019, 2020, 2021


🔧 1500 - Front Control Arm Replacement
This repair covers replacing the front upper and/or lower control arms on your 1500. Control arms locate the front wheels and contain bushings and ball joints that affect steering, tire wear, braking feel, and alignment.
Difficulty Level: Advanced | Estimated Time: 3-6 hours
Assumption: This procedure is for front control arms. Rear suspension on your 1500 uses a different arm/link setup.
⚠️ Safety & Precautions
- ⚠️ Support your 1500 with jack stands only. Never work under a truck supported by a floor jack alone.
- ⚠️ The front coil spring and strut assembly are under load. Do not loosen the strut center nut.
- ⚠️ Your 1500 has the eTorque mild-hybrid system. This control arm job does not require high-voltage service, but avoid orange high-voltage wiring and components.
- ⚠️ Disconnecting the 12V battery is not normally required for front control arms, but keep the ignition OFF and key away from the truck.
- ⚠️ Always replace control arm fasteners if the new arms include them, and never tighten control arm bushing bolts while the suspension is hanging.
- ⚠️ A wheel alignment is required after replacing control arms.
🔧 Required Tools
You'll need the following tools for this repair:
- Floor jack (rated 3-ton minimum)
- Jack stands (rated 3-ton minimum)
- Wheel chocks
- Safety glasses
- Mechanic gloves
- 1/2-inch drive breaker bar
- 1/2-inch drive torque wrench (250 ft-lb minimum)
- 3/8-inch drive ratchet
- 1/2-inch drive ratchet
- 21mm socket
- 22mm socket
- 24mm socket
- 18mm socket
- 15mm socket
- 10mm socket
- 21mm wrench
- 22mm wrench
- 24mm wrench
- 18mm wrench
- 15mm wrench
- Ball joint separator (specialty)
- Pry bar set
- Dead blow hammer
- Paint marker
- Needle-nose pliers
- Trim clip removal tool
- Penetrating oil
- Wire brush
- Tape measure
🔩 Required Parts
HowToo sells all the parts you need for this repair:
- Front upper control arm - Qty: 1 per side
- Front lower control arm - Qty: 1 per side
- Front upper control arm hardware kit - Qty: 1 per side if not included
- Front lower control arm hardware kit - Qty: 1 per side if not included
- Front sway bar link nut - Qty: 1 per side if removed
- Front axle/suspension cotter pins - Qty: as needed if equipped
- Alignment service - Qty: 1
📋 Before You Begin
- Park your 1500 on level ground and set the parking brake.
- Place wheel chocks behind the rear wheels.
- Keep the ignition OFF and the key fob away from the truck.
- Spray penetrating oil on the control arm bolts, ball joint nuts, and sway bar link hardware.
- Use a paint marker to mark the current lower control arm cam bolt positions before loosening them. Cam bolts are alignment bolts with offset washers.
- Take photos before disassembly. They help you route brake hoses and ABS wiring correctly during reassembly.
🔨 Step-by-Step Instructions
Follow these steps in order:
Step 1: Loosen the Front Wheel Lug Nuts
- Use a 21mm socket and 1/2-inch drive breaker bar to loosen the front wheel lug nuts about one turn.
- Do not remove the lug nuts yet.
- Break them loose before lifting.
Step 2: Raise and Support the Front of the Truck
- Use a floor jack (rated 3-ton minimum) under the front frame crossmember or approved front jacking point.
- Lift the front of your 1500 high enough to remove the wheels.
- Place jack stands (rated 3-ton minimum) under the frame rails.
- Lower the truck gently onto the jack stands and lightly shake the truck to verify it is stable.
Step 3: Remove the Front Wheel
- Use a 21mm socket to remove the lug nuts.
- Remove the wheel and place it flat under the frame as a backup safety measure.
Step 4: Support the Lower Control Arm
- Place the floor jack (rated 3-ton minimum) under the outer end of the lower control arm.
- Raise the jack slightly until it just supports the arm.
- This keeps the suspension from dropping suddenly when the ball joint is separated.
Step 5: Free the Brake Hose and ABS Wire Brackets
- Use a 10mm socket or trim clip removal tool to detach any brake hose or ABS wire brackets connected near the control arm or knuckle.
- Move the hose and wire gently aside without stretching them.
- ABS means anti-lock brake system. The wire is delicate, so do not pull on it.
Step 6: Disconnect the Sway Bar Link if Needed
- Use an 18mm socket and 18mm wrench to remove the sway bar link nut from the lower control arm if it blocks access.
- A sway bar link connects the suspension arm to the anti-roll bar and helps control body roll.
- Move the link away from the lower control arm.
Step 7: Separate the Upper Ball Joint from the Steering Knuckle
- Use a 21mm socket or 21mm wrench to loosen the upper ball joint nut.
- Leave the nut threaded on a few turns to protect the threads.
- Use a ball joint separator (specialty) to separate the upper ball joint from the steering knuckle.
- A ball joint separator presses the tapered joint apart without hammering directly on the joint.
- Once separated, remove the nut fully with the 21mm socket or 21mm wrench.
- Support the steering knuckle so it does not pull on the brake hose.
Step 8: Remove the Upper Control Arm
- Use a 21mm socket, 21mm wrench, or 18mm socket as fitted to remove the two upper control arm frame bolts.
- Use a paint marker to mark bolt orientation before removal.
- Remove the upper control arm from the truck.
- Compare the old and new upper control arms to confirm the same shape, ball joint angle, and bushing locations.
Step 9: Install the New Upper Control Arm
- Position the new upper control arm in the frame mounts.
- Install the bolts by hand first to avoid cross-threading.
- Use a 21mm socket, 21mm wrench, or 18mm socket to snug the bolts, but do not final-tighten yet.
- Insert the upper ball joint stud into the steering knuckle.
- Use a 21mm socket or 21mm wrench to install the ball joint nut.
- Torque the upper ball joint nut to 40 Nm (30 ft-lbs), then tighten an additional 90 degrees.
- Final torque for upper arm bushing bolts should be done at normal ride height.
Step 10: Separate the Lower Ball Joint from the Steering Knuckle
- Keep the lower control arm supported with the floor jack (rated 3-ton minimum).
- Use a 24mm socket or 24mm wrench to loosen the lower ball joint nut.
- Leave the nut threaded on a few turns.
- Use the ball joint separator (specialty) to separate the lower ball joint from the steering knuckle.
- Remove the nut fully with the 24mm socket or 24mm wrench.
- Carefully support the steering knuckle so the brake hose is not stretched.
Step 11: Mark and Remove the Lower Control Arm Cam Bolts
- Use a paint marker to mark the exact position of each cam washer on the frame.
- Use a 24mm socket and 24mm wrench to loosen and remove the lower control arm mounting bolts.
- Use a dead blow hammer and pry bar set only if the bolts are stuck.
- Remove the lower control arm from the truck.
- Paint marks get you close, not aligned.
Step 12: Install the New Lower Control Arm
- Position the new lower control arm into the frame pockets.
- Install the cam bolts and washers in the same direction they came out.
- Use the paint marker marks to place the cam washers close to their original positions.
- Use a 24mm socket and 24mm wrench to snug the lower control arm bolts, but do not final-tighten yet.
- Guide the lower ball joint stud into the steering knuckle.
- Use a 24mm socket or 24mm wrench to install the lower ball joint nut.
- Torque the lower ball joint nut to 70 Nm (52 ft-lbs), then tighten an additional 90 degrees.
Step 13: Reconnect the Sway Bar Link and Brackets
- Use an 18mm socket and 18mm wrench to reconnect the sway bar link to the lower control arm.
- Torque the sway bar link nut to 100 Nm (74 ft-lbs).
- Use a 10mm socket or trim clip removal tool to reinstall brake hose and ABS wire brackets.
- Make sure the brake hose and ABS wire do not rub the tire, spring, or control arm.
Step 14: Set the Suspension to Ride Height Before Final Tightening
- Use a tape measure to measure from the center of the wheel hub to the fender lip on the opposite front side before lifting, if available.
- Use the floor jack (rated 3-ton minimum) under the lower control arm to raise the suspension to normal ride height.
- Ride height means the position the suspension sits at when the truck is on the ground.
- This prevents twisting and damaging the new rubber bushings.
Step 15: Final-Tighten the Control Arm Mounting Bolts
- Use a 21mm socket and 21mm wrench to tighten the upper control arm frame bolts.
- Torque the upper control arm frame bolts to 115 Nm (85 ft-lbs).
- Use a 24mm socket, 24mm wrench, and 1/2-inch drive torque wrench to tighten the lower control arm cam bolts.
- Torque the lower control arm cam bolts to 203 Nm (150 ft-lbs).
- Keep the cam washers aligned with your paint marks while tightening.
Step 16: Reinstall the Wheel
- Place the wheel back on the hub.
- Use a 21mm socket to install the lug nuts by hand.
- Snug the lug nuts in a star pattern with the 21mm socket.
Step 17: Lower the Truck and Torque the Lug Nuts
- Use the floor jack (rated 3-ton minimum) to lift the truck slightly off the jack stands.
- Remove the jack stands (rated 3-ton minimum).
- Lower the truck to the ground.
- Use a 21mm socket and 1/2-inch drive torque wrench to tighten the lug nuts in a star pattern.
- Torque the wheel lug nuts to 176 Nm (130 ft-lbs).
Step 18: Repeat on the Other Side if Replacing in Pairs
- Use the same tools and steps on the opposite side.
- Control arms can be replaced one side at a time, but worn suspension parts are often best replaced in pairs.
✅ After Repair
- ✅ Turn the steering wheel slowly from lock to lock and check for hose or wire stretching.
- ✅ Test drive slowly at first. Listen for clunks, rubbing, or steering pull.
- ✅ Schedule a professional four-wheel alignment immediately. Your 1500 will not hold proper tire wear without it.
- ✅ After 50-100 miles, recheck lug nut torque with a 21mm socket and 1/2-inch drive torque wrench.
- ✅ If the steering wheel is off-center, do not keep driving long distances before alignment.
💰 DIY vs Shop Cost
Shop Cost: $850-$1,800 (parts + labor, depending on upper/lower and one side/both sides)
DIY Cost: $250-$900 (parts only, depending on how many arms are replaced)
You Save: $600-$900 by doing it yourself!
Shop labor rates vary but typically run $100-$150/hour. This repair takes a shop approximately 3-6 hours.
🎯 Ready to get started?
HowToo makes it easy: same-day/2-day shipping on every part, plus all the tools and specialty tools you need! Check out the parts and tools sections below to add everything to your cart.