
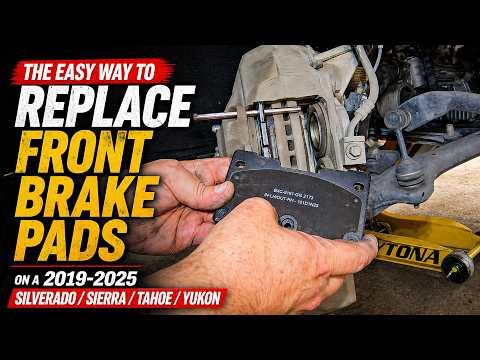






How to Replace Front Brake Pads on a 2019-2025 Chevrolet Silverado 1500 (Engine: V8 5.3L)
Step-by-step instructions with required tools, parts, torque specs, and safety tips for 2019, 2020, 2021
How to Replace Front Brake Pads on a 2019-2025 Chevrolet Silverado 1500 (Engine: V8 5.3L)
Step-by-step instructions with required tools, parts, torque specs, and safety tips for 2019, 2020, 2021


🔧 Silverado 1500 - Front Brake Pad Replacement
This is a manageable first brake job if you work carefully and support your Silverado correctly. You’ll remove both front wheels, retract the caliper pistons, replace all four front pads, then verify a firm brake pedal before driving.
Difficulty Level: Intermediate | Estimated Time: 2-3 hours
Assumption: These steps cover the stock four-piston front brake system using the D2173-style pad set. Stop if your caliper or replacement pads don’t match what you remove.
⚠️ Safety & Precautions
- ⚠️ Work on level, solid ground and block both rear wheels.
- ⚠️ Support your Silverado with jack stands. Never work beneath a vehicle supported only by a jack.
- ⚠️ Wear safety glasses and a dust mask. Don’t blow brake dust away with compressed air.
- ⚠️ Don’t press the brake pedal while a caliper is removed.
- ⚠️ Never let a caliper hang from its rubber brake hose.
- ⚠️ Brake fluid damages paint. Wipe spills immediately with water.
- ⚠️ Battery disconnection isn’t required for this front brake job.
🔧 Required Tools
You'll need the following tools for this repair:
- 22mm impact-rated socket
- 1/2-inch breaker bar
- 1/2-inch drive torque wrench rated to 200 Nm
- Metric socket set from 10mm to 24mm
- Metric combination wrench set from 10mm to 24mm
- 3/8-inch ratchet
- Flat-blade screwdriver
- Small hook pick
- Four-piston brake caliper spreader (specialty)
- Floor jack rated 3-ton minimum
- Jack stands rated 3-ton minimum
- Wheel chocks
- Caliper hanger
- Small nylon-bristle brush
- Brake parts cleaner
- Disposable shop towels
- Nitrile gloves
- Safety glasses
- Dust mask rated N95
🔩 Required Parts
HowToo sells all the parts you need for this repair:
- Akebono ProACT Ultra-Premium front ceramic brake pad set - Qty: 1
- Front brake pad abutment clips - Qty: 1 set
- High-temperature ceramic brake lubricant - Qty: 1 packet
- Brake parts cleaner - Qty: 1 can
- DOT 4 brake fluid - Qty: 1 small sealed container if topping off is required
The Akebono set is my first pick for normal street use. It’s quiet, low-dust, and includes the clips. Nobody misses scrubbing black brake dust off truck wheels.
📋 Before You Begin
- 📋 Park on level ground, select Park, apply the parking brake, and switch off the ignition.
- 📋 Open the hood and locate the brake-fluid reservoir near the driver-side firewall.
- 📋 Clean around the reservoir cap with a shop towel before loosening it.
- 📋 Check the fluid level. Remove a small amount only if it’s already near the maximum line.
- 📋 Loosen the reservoir cap without removing it completely. This lets displaced fluid return while the pistons retract.
- 📋 Compare every new pad with the old pads before installation.
🔨 Step-by-Step Instructions
Follow these steps in order:
Step 1: Loosen the front wheel nuts
- Use the 22mm socket and 1/2-inch breaker bar to loosen each front lug nut about one-quarter turn.
- Don’t remove the lug nuts while the tires are still carrying the truck’s weight.
Step 2: Raise and support the front
- Place the 3-ton floor jack beneath a solid front frame lifting point.
- Raise your Silverado high enough to remove both front wheels.
- Place the 3-ton jack stands under the left and right frame rails.
- Lower the truck gently onto the stands and push the body lightly to verify stability.
Step 3: Remove both front wheels
- Use the 22mm socket and 1/2-inch breaker bar to remove the lug nuts.
- Remove the wheels and slide one beneath each frame rail as backup protection.
Step 4: Inspect the brake assembly
- Use the flashlight from your work area to inspect the rotor, caliper, hose, and pads.
- Look for brake-fluid wetness, torn piston boots, deep rotor grooves, blue heat spots, or cracks.
- Compare inner and outer pad thickness. A large difference may indicate a sticking piston or pad.
- Stop the repair if you find fluid leakage or a damaged brake hose.
Step 5: Disconnect the pad-wear sensor
- Note how the sensor wire is routed before disturbing it.
- Use the small hook pick to release its retaining clips without pulling on the wire.
- Disconnect the electrical connector by pressing its lock and pulling on the connector body.
- Replace the sensor if its tip or insulation is damaged.
Step 6: Retract the caliper pistons
- Place an old pad against the pistons to distribute pressure evenly.
- Use the four-piston brake caliper spreader to push the pistons inward slowly and evenly.
- A caliper spreader presses multiple pistons back into the caliper without twisting them.
- Watch the brake-fluid reservoir while compressing the pistons. Remove excess fluid with clean shop towels if it approaches the rim.
- Stop if one piston refuses to move or fluid leaks around a piston boot.
Step 7: Remove the caliper
- Use the correctly fitting tool from the metric socket set and 3/8-inch ratchet to remove the two caliper mounting bolts.
- Support the caliper with the caliper hanger. Don’t twist or stretch the brake hose.
- Don’t disconnect the hydraulic hose.
Step 8: Remove the old pads and clips
- Slide the inner and outer pads out of the bracket or caliper.
- Use the flat-blade screwdriver to remove the old stainless abutment clips.
- Abutment clips are the small metal guides on which the pads slide.
- Keep the old pads arranged by position until the new pads are installed.
Step 9: Clean and inspect the pad supports
- Use the brake parts cleaner and nylon-bristle brush to clean the clip mounting surfaces.
- Don’t grind or remove metal from the caliper bracket.
- Inspect the piston boots for tears and confirm every piston remains fully retracted.
- Clean the rotor faces with brake parts cleaner if grease or dirt touched them.
Step 10: Install the new hardware
- Press the new abutment clips completely into their original locations by hand.
- Apply a very thin layer of ceramic brake lubricant where the pad ears contact the clips.
- Keep lubricant away from the pad friction material and rotor faces.
- A thin film is plenty.
Step 11: Install the new brake pads
- Match the new inner and outer pads to the old pad positions.
- Install the wear-indicator pad in the same position as the original.
- Slide each pad into place by hand. It should move without force or binding.
- Don’t sand, file, or modify a new pad to make it fit.
Step 12: Reinstall the caliper
- Position the caliper over the pads without twisting the brake hose.
- Start both mounting bolts by hand to prevent cross-threading.
- Use the appropriate metric socket and 1/2-inch torque wrench to tighten the caliper mounting bolts.
- Torque to 200 Nm (148 ft-lbs) for the standard four-piston front caliper mounting bolts.
- If your removed fasteners are small guide-pin bolts instead of large fixed-caliper mounting bolts, don’t use this specification. That indicates the alternate two-piston system.
Step 13: Reconnect the wear sensor
- Push the connector together until its lock clicks.
- Route the wire through every original clip using the small hook pick if needed.
- Turn the steering from side to side by hand and confirm the wire can’t contact the tire or rotor.
Step 14: Repeat on the opposite side
- Perform Steps 4 through 13 on the other front brake.
- Replace front pads as a complete axle set. Never replace pads on only one front wheel.
Step 15: Reinstall the wheels
- Place each wheel on the hub and install all lug nuts by hand.
- Use the 22mm socket to snug the nuts in a crossing pattern.
- Raise the truck with the 3-ton floor jack, remove the stands, and lower the tires to the ground.
- Use the 22mm socket and 1/2-inch torque wrench to tighten the lug nuts in a crossing pattern.
- Torque to 190 Nm (140 ft-lbs).
Step 16: Restore brake pedal pressure
- Sit in the driver’s seat before starting the engine.
- Press and release the brake pedal slowly several times until it becomes firm.
- Don’t move your Silverado until the pedal is firm and holds steady.
- Check the reservoir and adjust the fluid to the correct line using fresh DOT 4 brake fluid.
- Tighten the reservoir cap securely.
✅ After Repair
- ✅ Start the engine and hold firm pressure on the brake pedal for 30 seconds. The pedal shouldn’t continue sinking.
- ✅ Check around both front calipers for brake-fluid leakage.
- ✅ Confirm the brake warning and ABS lights switch off normally.
- ✅ Make several gentle stops at walking speed before entering traffic.
- ✅ Bed the pads with about 8 moderate stops from 40 mph to 10 mph without coming to a complete stop.
- ✅ Drive for several minutes afterward without heavy braking so the brakes can cool.
- ✅ Avoid emergency-style braking for the first 200 miles unless safety requires it.
- ✅ Recheck the wheel-lug torque after approximately 50 miles.
- ✅ Stop driving if the truck pulls sharply, the pedal feels soft, or scraping continues.
💰 DIY vs Shop Cost
Shop Cost: $300-$550 USD equivalent for front pads and labor
DIY Cost: $65-$130 USD equivalent for pads and consumables
You Save: Approximately $200-$400 USD equivalent by doing it yourself!
Local labor and imported-part pricing around Sonīpat can vary considerably. This repair takes a shop approximately 1-1.5 hours.
🎯 Ready to get started?
HowToo makes it easy: same-day/2-day shipping on every part, plus all the tools and specialty tools you need! Check out the parts and tools sections below to add everything to your cart.