
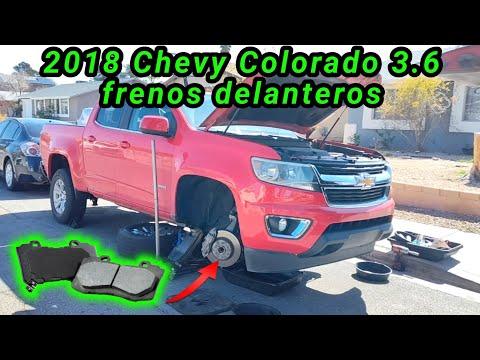







How to Replace Front Brake Pads on a 2018 Chevrolet Colorado
Step-by-step DIY front brake pad change with tools, parts list, torque specs, and safety tips for 2015, 2016, 2017, 2018, 2019, 2020
How to Replace Front Brake Pads on a 2018 Chevrolet Colorado
Step-by-step DIY front brake pad change with tools, parts list, torque specs, and safety tips for 2015, 2016, 2017, 2018, 2019, 2020


Colorado - Front Brake Pad Replacement 🛠️
Got it—you want to replace the front brake pads on your Colorado. I’ll walk you through it step by step, beginner-friendly.
Quick questions before we start:
- 🧰 Do you have a solid jack and jack stands (not just the small emergency jack)?
- 🧱 Are you planning to replace pads only, or pads and rotors together?
I’ll assume pads only and that you have basic tools; if not, tell me and I’ll adjust.
Colorado - Safety & Prep ⚠️
- 🧯 Work on level ground, parking brake fully applied, transmission in gear.
- 🧱 Use jack stands under the frame; never rely on the jack alone.
- 🔌 Keep the ignition OFF and key out so nothing moves unexpectedly.
- 🧤 Wear gloves and safety glasses; brake dust is nasty.
Colorado - Tools & Parts Needed 🧰
- 🛠️ Floor jack and 2 jack stands
- 🛠️ Lug wrench or 1/2" drive ratchet + 22 mm socket (wheel nuts)
- 🛠️ Socket set:
- 18 mm socket (caliper bracket bolts, if you remove bracket)
- 13 mm socket (caliper guide pin bolts)
- 🛠️ Wrench set (in case a wrench fits better than a socket)
- 🛠️ C-clamp or disc brake piston tool (tool to push the caliper piston back)
- 🛠️ Flat screwdriver or small pry bar (to gently pry caliper)
- 🛠️ Wire brush (to clean metal surfaces)
- 🛠️ Brake cleaner spray (solvent to clean brakes)
- 🛠️ Catch pan / tray (to catch dust and cleaner runoff)
- 🛠️ Torque wrench (tool that tightens bolts to a specific force)
- 🛠️ Bungee cord or wire (to hang the caliper, not by the hose)
- 🛠️ High-temp brake grease (for pad ears and slide pins)
- 🛠️ Optional: Turkey baster or fluid syringe (to remove a little brake fluid from reservoir if full)
Colorado - Parts You Need 📦
- 🧩 Front brake pads set (for your Colorado 2.5L RWD)
- 🧩 New pad hardware kit (stainless clips that the pads slide in) – highly recommended
HowToo will show you compatible pads, hardware, and tools below this guide—you can add them to your cart there.
Colorado - Torque Specs 🔧
- 🧷 Front caliper guide pin bolts: ~30 ft-lb (40 N·m)
- 🧷 Front caliper bracket bolts: ~129 ft-lb (175 N·m)
- 🧷 Wheel lug nuts: 140 ft-lb (190 N·m)
Values are typical for this platform; use a torque wrench for all of these.
Colorado - Step 1: Prepare the Truck 🧱
- 🛑 Park on level ground, set parking brake, leave transmission in gear.
- 🧊 Loosen (do not remove) the front wheel lug nuts about 1/2 turn while the truck is still on the ground.
- 🧱 Place the jack under the front frame crossmember or recommended jacking point and lift the front.
- 🧱 Place jack stands under the frame rails on both sides and gently lower the truck onto them.
- 🚗 Remove the front wheels completely and set them aside.
Colorado - Step 2: Check Brake Fluid Level 💧
- 🧪 Open the hood and locate the brake fluid reservoir (on driver side near firewall).
- 🧪 If fluid is at or above the MAX line, use a turkey baster to remove a small amount into a container. This prevents overflow when you push the pistons back.
Colorado - Step 3: Remove Caliper & Old Pads (One Side at a Time) 🔩
- 🛠️ Turn the steering wheel to give better access to the side you’re working on (engine off).
- 🛠️ On the back of the caliper, locate the two guide pin bolts (top and bottom, usually 13 mm).
- 🛠️ Remove both guide pin bolts and set them aside.
- 🛠️ Gently pry the caliper away from the rotor using a flat screwdriver if needed.
- 🪢 Hang the caliper from the suspension spring with a bungee cord or wire. Do not let it hang by the rubber brake hose.
- 🧱 Slide the old brake pads out of the bracket. Note which side had the wear indicator (small metal tab).
- 🧱 If you’re not changing rotors, you can leave the caliper bracket in place. If you want to remove it for better cleaning:
- Remove the two large caliper bracket bolts (18 mm) and pull the bracket off.
Colorado - Step 4: Compress the Caliper Piston 🧱
- 🧊 Check the caliper piston face (round part that pushes the inner pad).
- 🛠️ Place an old brake pad against the piston.
- 🛠️ Use a C-clamp over the caliper body and the old pad, and slowly tighten to push the piston fully back into the caliper.
- 🧪 Watch the brake fluid reservoir while doing this; if fluid rises close to the top, remove a bit more with the baster.
- 🧊 Once the piston is fully seated, remove the C-clamp and old pad.
Colorado - Step 5: Clean & Prep the Bracket 🧼
- 🧽 If you removed the bracket, clamp it in a vice or hold it firmly on a bench.
- 🧽 Remove the old pad hardware clips from the bracket (metal pieces where pad ears sit).
- 🧽 Use a wire brush to clean the areas where the clips sit until shiny metal is visible.
- 🧴 Spray with brake cleaner and let dry.
- 🧩 Install the new hardware clips from your kit; they should snap into place.
- 🧴 Apply a thin film of brake grease on the areas of the clips where the pad ears will slide. Do not get grease on pad friction surfaces or rotor.
- 🧴 Pull out the caliper slide pins (the bolts that the caliper slides on) one at a time:
- Clean old grease and dirt off the pins.
- Apply fresh brake grease to the pins and reinstall them into the rubber boots, making sure they move smoothly.
- 🧷 If you removed the bracket, reinstall it now and torque the bracket bolts to about 129 ft-lb.
Colorado - Step 6: Install New Pads 🧩
- 🧱 Identify inner vs outer pads:
- The pad with the wear indicator tab usually goes on the inner side.
- 🧱 Slide the new pads into the hardware clips in the bracket. They should move snugly but not be forced.
- 🧴 Put a small amount of brake grease on the back of the pads where they contact the caliper/piston (if recommended by pad manufacturer).
Colorado - Step 7: Reinstall Caliper 🔩
- 🛠️ Swing the caliper back over the new pads and rotor. It should fit easily if the piston is fully compressed.
- 🛠️ Align the caliper with the slide pins and install the guide pin bolts by hand first to avoid cross-threading.
- 🧷 Tighten the guide pin bolts to about 30 ft-lb with a torque wrench.
- 🧽 Wipe off any grease that may have gotten on the rotor or pad surfaces and spray with brake cleaner if needed.
Colorado - Step 8: Repeat on the Other Side 🔁
- 🔁 Repeat Steps 3–7 on the other front wheel.
- 🧠 Always replace brake pads in pairs (both front wheels) so braking stays balanced.
Colorado - Step 9: Reinstall Wheels & Lower the Truck 🚗
- 🛠️ Put the wheels back on and hand-thread all lug nuts.
- 🧱 Jack the truck slightly to remove the jack stands, then lower it to the ground.
- 🔧 Torque the lug nuts in a star pattern to 140 ft-lb.
Colorado - Step 10: Pump Brakes & Final Checks ✅
- 🦶 Before driving, sit in the driver’s seat and pump the brake pedal slowly 10–15 times until it feels firm. This seats the pads against the rotors.
- 🧪 Recheck the brake fluid level and adjust to the MAX line if needed.
- 👂 Start the engine and gently press the brake pedal again; it should feel firm and consistent.
Colorado - Bedding In New Pads 🚦
- 🚗 Find a safe, empty road.
- 🚦 Do about 5–6 stops from 30 mph to 5 mph with medium brake pressure, letting the brakes cool slightly between stops.
- 🚦 Then do 2–3 stops from 40–45 mph to 10 mph with slightly firmer pressure.
- 🧊 Avoid hard panic stops or sitting with your foot hard on the pedal while stopped right after bedding. This helps the pads and rotors wear in smoothly.
Colorado - What a Shop Would Charge 💵
- 💰 A shop would typically charge around $250–$350 for front pads (with hardware) on your Colorado, more if rotors are replaced.
HowToo makes it easy: below this guide you’ll see front pads, hardware kits, brake cleaner, grease, a C-clamp or piston tool, and a torque wrench that fit this job. You can add them to your cart right from the parts section for fast shipping.
If you tell me what tools you already have, I can trim this down to a minimal shopping list for you.