


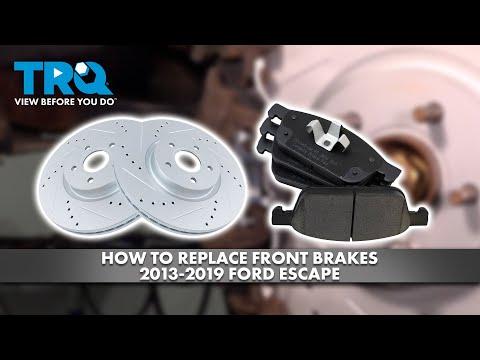






How to Replace Front Brake Pads on a 2017-2019 Ford Escape (Trim: SE | Engine: Inline 4 2.0L)
Step-by-step DIY guide with required tools, parts, torque specs, and safety tips for 2017, 2018, 2019
How to Replace Front Brake Pads on a 2017-2019 Ford Escape (Trim: SE | Engine: Inline 4 2.0L)
Step-by-step DIY guide with required tools, parts, torque specs, and safety tips for 2017, 2018, 2019


🔧 Escape - Front Brake Pad Replacement
This is a solid first brake job. You’ll remove both front wheels, lift each caliper, compress the piston, and install the new pads. Replace pads on both front wheels together so braking stays balanced.
Difficulty Level: Intermediate | Estimated Time: 1.5-2.5 hours
Assumption: The rotors and calipers are reusable and the brake system isn’t leaking.
⚠️ Safety & Precautions
- ⚠️ Support your Escape with jack stands. Never work under a vehicle supported only by a jack.
- ⚠️ Keep grease, oil, and dirty hands away from pad and rotor friction surfaces.
- ⚠️ Never let a caliper hang from its rubber brake hose.
- ⚠️ Check the brake-fluid reservoir while compressing the pistons. Remove excess fluid if it approaches the top.
- ⚠️ Don’t disconnect the brake hose. A normal pad replacement doesn’t require bleeding.
- ⚠️ The front brakes don’t require electronic parking-brake service mode.
- ⚠️ Battery disconnection isn’t required.
🔧 Required Tools
You'll need the following tools for this repair:
- 19mm six-point socket
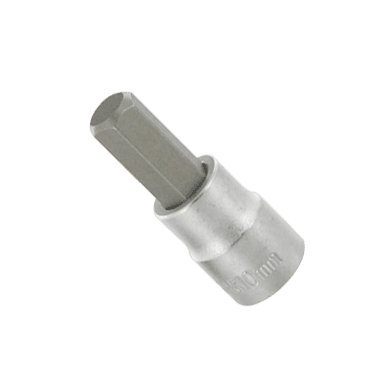
- 7mm hex-bit socket
- 3/8-inch drive ratchet
- 1/2-inch drive breaker bar
- 3/8-inch drive torque wrench rated 10-80 ft-lbs
- 1/2-inch drive torque wrench rated 20-150 ft-lbs
- 6-inch C-clamp or disc-brake piston compressor (specialty)
- Small flat-blade screwdriver
- Nylon brake-caliper hanger
- Small wire brush
- Plastic drain pan
- Floor jack rated 2-ton minimum
- Jack stands rated 2-ton minimum
- Wheel chocks
- Nitrile gloves
- Safety glasses
A torque wrench clicks when a fastener reaches the specified tightness.
🔩 Required Parts
HowToo sells all the parts you need for this repair:
- Front brake pad set - Qty: 1, replaces both sides
- Front brake hardware kit - Qty: 1, recommended if not included with the pads
- Silicone brake-caliper grease - Qty: 1 small tube
- Aerosol brake cleaner - Qty: 1 can
- DOT 4 LV brake fluid meeting Ford WSS-M6C65-A2 - Qty: 1 small bottle, only if topping up is necessary
Replace deeply grooved, cracked, heat-spotted, or undersized rotors in pairs. Pads alone won’t cure a steering-wheel shake caused by damaged rotors.
📋 Before You Begin
- 📋 Park on firm, level ground and place the transmission in Park.
- 📋 Apply the parking brake and chock both rear wheels.
- 📋 Let the brakes cool completely before touching them.
- 📋 Open the hood and locate the brake-fluid reservoir. Leave its cap resting loosely in place.
- 📋 Photograph the original pad, spring, and hardware positions before disassembly.
- 📋 Work on one side at a time. The assembled side becomes your reference.
🔨 Step-by-Step Instructions
Follow these steps in order:
Step 1: Loosen the front wheel nuts
- Use the 19mm six-point socket and 1/2-inch breaker bar to loosen each front wheel nut about one-quarter turn.
- Don’t remove the nuts while the tires are still carrying the vehicle’s weight.
Step 2: Raise and support the front
- Use the floor jack at the approved front lifting point.
- Place the jack stands beneath the reinforced side support points.
- Lower your Escape carefully onto the stands and gently test that it’s stable.
- Give it a firm stability check.
Step 3: Remove both front wheels
- Use the 19mm socket and ratchet to remove the wheel nuts.
- Remove the wheels and slide them beneath the rocker-panel area as an additional precaution.
Step 4: Inspect the brakes
- Use the flashlight and inspect the rotor for cracks, blue heat marks, heavy grooves, or a large outer lip.
- Compare the inner and outer pad thickness. Major unevenness can indicate a seized guide pin or sticking caliper.
- Inspect the rubber brake hose and caliper for wetness. Stop if you find a brake-fluid leak.
Step 5: Remove the caliper spring and guide-pin covers
- Wear safety glasses. The external spring clip can release suddenly.
- Use the small flat-blade screwdriver to carefully remove the caliper spring clip.
- Remove the rubber caps covering the upper and lower guide-pin bolts.
- Note the spring’s exact orientation before setting it aside.
Step 6: Remove the front caliper
- Use the 7mm hex-bit socket and 3/8-inch ratchet to remove the upper and lower guide-pin bolts.
- Lift the caliper away from the rotor without pulling or twisting the brake hose.
- Support it with the nylon brake-caliper hanger.
- Don’t press the brake pedal while the caliper is removed.
Step 7: Remove the old pads
- Pull the outer pad from the bracket by hand.
- Pull the inner pad and its retaining clip from the caliper piston.
- Use the small wire brush to clean the pad-contact areas without damaging rubber boots.
- Use aerosol brake cleaner over the plastic drain pan to remove loose brake dust. Don’t use compressed air.
Step 8: Inspect and lubricate the guide pins
- Pull each guide pin out by hand, keeping track of its original location.
- Clean each pin with a lint-free towel and inspect it for rust, pitting, or bending.
- Check that the rubber boots aren’t torn and seat correctly in their grooves.
- Apply a thin coating of silicone brake-caliper grease to the smooth guide-pin surfaces.
- Don’t use petroleum grease. It can swell and damage the rubber boots.
Step 9: Compress the caliper piston
- Place an old pad against the piston face to spread the pressure evenly.
- Use the 6-inch C-clamp or disc-brake piston compressor to push the piston slowly and straight into the caliper.
- Watch the brake-fluid reservoir during compression. Use a clean suction tool if the level approaches the top.
- Stop if the piston binds, tilts, or requires excessive force. A sticking caliper must be repaired before driving.
Step 10: Install the new pads
- Install the supplied replacement hardware in the same positions as the old pieces.
- Apply a very thin film of silicone brake-caliper grease only where the pad ears contact the hardware.
- Keep grease off the rotor and pad friction material.
- Press the inner pad’s retaining clip into the piston and place the outer pad in position.
- Make sure any wear indicator matches the original pad’s location.
Step 11: Reinstall the caliper
- Set the caliper over the new pads without forcing it.
- Make sure the brake hose isn’t twisted and both guide-pin boots are properly seated.
- Start both guide-pin bolts by hand to prevent cross-threading.
- Use the 7mm hex-bit socket and 3/8-inch torque wrench. Torque the front caliper guide-pin bolts to 28 Nm (21 ft-lbs). The reproduced Ford workshop procedure lists this specification. scribd.com
- Reinstall both guide-pin caps and the external spring clip using the small flat-blade screwdriver.
Step 12: Repeat on the opposite side
- Repeat Steps 4 through 11 on the other front wheel.
- Compare both finished sides and confirm every spring, cap, and boot is seated identically.
Step 13: Reinstall the wheels
- Clean the wheel and hub mating surfaces with the small wire brush. Don’t apply grease or anti-seize to the wheel studs.
- Install each wheel and start every wheel nut by hand.
- Snug the nuts in a star pattern using the 19mm socket and ratchet.
- Use the floor jack to raise your Escape, remove the stands, and lower the tires to the ground.
- Use the 19mm socket and 1/2-inch torque wrench. Tighten in a star pattern to 135 Nm (100 ft-lbs). Ford specifies this torque for the 2019 Escape. fordservicecontent.com
✅ After Repair
- ✅ Before moving, press the brake pedal repeatedly until it becomes firm. The first few presses may travel much farther than normal.
- ✅ Check the brake-fluid level and install the reservoir cap securely. Don’t overfill it.
- ✅ Look around both calipers for leaks, loose hardware, or twisted hoses.
- ✅ Start the engine and press the pedal again. Stop if it sinks steadily or remains unusually soft.
- ✅ Test the brakes at walking speed in a safe, traffic-free area before normal driving.
- ✅ Follow the pad manufacturer’s bedding procedure. If none is supplied, make several moderate stops with cooling time between them and avoid holding the hot brakes at a complete stop.
- ✅ Avoid panic stops and heavy braking for approximately the first 200 miles unless safety requires it.
- ✅ Recheck wheel-nut torque after approximately 100 miles or 160 kilometers, as Ford directs after wheel removal. fordservicecontent.com
💰 DIY vs Shop Cost
Shop Cost: Approximately ₹8,000-₹18,000 for front pads and labor, depending on pad brand and whether rotor work is needed.
DIY Cost: Approximately ₹2,500-₹8,000 for pads, cleaner, and lubricant, excluding reusable tools.
You Save: Approximately ₹4,000-₹10,000 by doing it yourself.
Local labor and imported-part prices vary. A front pad replacement generally takes a shop about 1-1.5 hours.
🎯 Ready to get started?
HowToo makes it easy: same-day/2-day shipping on every part, plus all the tools and specialty tools you need! Check out the parts and tools sections below to add everything to your cart.
