

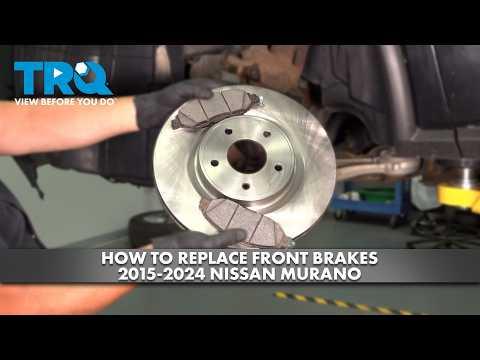






How to Replace Front Brake Pads on a 2015-2024 Nissan Murano (Engine: V6 3.5L)
Step-by-step DIY guide with required tools, parts, torque specs, and safety tips for 2015, 2016, 2017, 2018, 2019, 2020, 2021, 2022, 2023, 2024
How to Replace Front Brake Pads on a 2015-2024 Nissan Murano (Engine: V6 3.5L)
Step-by-step DIY guide with required tools, parts, torque specs, and safety tips for 2015, 2016, 2017, 2018, 2019, 2020, 2021, 2022, 2023, 2024


🔧 Murano - Front Brake Pad Replacement
Replacing the front brake pads requires lifting your Murano, removing both front calipers, compressing the caliper pistons, and installing new pads and hardware. Replace the pads on both front wheels so braking remains balanced.
Difficulty Level: Beginner | Estimated Time: 1.5-2.5 hours
⚠️ Safety & Precautions
- ⚠️ Support your Murano with jack stands. Never work under a vehicle supported only by a floor jack.
- ⚠️ Brake dust can be harmful. Do not blow it away with compressed air.
- ⚠️ Allow the brakes to cool completely before beginning.
- ⚠️ Do not press the brake pedal while a caliper is removed.
- ⚠️ Never let a caliper hang from its rubber brake hose.
- ⚠️ Watch the brake-fluid reservoir while compressing the pistons. Remove excess fluid if it approaches the top.
- ⚠️ The electronic parking brake operates only the rear brakes and does not require service mode for this repair.
- ⚠️ Battery disconnection is not required.
🔧 Required Tools
You'll need the following tools for this repair:
- 21mm impact-rated socket
- 14mm socket
- 3/8-inch-drive ratchet
- 1/2-inch-drive breaker bar
- 1/2-inch-drive torque wrench rated 20-150 ft-lbs
- Open-end wrench sized to caliper slide-pin flats
- Disc-brake piston compression tool (specialty)
- Small flat-blade screwdriver
- Nylon brake-cleaning brush
- Brake-pad thickness gauge
- Brake-rotor micrometer (specialty)
- Floor jack rated 2-ton minimum
- Jack stands rated 2-ton minimum
- Wheel chocks
- Mechanic’s wire rated 25 pounds minimum
- DOT 3 fluid syringe
- Safety glasses
- Nitrile mechanic gloves
🔩 Required Parts
HowToo sells all the parts you need for this repair:
- Front brake pad set - Qty: 1 set; replace both sides
- Front brake pad hardware kit - Qty: 1 set
- High-temperature silicone brake lubricant - Qty: 1 tube
- Non-chlorinated brake cleaner - Qty: 1 can
- DOT 3 brake fluid - Qty: 1 small bottle, only if fluid adjustment is needed
📋 Before You Begin
- Park on firm, level pavement. Shift into Park, switch off the engine, and apply the parking brake.
- Place wheel chocks securely behind both rear tires.
- Open the hood and locate the brake-fluid reservoir near the driver-side firewall. Clean around its cap before opening it.
- Confirm the reservoir is not overfilled. Use the DOT 3 fluid syringe to remove a small amount if the level is already at MAX.
- No infotainment menu, scan tool, or electronic parking-brake service mode is needed.
🔨 Step-by-Step Instructions
Follow these steps in order:
Step 1: Loosen the Front Wheel Nuts
- Use the 21mm socket and 1/2-inch breaker bar to loosen each front wheel nut about one-quarter turn.
- Do not remove the wheel nuts while your Murano is still on the ground.
Step 2: Raise and Support the Front
- Position the 2-ton floor jack under the reinforced center of the front suspension member.
- Raise the front, then place 2-ton jack stands beneath the reinforced front side-sill support points behind the front wheels.
- Lower your Murano gently onto the stands. Push the body lightly to verify that it is stable.
- Keep the floor jack nearby as backup support.
Step 3: Remove Both Front Wheels
- Use the 21mm socket and 3/8-inch ratchet to remove the wheel nuts.
- Remove both front wheels and slide them flat beneath the side sills as an additional precaution.
Step 4: Inspect the Brake Assembly
- Use the brake-pad thickness gauge to compare the inner and outer pads. Severe uneven wear can indicate a seized slide pin or caliper.
- Use the brake-rotor micrometer to measure the rotor at several points, avoiding the raised outer lip.
- Compare the measurement with the minimum thickness marked on the rotor. Replace both front rotors if either rotor is below specification, deeply grooved, cracked, or heat-spotted.
- Check the rubber brake hose and caliper boots for cracks, leaks, or swelling.
Step 5: Remove the First Caliper
- Turn the steering wheel to improve access to the caliper bolts.
- Use the 14mm socket and 3/8-inch ratchet to remove the lower and upper caliper slide-pin bolts.
- If a slide pin turns, hold its flats with the open-end wrench while loosening the bolt with the 14mm socket.
- Lift the caliper from the bracket. Use the 25-pound mechanic’s wire to suspend it from the suspension.
- A slide pin allows the caliper to move sideways and apply both pads evenly.
Step 6: Remove the Old Pads and Hardware
- Pull the inner and outer pads from the caliper bracket by hand.
- Use the small flat-blade screwdriver to carefully release the stainless-steel pad clips from the bracket.
- Note the location and direction of the old wear indicator. Install the new pad with its indicator in the matching position.
- Do not remove the caliper bracket unless the rotor is also being replaced.
Step 7: Clean and Inspect the Caliper
- Use non-chlorinated brake cleaner and the nylon brake-cleaning brush to clean the pad-contact areas of the bracket.
- Pull each slide pin out by hand, one at a time. Wipe it clean and inspect it for rust or scoring.
- Apply a thin coating of high-temperature silicone brake lubricant to the smooth slide-pin surface, then reinstall it with its rubber boot fully seated.
- Do not put lubricant on the rotor, pad friction material, wheel studs, or wheel-nut seats.
- Stop and replace the affected caliper or bracket if a pin is seized, heavily corroded, or its rubber boot is torn.
Step 8: Compress the Caliper Pistons
- Place one old pad against both caliper pistons.
- Use the disc-brake piston compression tool to press both pistons slowly and evenly into the caliper.
- Watch the brake-fluid reservoir while compressing the pistons. Use the DOT 3 fluid syringe if the fluid approaches the reservoir opening.
- Inspect the piston dust boots and make sure they are not pinched or torn.
- Slow compression helps prevent reservoir overflow.
Step 9: Install the New Pads
- Press the new front brake pad hardware into the bracket by hand. Ensure every clip sits flat and locks into place.
- Apply a very thin film of high-temperature silicone brake lubricant only where the pad backing-plate tabs contact the hardware.
- Install the new inner and outer pads by hand. Match the wear-indicator position noted during removal.
- Make sure both pads slide freely without touching the rotor with lubricant.
Step 10: Reinstall the Caliper
- Lower the caliper over the new pads without twisting the brake hose.
- Start both slide-pin bolts by hand to prevent cross-threading.
- Use the open-end wrench to hold a turning slide pin, then tighten each bolt with the 14mm socket and torque wrench.
- Torque the front caliper slide-pin bolts to 34 Nm (25 ft-lbs).
- Remove the mechanic’s wire and verify that the brake hose follows its natural routing.
Step 11: Repeat on the Opposite Side
- Repeat Steps 4 through 10 on the other front brake using the same listed tools.
- Always replace front pads on both sides, even if one side appears less worn.
Step 12: Reinstall the Wheels
- Use brake cleaner and the nylon brake-cleaning brush to remove oily residue from both rotor friction surfaces.
- Install each wheel and start all wheel nuts by hand.
- Use the 21mm socket and 3/8-inch ratchet to snug the nuts in a crisscross pattern.
- Use the 2-ton floor jack to lift your Murano slightly, remove the jack stands, and lower it until the tires touch the ground.
- Use the 21mm socket and torque wrench to tighten the wheel nuts in a crisscross pattern.
- Torque the wheel nuts to 113 Nm (83 ft-lbs).
Step 13: Restore Brake Pedal Pressure
- Before starting the engine, press and release the brake pedal several times until it feels firm.
- Never move your Murano while the pedal feels soft or travels close to the floor.
- Check the reservoir and adjust the level to MAX with fresh DOT 3 brake fluid if needed. Do not overfill it.
- Install the reservoir cap securely.
✅ After Repair
- Start the engine and hold firm pressure on the brake pedal for 30 seconds. The pedal should remain steady.
- Inspect both front calipers, brake hoses, and the ground beneath your Murano for fluid leaks.
- At walking speed, test the brakes in a safe, traffic-free area before normal driving.
- Bed in the pads with 6-8 moderate stops from approximately 30 mph to 5 mph. Do not come to a complete stop between applications.
- Drive for several minutes afterward with minimal braking to let the brakes cool.
- Avoid hard braking and holding the hot brakes at a complete stop for the first 200 miles unless required for safety.
- Recheck the wheel-nut torque after 25-50 miles.
- If the pedal remains soft, the vehicle pulls, or grinding continues, stop driving and inspect the work.
💰 DIY vs Shop Cost
Shop Cost: $300-$550 (parts + labor)
DIY Cost: $55-$160 (parts only)
You Save: $140-$390 by doing it yourself!
Shop labor rates vary but typically run $100-$150/hour. This repair takes a shop approximately 1-1.5 hours.
🎯 Ready to get started?
HowToo makes it easy: same-day/2-day shipping on every part, plus all the tools and specialty tools you need! Check out the parts and tools sections below to add everything to your cart.