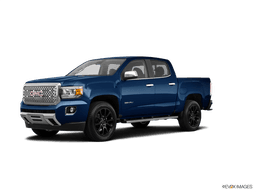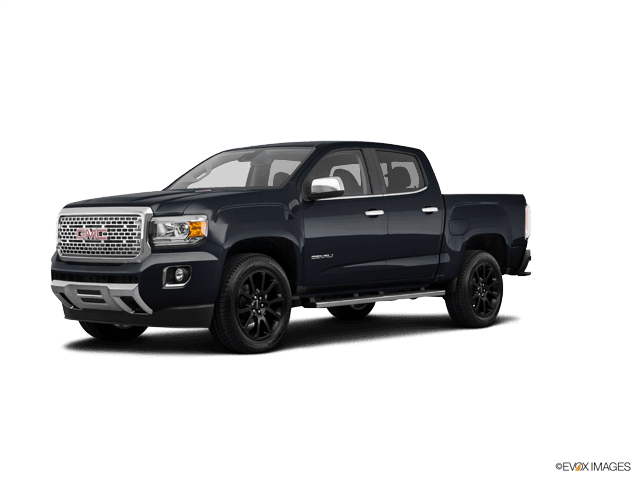

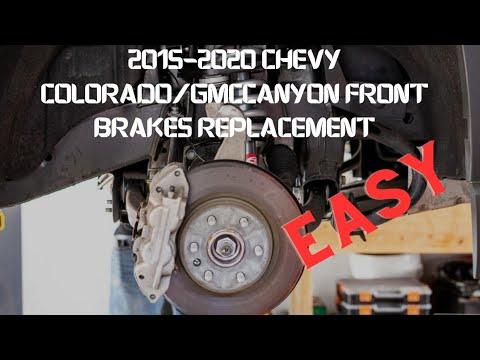






How to Replace Front Brake Pads on a 2015-2020 GMC Canyon (Trim: Denali)
Step-by-step DIY instructions with tools, parts, torque specs, and safety tips for 2015, 2016, 2017, 2018, 2019, 2020
How to Replace Front Brake Pads on a 2015-2020 GMC Canyon (Trim: Denali)
Step-by-step DIY instructions with tools, parts, torque specs, and safety tips for 2015, 2016, 2017, 2018, 2019, 2020


🔧 Canyon - Front Brake Pad Replacement
This is a straightforward pad replacement if the rotors are smooth, thick enough, and free of deep grooves or heavy vibration. I’d use the Bosch QuietCast Front Ceramic Brake Pad Set at about $48.48. It includes hardware and lubricant, which makes life easier for a first brake job.
Difficulty Level: Intermediate | Estimated Time: 1.5-2.5 hours
Assumption: These instructions cover a pad-only service using the original front calipers and rotors.
⚠️ Safety & Precautions
- ⚠️ Work on level, solid ground and support your Canyon with jack stands. Never rely on the jack alone.
- ⚠️ Wear a dust mask and safety glasses. Don’t blow brake dust away with compressed air.
- ⚠️ Don’t press the brake pedal while a caliper is removed.
- ⚠️ Never let the caliper hang from its rubber brake hose.
- ⚠️ Stop if you find brake-fluid leakage, a cracked hose, a seized piston, or badly damaged caliper hardware.
- ⚠️ Battery disconnection and electronic parking-brake service mode aren’t required for the front brakes.
- ⚠️ Brake fluid damages paint. Clean spills immediately without wiping them across painted surfaces.
🔧 Required Tools
You'll need the following tools for this repair:
- 21mm impact socket
- Metric socket set, 10-21mm
- 3/8-inch drive ratchet
- 1/2-inch drive breaker bar
- 1/2-inch drive torque wrench, 30-150 ft-lbs
- 3/8-inch drive torque wrench, 10-100 ft-lbs
- Floor jack rated 2-ton minimum
- Jack stands rated 2-ton minimum
- Wheel chocks
- Disc brake piston compressor (specialty)
- Caliper hanger (specialty)
- Flat-blade screwdriver
- Small nylon detailing brush
- Drain pan
- Turkey baster or fluid syringe
- Safety glasses
- Nitrile gloves
- N95 dust mask
🔩 Required Parts
HowToo sells all the parts you need for this repair:
- Bosch QuietCast front ceramic brake pad set - Qty: 1
- Front brake pad installation hardware - Qty: 1 set, included with selected pads
- Synthetic brake lubricant - Qty: 1 packet, included with selected pads
- Non-chlorinated brake cleaner - Qty: 1 can
- DOT 3 brake fluid - Qty: 1 small sealed bottle, only if topping up is necessary
Replace all four front pads together. Never replace pads on only one front wheel.
📋 Before You Begin
- Park your Canyon on level pavement, shift into Park, apply the parking brake, and switch off the ignition.
- Place wheel chocks firmly behind both rear tires.
- Open the hood and locate the brake-fluid reservoir near the driver’s side of the firewall.
- Clean around the reservoir cap with the small nylon detailing brush before opening it.
- If the fluid is at the maximum line, remove a small amount with the fluid syringe. Compressing the caliper pistons will raise its level.
- Leave the reservoir cap resting loosely in place to keep dirt out.
- No infotainment menu, scan tool, brake bleeding, or electronic parking-brake procedure is needed.
🔨 Step-by-Step Instructions
Follow these steps in order:
Step 1: Loosen the Front Wheel Nuts
- Use the 21mm impact socket and 1/2-inch breaker bar to loosen each front lug nut about one-quarter turn.
- Don’t remove the lug nuts while the tires are still carrying the truck’s weight.
Step 2: Raise and Support the Front
- Position the 2-ton floor jack beneath a proper front frame lifting point.
- Raise the front high enough to place the 2-ton jack stands beneath solid frame support points on both sides.
- Lower the truck onto the stands, leave the jack lightly touching its lift point, and gently push the body to confirm stability.
- A solid truck is a safe truck.
Step 3: Remove the Front Wheels
- Use the 21mm impact socket and 3/8-inch ratchet to remove the lug nuts.
- Lift off both front wheels and slide them beneath the frame as secondary protection.
Step 4: Inspect the Brake Assembly
- Use the flashlight from your work area to inspect the brake hose, caliper, rotor, and surrounding components.
- Stop if the hose is cracked, wet, swollen, or rubbing against anything.
- Inspect both rotor faces. Replace the rotors in pairs if they’re deeply grooved, heat-spotted, cracked, below minimum thickness, or causing pedal pulsation.
- Check pad wear on both sides. One pad being much thinner can indicate a sticking slide pin or caliper piston.
Step 5: Remove the Caliper Guide Bolts
- Turn the steering wheel to give yourself better access to the caliper.
- Use the matching socket from the 10-21mm metric socket set and the 3/8-inch ratchet to remove the upper and lower caliper guide bolts.
- Keep the bolts clean and note their installed positions.
- If the guide pin spins, hold its flats with the correctly sized wrench while loosening the bolt.
Step 6: Lift and Support the Caliper
- Carefully lift the caliper away from the pads and rotor.
- Use the caliper hanger to suspend it from a sturdy suspension point.
- Don’t twist, pull, or place weight on the rubber brake hose.
Step 7: Remove the Old Pads and Hardware
- Use the flat-blade screwdriver to ease the inner and outer pads from the caliper bracket.
- Remove the stainless abutment clips. These clips are the small tracks supporting the pad ends.
- Compare the old pads. Uneven wear means the caliper slides or piston need closer inspection before reassembly.
Step 8: Clean and Inspect the Caliper Bracket
- Place the drain pan below the brake assembly.
- Spray the hardware seating areas with non-chlorinated brake cleaner.
- Use the small nylon detailing brush to remove loose dirt and brake dust.
- Check the rubber guide-pin boots for splits, poor seating, or leakage.
- Move each guide pin by hand. It should slide smoothly without sticking.
Step 9: Install the New Hardware
- Press the new stainless abutment clips into the caliper bracket by hand.
- Confirm every clip sits completely flat and doesn’t contact the rotor.
- Apply a very thin film of the included synthetic brake lubricant where the pad ears contact the clips.
- Don’t put lubricant on the rotor or pad friction surfaces.
Step 10: Compress the Caliper Pistons
- Place one old brake pad across the caliper pistons.
- Use the disc brake piston compressor to push the pistons inward slowly and evenly.
- Watch the brake-fluid reservoir while compressing. Remove excess fluid with the fluid syringe if it approaches the top.
- Stop if a piston binds, tilts, damages its rubber boot, or won’t retract smoothly.
Step 11: Install the New Brake Pads
- Keep the pad friction surfaces clean and dry.
- Use your hands to slide the new inner and outer pads into the hardware clips.
- Install pads with mechanical wear indicators in the same orientation as the original pads.
- Confirm the pad ears move freely in the clips without excessive looseness.
Step 12: Reinstall the Caliper
- Remove the caliper hanger and lower the caliper over the new pads.
- Don’t force the caliper into place. Recheck piston position and pad seating if it won’t fit.
- Start both guide bolts by hand to avoid cross-threading.
- Use the matching socket and 3/8-inch torque wrench to tighten the guide bolts.
- Torque the front caliper guide bolts to 100 Nm (74 ft-lbs).
Step 13: Repeat on the Opposite Side
- Use the same tools and procedure on the other front wheel.
- Compare the old left and right pads for uneven wear.
- Confirm both brake hoses remain untwisted and both calipers are fully secured.
Step 14: Reinstall the Front Wheels
- Fit each wheel over the studs and install all lug nuts by hand.
- Use the 21mm impact socket and 3/8-inch ratchet to snug the nuts in a crisscross pattern.
- Don’t apply final torque while the vehicle is fully raised.
Step 15: Lower and Torque the Wheels
- Use the 2-ton floor jack to raise your Canyon slightly and remove both jack stands.
- Lower the tires until they firmly contact the ground.
- Use the 21mm impact socket and 1/2-inch torque wrench to tighten the lug nuts in a crisscross pattern.
- Torque the wheel lug nuts to 190 Nm (140 ft-lbs).
✅ After Repair
- Before starting the engine, press the brake pedal repeatedly until it becomes firm. This seats the caliper pistons against the new pads.
- Check the brake-fluid level and correct it to the proper mark using fresh DOT 3 brake fluid only if needed.
- Secure the brake-fluid reservoir cap and clean any spilled fluid immediately.
- Start the engine and verify the pedal remains firm. Don’t drive if it sinks, feels unusually soft, or a brake warning stays on.
- Perform a slow test in a clear area. Confirm straight, quiet stopping before entering traffic.
- Bed in the pads with about 5 moderate stops from 40 mph to 10 mph, followed by 5 lighter stops from 30 mph to 5 mph.
- Drive for several minutes without hard braking to let the brakes cool. Don’t remain stopped with the pedal clamped hard immediately after bedding.
- Recheck lug-nut torque after approximately 50 miles.
💰 DIY vs Shop Cost
Shop Cost: $250-$450 (parts + labor)
DIY Cost: $50-$110 (parts and consumables)
You Save: $140-$400 by doing it yourself!
Local labor rates vary widely. This repair usually takes a shop approximately 1-1.5 hours.
🎯 Ready to get started?
HowToo makes it easy: same-day/2-day shipping on every part, plus all the tools and specialty tools you need! Check out the parts and tools sections below to add everything to your cart.