

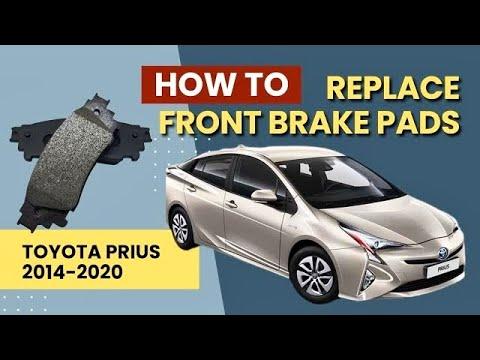





How to Replace Front Brake Pads on a 2010-2022 Toyota Prius
Step-by-step DIY guide with required tools, parts, torque specs, and hybrid safety tips for 2010, 2012, 2013, 2014, 2015, 2016, 2017, 2018, 2019, 2020, 2021, 2022
How to Replace Front Brake Pads on a 2010-2022 Toyota Prius
Step-by-step DIY guide with required tools, parts, torque specs, and hybrid safety tips for 2010, 2012, 2013, 2014, 2015, 2016, 2017, 2018, 2019, 2020, 2021, 2022


🔧 Prius - Front Brake Pad Replacement
This repair replaces the front brake pads on your Prius while reusing the rotors if they remain within Toyota’s service limits. Because the electronically controlled brake system can pressurize itself unexpectedly, the 12-volt battery must be disconnected before removing either caliper.
Difficulty Level: Intermediate | Estimated Time: 1.5-2.5 hours
Assumption: The original front calipers and standard-size rotors are installed.
⚠️ Safety & Precautions
- ⚠️ Never work beneath your Prius while it is supported only by a jack. Use jack stands on solid, level ground.
- ⚠️ Keep the key fob away from the vehicle and disconnect the 12-volt battery. Opening a door can otherwise activate the brake actuator and move a caliper piston.
- ⚠️ Do not touch orange high-voltage cables or connectors. The hybrid system does not need to be opened for this repair.
- ⚠️ Do not press the brake pedal while a caliper is removed.
- ⚠️ Brake dust can be harmful. Do not use compressed air; remove dust with brake cleaner.
- ⚠️ If a rotor is cracked, deeply grooved, below minimum thickness, or the caliper leaks, stop and repair those faults before driving.
🔧 Required Tools
You'll need the following tools for this repair:
- 10mm wrench
- 14mm socket
- 17mm open-end wrench
- 21mm socket
- 3/8-inch drive ratchet
- 1/2-inch drive breaker bar
- 3/8-inch drive torque wrench rated 10-80 Nm
- 1/2-inch drive torque wrench rated 40-150 Nm
- Front brake caliper piston compressor (specialty)
- Digital brake rotor micrometer reading 0.01mm (specialty)
- Metric brake pad thickness gauge (specialty)
- Flat-blade screwdriver
- Nylon detailing brush
- Drain pan rated 2-liter minimum
- Floor jack rated 2-ton minimum
- Jack stands rated 2-ton minimum
- Rubber wheel chocks
- Caliper hanger rated 10kg minimum
- Disposable nitrile gloves
- ANSI Z87.1 safety glasses
🔩 Required Parts
HowToo sells all the parts you need for this repair:
- Front brake pad set - Qty: 1 set; replace both sides
- Front brake pad fitting hardware kit - Qty: 1 kit
- Front brake pad anti-squeal shim kit - Qty: 1 kit if not included with pads
- High-temperature silicone brake grease - Qty: 1 tube
- Non-chlorinated brake cleaner - Qty: 1 can
- DOT 3 brake fluid - Qty: 500ml only if fluid adjustment is required
📋 Before You Begin
- 📍 Park on firm, level ground. Shift to P, apply the parking brake, switch the vehicle off, and chock both rear wheels.
- 🔑 Move the key fob at least 5m away so the hybrid and brake systems cannot be activated accidentally.
- 🔋 Open the hood. Disconnect only the negative terminal of the 12-volt battery, then wait at least 2 minutes before touching the brakes.
- 🚫 Do not open a door, press the brake pedal, or switch the vehicle on while either caliper is removed.
- 🧠 No infotainment service mode, scan-tool command, EPB retraction, battery registration, or ADAS calibration is required for front pad replacement.
🔨 Step-by-Step Instructions
Follow these steps in order:
Step 1: Disable the Brake System
- Use the 10mm wrench to loosen the 12-volt battery’s negative-terminal clamp.
- Lift the clamp from the battery post and position it where it cannot spring back into contact.
- Wait at least 2 minutes before continuing. This allows the brake-control system to power down.
Step 2: Loosen the Front Wheel Nuts
- Use the 21mm socket and 1/2-inch drive breaker bar to loosen each front wheel nut about one-quarter turn.
- Do not remove the nuts while the tires are still supporting the vehicle.
Step 3: Raise and Support the Front
- Use the floor jack rated 2-ton minimum at the reinforced front-center jacking point beneath the front subframe.
- Position the jack stands rated 2-ton minimum beneath the left and right reinforced side support points.
- Lower the vehicle gently onto both stands. Leave the floor jack lightly touching the center point as backup support.
- Confirm stability with a gentle push before working near the wheels.
Step 4: Remove Both Front Wheels
- Use the 21mm socket and 1/2-inch drive breaker bar to remove the wheel nuts.
- Lift off each wheel and place it flat away from the work area.
Step 5: Check the Brake-Fluid Level
- Put the drain pan rated 2-liter minimum beneath the brake-fluid reservoir area as spill protection.
- Inspect the translucent reservoir without opening it. Compressing the pistons will push fluid toward the reservoir.
- If the fluid is already above the MAX line, have excess fluid removed with dedicated brake-service equipment. Never reuse extracted fluid.
Step 6: Remove the First Caliper
- Work on one side at a time so the assembled opposite side remains a reference.
- Use the 14mm socket and 3/8-inch drive ratchet to remove the upper and lower caliper slide-pin bolts.
- If a slide pin turns, hold its flats with the 17mm open-end wrench while loosening the bolt with the 14mm socket.
- Lift the caliper from the bracket and support it with the caliper hanger rated 10kg minimum.
- Do not let the caliper hang from its flexible brake hose.
Step 7: Remove and Inspect the Old Pads
- Use the flat-blade screwdriver carefully to lift the inner and outer pads from the bracket.
- Use the flat-blade screwdriver to remove the stainless pad-support plates if the replacement hardware kit includes new ones.
- Use the metric brake pad thickness gauge to compare inner and outer pad wear. A large difference can indicate sticking slide pins or a binding caliper.
- Inspect the caliper boots for tears and the piston area for fluid. Stop if there is leakage or serious corrosion.
Step 8: Inspect the Rotor
- Use the non-chlorinated brake cleaner, nylon detailing brush, and disposable nitrile gloves to clean loose dust from the rotor and bracket.
- Use the digital brake rotor micrometer reading 0.01mm to measure rotor thickness at several points, about 10mm inward from the outer edge.
- The standard front rotor thickness is approximately 25.0mm. Replace the rotor if it is at or below the cast or stamped minimum specification, commonly 22.0mm, or if it is cracked or badly scored.
- Measure both rotors. Front rotors should be replaced as a pair when replacement is necessary.
Step 9: Compress the Caliper Piston
- Place an old pad against the piston, then use the front brake caliper piston compressor to press the piston slowly and squarely into the caliper.
- Watch the reservoir while compressing. Stop immediately if the fluid approaches the top.
- This front piston presses straight inward; it does not need to be rotated.
- Compress slowly to protect the brake actuator.
Step 10: Install the New Hardware and Pads
- Use the nylon detailing brush and non-chlorinated brake cleaner to clean the hardware contact surfaces on the bracket.
- Use the flat-blade screwdriver carefully to seat the new pad-support plates fully in the bracket.
- Apply a very thin film of high-temperature silicone brake grease to pad ears and specified shim contact points using a gloved fingertip.
- Keep grease completely off the rotor, pad friction material, and rubber boots.
- Install the anti-squeal shims in the same orientation as the original parts, then slide the inner and outer pads into place by hand.
Step 11: Reinstall the Caliper
- Lower the caliper over the new pads without twisting the brake hose.
- Start both slide-pin bolts by hand to prevent cross-threading.
- If needed, hold the pin flats with the 17mm open-end wrench.
- Use the 14mm socket and 3/8-inch drive torque wrench rated 10-80 Nm to tighten both slide-pin bolts. Torque to 34 Nm (25 ft-lbs).
Step 12: Repeat on the Opposite Side
- Repeat Steps 6 through 11 using the same listed tools.
- Confirm that both calipers move freely on their slide pins and both brake hoses remain untwisted.
Step 13: Reinstall the Wheels
- Install each wheel and start all wheel nuts by hand.
- Use the 21mm socket and 1/2-inch drive torque wrench rated 40-150 Nm to snug the nuts in a star pattern while the vehicle remains supported.
- Use the floor jack rated 2-ton minimum to raise the vehicle slightly, remove the jack stands, and lower the tires onto the ground.
- Use the 21mm socket and 1/2-inch drive torque wrench rated 40-150 Nm to tighten the nuts in a star pattern. Torque to 103 Nm (76 ft-lbs).
Step 14: Reconnect the 12-Volt Battery
- Use the 10mm wrench to reinstall and tighten the negative-terminal clamp securely.
- Do not overtighten or distort the battery terminal.
✅ After Repair
- ✅ With your Prius still in P, press and release the brake pedal several times until it becomes firm. Do not select a gear until the pedal feels normal.
- ✅ Switch the vehicle to READY and check that the red brake, ABS, and stability-control warnings turn off after their normal self-check.
- ✅ Inspect the reservoir. The fluid must be between MIN and MAX; use only fresh DOT 3 fluid if adjustment is required.
- ✅ Check around both calipers and hoses for leakage. Make sure no tools remain beneath the vehicle.
- ✅ Test at walking speed in a safe, traffic-free area. Confirm that your Prius stops straight and the pedal stays firm.
- ✅ For the first 300-500km, avoid repeated hard stops unless needed for safety. Follow the pad manufacturer’s bedding procedure if one is supplied.
- ✅ Recheck wheel-nut torque to 103 Nm (76 ft-lbs) after approximately 50-100km.
- ✅ A warning light that remains on requires a Toyota-compatible brake-system scan before normal driving.
💰 DIY vs Shop Cost
Shop Cost: ₹8,000-₹18,000 (parts + labor)
DIY Cost: ₹3,500-₹9,000 (parts only)
You Save: ₹4,500-₹9,000 by doing it yourself!
Sonīpat-area labor rates vary by workshop and parts brand. This repair takes a shop approximately 1-1.5 hours.
🎯 Ready to get started?
HowToo makes it easy: same-day/2-day shipping on every part, plus all the tools and specialty tools you need! Check out the parts and tools sections below to add everything to your cart.