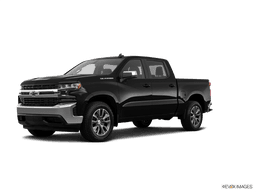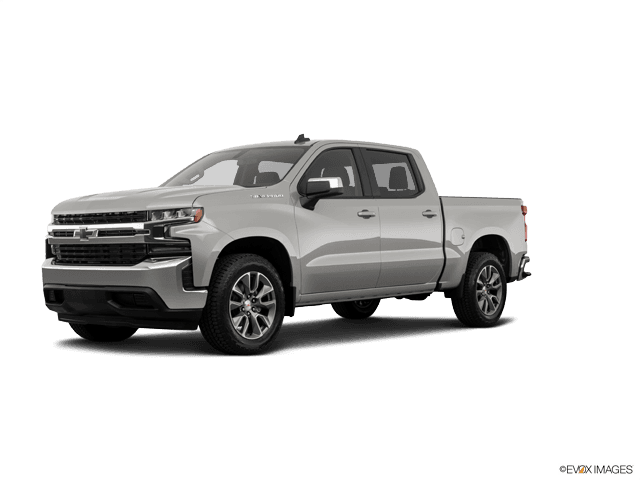

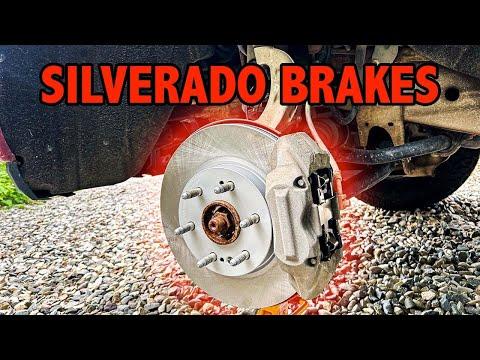






How to Replace Front Brake Pads and Rotors on a 2019-2025 Chevrolet Silverado 1500 (Engine: V8 5.3L)
Step-by-step DIY instructions with required tools, parts, torque specs, and safety tips for 2019, 2020, 2021
How to Replace Front Brake Pads and Rotors on a 2019-2025 Chevrolet Silverado 1500 (Engine: V8 5.3L)
Step-by-step DIY instructions with required tools, parts, torque specs, and safety tips for 2019, 2020, 2021


🔧 Silverado 1500 - Front Brake Pads and Rotor Replacement
This is a solid intermediate DIY job. You’ll remove both front calipers, replace the pads and rotors in pairs, clean the mounting surfaces, then bed in the new brakes.
Difficulty Level: Intermediate | Estimated Time: 3-4 hours
Assumption: These instructions cover the stock four-piston front brakes with approximately 343 mm rotors, not the optional six-piston Brembo upgrade.
⚠️ Safety & Precautions
- ⚠️ Support your Silverado 1500 with properly rated jack stands. Never work under a vehicle supported only by a jack.
- 🛑 Chock both rear wheels and place the transmission in Park.
- 🌡️ Let the brakes cool completely before starting.
- 🔩 Replace pads and rotors on both front wheels, never one side only.
- 🪝 Hang each caliper securely. Never let it dangle from the rubber brake hose.
- 🧤 Brake dust may contain harmful material. Don’t blow it away with compressed air.
- 💧 Don’t press the brake pedal while a caliper is removed.
- 🔋 Battery disconnection isn’t required for this front brake service.
🔧 Required Tools
You'll need the following tools for this repair:
- 22mm deep socket
- Metric socket set, 10-24mm
- 1/2-inch drive breaker bar
- 1/2-inch drive ratchet
- 3/8-inch drive ratchet
- Torque wrench, 30-250 Nm range
- Four-piston brake caliper compression tool (specialty)
- Flat-blade screwdriver
- Small needle-nose pliers
- Dead-blow hammer, 2-pound
- Wire hub-cleaning brush
- Brake caliper hanger (specialty)
- Floor jack, rated 3-ton minimum
- Jack stands, rated 3-ton minimum
- Wheel chocks
- Drain pan
- Safety glasses
- Nitrile gloves
🔩 Required Parts
HowToo sells all the parts you need for this repair:
- Dynamic Friction 5000 front brake kit - Qty: 1
- Front brake rotors, approximately 343mm - Qty: 2, replace in pairs
- Front ceramic brake pad set - Qty: 1
- Front brake pad hardware kit - Qty: 1
- Aerosol brake cleaner - Qty: 2 cans
- High-temperature silicone brake lubricant - Qty: 1 tube
- Medium-strength removable threadlocker - Qty: 1 tube
The complete kit is the cleanest buy because it keeps the pads, rotors, and hardware matched. Brake jobs don’t improve when three unrelated boxes meet for the first time.
📋 Before You Begin
- 🚗 Park on hard, level ground with the transmission in Park.
- 🧱 Place wheel chocks firmly in front of and behind both rear tires.
- 🛞 Loosen each front wheel nut about one-quarter turn with a 22mm socket before lifting.
- 🧪 Check the brake-fluid reservoir. If it’s near the MAX line, remove a small amount so piston retraction doesn’t make it overflow.
- 📦 Compare the new rotors and pads with the removed parts before final assembly.
- 📏 The replacement rotor should measure about 343 mm across for the standard four-piston setup.
🔨 Step-by-Step Instructions
Follow these steps in order:
Step 1: Lift and support the front
- Use the 3-ton floor jack at the front frame lifting point and raise your Silverado 1500.
- Place both 3-ton jack stands under solid frame support points.
- Lower the truck gently onto the stands, then give it a firm stability check.
- Keep the floor jack lightly touching the lift point as secondary support.
Step 2: Remove both front wheels
- Use the 22mm deep socket and 1/2-inch ratchet to remove the wheel nuts.
- Remove both front wheels and slide them away from your work area.
- Turn the steering wheel to give yourself better access to the first caliper.
Step 3: Inspect the brake assembly
- Use a flashlight to inspect the brake hose, caliper, and surrounding area for fluid leaks.
- Check whether one old pad is substantially thinner than the others. Uneven wear can indicate a sticking piston or hardware problem.
- Stop the repair if the hose is cracked, the caliper is leaking, or a piston boot is torn.
Step 4: Retract the caliper pistons
- Open the hood and loosen the brake-fluid reservoir cap by one turn.
- Watch the fluid level while using the four-piston brake caliper compression tool to press all pistons back slowly and evenly.
- A four-piston tool pushes the pistons together so one piston can’t pop outward while another retracts.
- Stop immediately if a piston binds or fluid begins overflowing.
- Slow pressure protects seals and prevents spills.
Step 5: Remove the brake-pad retaining hardware
- Use needle-nose pliers and a flat-blade screwdriver to remove the retaining clip and pad pins, if fitted to your caliper.
- Keep one hand over spring-loaded hardware while releasing it.
- Pull the old pads out of the caliper and note their orientation.
- Disconnect the pad-wear sensor carefully if it’s attached to the old pad.
Step 6: Remove and support the caliper
- Use the correct metric socket and breaker bar to remove the two caliper mounting bolts from the back of the steering knuckle.
- Lift the caliper straight off the rotor without twisting or pulling the brake hose.
- Use the brake caliper hanger to suspend it from the frame or suspension.
- Don’t disconnect the brake hose. Keeping it connected avoids introducing air into the system.
Step 7: Remove the old rotor
- Remove any factory rotor-retaining screw or disposable shipping clip with the appropriate metric socket or screwdriver.
- Pull the rotor straight off the hub.
- If it’s rusted in place, use the 2-pound dead-blow hammer to strike the rotor hat between the wheel studs.
- Don’t strike the wheel studs, hub bearing, or dust shield.
Step 8: Clean the hub face
- Place the drain pan below the hub.
- Use aerosol brake cleaner and the wire hub-cleaning brush to remove rust and debris from the hub face.
- Clean around every wheel stud and the hub-centering ring.
- The hub face must be smooth. Rust trapped behind the rotor can cause pedal pulsation.
- A clean hub prevents a comeback.
Step 9: Prepare and install the new rotor
- Use aerosol brake cleaner and a clean towel to wipe both friction surfaces unless the rotor instructions state its coating is installation-ready.
- Install the new rotor fully against the hub.
- Hold it temporarily with two wheel nuts installed backward by hand.
- If your rotor uses a retaining screw, tighten it only to 12 Nm (106 in-lbs).
Step 10: Clean and prepare the caliper
- Use aerosol brake cleaner and the wire brush to clean the pad contact areas without damaging piston boots.
- Confirm every piston is fully and evenly retracted with the four-piston caliper compression tool.
- Apply a very thin layer of high-temperature silicone brake lubricant to pad contact points and the backs of the pads where specified.
- Keep all lubricant away from pad friction material and rotor surfaces.
Step 11: Reinstall the caliper
- Position the caliper over the new rotor without twisting the brake hose.
- Clean the mounting-bolt threads and apply medium-strength removable threadlocker if the replacement instructions require it.
- Start both mounting bolts by hand to prevent crossed threads.
- Use the metric socket and torque wrench to tighten the standard four-piston caliper mounting bolts to 200 Nm (148 ft-lbs).
- Don’t use this torque for an aftermarket six-piston Brembo brake system.
Step 12: Install the new pads and hardware
- Slide the new inner and outer pads into their correct positions.
- Reconnect or install the pad-wear sensor without stretching its wire.
- Use needle-nose pliers and the flat-blade screwdriver to install the new retaining pins and spring hardware.
- Make sure the pads move correctly and all clips sit fully in their grooves.
Step 13: Repeat on the other side
- Use the same tools and procedure on the opposite front brake.
- Compare both completed assemblies before installing the wheels.
- Verify both brake hoses are untwisted and all sensor wiring is clipped safely away from the rotor and tire.
Step 14: Install and torque the wheels
- Remove the temporary wheel nuts holding each rotor.
- Install both wheels and start every wheel nut by hand.
- Use the 22mm socket to snug the nuts in a crisscross pattern.
- Raise your Silverado 1500 slightly with the floor jack, remove the jack stands, and lower it completely.
- Use the 22mm socket and torque wrench to tighten the wheel nuts in a crisscross pattern to 190 Nm (140 ft-lbs).
Step 15: Restore the brake pedal
- Confirm the brake-fluid reservoir cap is installed.
- With the engine off, press the brake pedal slowly several times until it becomes firm.
- Never move the truck until the pedal is firm and holds steady.
- Check the fluid level and adjust only with fresh DOT 3 brake fluid if needed.
✅ After Repair
- 🔍 Inspect both front brakes for leaks, loose wiring, or hardware touching the rotors.
- 🚦 Start the engine and press the brake pedal firmly. It should remain solid without slowly sinking.
- 🐢 Test the brakes at walking speed before entering normal traffic.
- 🔥 Bed the pads using the pad manufacturer’s instructions. A typical street procedure is several controlled moderate stops with cooling time between them.
- 🚫 Don’t come to a complete stop and hold the hot pads against the rotors during bedding.
- 🛣️ Avoid panic stops and heavy towing for the first 200 miles unless required for safety.
- 🔧 Recheck wheel-nut torque after 50-100 miles.
- ⚠️ Stop driving if the pedal is soft, the truck pulls strongly, fluid leaks, or a wheel becomes unusually hot.
💰 DIY vs Shop Cost
Shop Cost: $650-$1,050 (parts + labor)
DIY Cost: $240-$500 (parts only)
You Save: $300-$650 by doing it yourself!
Shop labor rates vary but typically run $100-$150/hour. This repair takes a shop approximately 1.5-2.5 hours.
🎯 Ready to get started?
HowToo makes it easy: same-day/2-day shipping on every part, plus all the tools and specialty tools you need! Check out the parts and tools sections below to add everything to your cart.