







How to Replace Front Brake Pads and Rotors on a 2019-2022 Chevrolet Silverado 1500 (Engine: V8 5.3L)
Step-by-step DIY guide with required tools, parts, torque specs, safety tips, and brake bedding for 2019, 2020, 2021
How to Replace Front Brake Pads and Rotors on a 2019-2022 Chevrolet Silverado 1500 (Engine: V8 5.3L)
Step-by-step DIY guide with required tools, parts, torque specs, safety tips, and brake bedding for 2019, 2020, 2021


🔧 Silverado 1500 - Front Brake Pad and Rotor Replacement
This is a manageable driveway repair if you work one side at a time and support your Silverado correctly. You’ll remove both front calipers and brackets, replace both rotors and the full front pad set, then bed the new brakes.
Assumption: These instructions cover the stock standard four-piston front brakes with approximately 343 mm rotors, not an optional six-piston big-brake package.
Difficulty Level: Intermediate | Estimated Time: 3-4 hours
⚠️ Safety & Precautions
- ⚠️ Support your Silverado with properly rated jack stands. Never work under a vehicle supported only by a jack.
- ⚠️ Chock both rear wheels and leave the transmission in Park.
- ⚠️ Brake dust is harmful. Don’t use compressed air or blow dust off the brakes.
- ⚠️ Don’t press the brake pedal while either front caliper is removed.
- ⚠️ Hang each caliper securely. Never let its weight pull on the rubber brake hose.
- ⚠️ Brake fluid damages paint. Remove any spill immediately with plenty of water.
- 🔋 Battery disconnection isn’t required for this front brake job.
🔧 Required Tools
You'll need the following tools for this repair:
- 22mm deep socket
- Metric socket set from 10mm to 24mm
- Metric combination wrench set from 10mm to 24mm
- 1/2-inch drive breaker bar
- 1/2-inch drive torque wrench rated to 250 ft-lbs
- 3/8-inch drive ratchet
- Flat-blade screwdriver
- Small hooked pick
- Four-piston brake caliper spreader (specialty)
- 3-ton floor jack
- 3-ton jack stands
- Wheel chocks
- Caliper hanger hooks
- Dead-blow hammer
- Hub-cleaning wire brush
- Nylon detailing brush
- Plastic drain pan
- Shop towels
- Nitrile gloves
- Safety glasses
🔩 Required Parts
HowToo sells all the parts you need for this repair:
- Front ceramic brake pad set - Qty: 1
- Front vented brake rotors - Qty: 2, replace in pairs
- Front brake hardware kit - Qty: 1
- Mechanical pad wear sensor - Qty: 1 if not included with the selected kit
- Brake cleaner - Qty: 2 cans
- High-temperature ceramic brake lubricant - Qty: 1 tube
- Medium-strength threadlocker - Qty: 1 tube
I’d use the Dynamic Friction 5000 Front Brake Kit at about $243. It packages two 343 mm rotors, ceramic pads, and installation hardware together. Matching everything in one box saves the usual parts-counter scavenger hunt.
📋 Before You Begin
- 📍 Park on solid, level ground. Put the transmission in Park and chock both rear wheels.
- 🧊 Let the brakes cool completely before touching them.
- 🔍 Look through the wheel and confirm the caliper has four piston bulges and the replacement rotor matches the old rotor’s diameter.
- 🧰 Open the hood and locate the brake-fluid reservoir. Clean around the cap with shop towels before opening it.
- 💧 Check the fluid level. Remove a small amount only if the reservoir is already at the maximum line.
- 📱 No infotainment service mode or electronic parking-brake retraction is needed for the front brakes.
🔨 Step-by-Step Instructions
Follow these steps in order:
Step 1: Loosen the Front Wheel Nuts
- Use a 22mm deep socket and 1/2-inch breaker bar to loosen each front wheel nut about one-quarter turn.
- Don’t remove the wheel nuts while the tires are still carrying the truck’s weight.
Step 2: Raise and Support the Front
- Use the 3-ton floor jack under a solid front frame or approved center lifting point.
- Place the 3-ton jack stands under both front frame rails.
- Lower the truck onto the stands, then gently shake it to verify stability.
Step 3: Remove the Wheels
- Use the 22mm deep socket and 1/2-inch breaker bar to remove the wheel nuts.
- Remove both front wheels and slide one underneath the frame as a secondary safeguard.
Step 4: Inspect the Brake Assembly
- Use the nylon detailing brush and brake cleaner over the plastic drain pan to remove loose dust.
- Inspect the brake hose for cracks, wetness, rubbing, or twists.
- Check the caliper for fluid around the pistons and compare inner-pad wear with outer-pad wear.
- If a hose or caliper is leaking, stop and repair that problem before installing new pads.
Step 5: Disconnect the Pad Wear Sensor
- Use the small hooked pick to release the connector lock without pulling on the wiring.
- Unclip the sensor lead from its retainers and note the original routing.
- Don’t reuse a sensor that’s worn through, cracked, or included new with the replacement kit.
Step 6: Retract the Caliper Pistons
- Remove the brake-fluid reservoir cap by hand and cover the surrounding area with shop towels.
- Use the four-piston brake caliper spreader against the old pads to press all pistons back slowly and evenly.
- Watch the reservoir. Remove excess fluid with clean shop towels if it approaches the rim.
- If one piston refuses to retract evenly, stop. A sticking caliper can ruin the new brakes.
Step 7: Remove and Support the Caliper
- Use the correctly fitting socket from the metric socket set with the 1/2-inch breaker bar to remove the caliper mounting bolts.
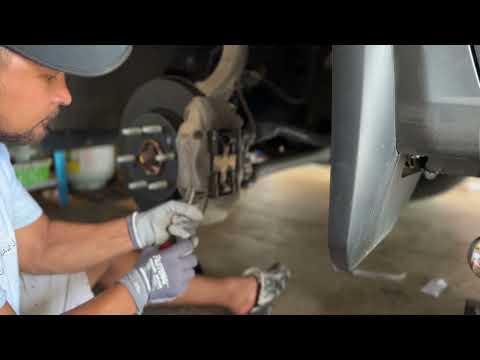
- Lift the caliper away from the rotor and support it with a caliper hanger hook.
- Don’t twist, stretch, or disconnect the brake hose.
Step 8: Remove the Brake Pads and Hardware
- Use the flat-blade screwdriver to remove the old pads and stainless abutment clips.
- An abutment clip is the thin stainless guide where the ends of the pads slide.
- Note the orientation of the inner pad, outer pad, shims, clips, and wear sensor.
- Compare the old pads. A large wear difference points to a piston, bracket, or hardware problem.
Step 9: Remove the Caliper Bracket
- Use the correctly fitting socket from the metric socket set and the 1/2-inch breaker bar to remove both bracket bolts.
- Support the bracket while removing the final bolt because it’s heavy.
- Clean reusable bolts with the hub-cleaning wire brush.
Step 10: Remove the Old Rotor
- Pull the rotor straight from the hub.
- If rust holds it in place, strike the rotor hat between the wheel studs with the dead-blow hammer.
- Don’t strike the wheel studs or hit the thin braking surface near its edge.
Step 11: Clean the Hub Face
- Use the hub-cleaning wire brush to remove rust and scale where the rotor contacts the hub.
- Wipe the surface clean with brake cleaner and shop towels.
- The new rotor must sit completely flat. A tiny rust ridge can create pedal pulsation later.
Step 12: Prepare and Install the New Rotor
- Compare the new rotor with the old one before installation. Match diameter, height, thickness, center hole, and six wheel-stud holes.
- Use brake cleaner and shop towels to clean both friction surfaces unless the rotor instructions specifically say its coating stays in place.
- Install the rotor over the wheel studs and hold it against the hub with one wheel nut installed backward by hand.
Step 13: Reinstall the Caliper Bracket
- Apply one small drop of medium-strength threadlocker to each clean bracket-bolt thread if the replacement instructions call for it.
- Start both bolts by hand to prevent cross-threading.
- Use the correct socket from the metric socket set and the 1/2-inch torque wrench.
- Torque the caliper bracket bolts to 230 Nm (170 ft-lbs).
Step 14: Install New Hardware and Pads
- Use the nylon detailing brush and brake cleaner to clean the hardware seats in the bracket.
- Press the new abutment clips fully into place by hand.
- Apply a very thin film of high-temperature ceramic brake lubricant where the pad ears contact the clips.
- Keep lubricant completely off the rotor surface and pad friction material.
- Install the new inner and outer pads in the same orientation as the originals.
- Thin grease works. Globs collect grit.
Step 15: Reinstall the Caliper
- Remove the caliper hanger hook and lower the caliper squarely over the pads.
- Never force the caliper. Recheck that every piston is fully retracted if clearance is tight.
- Start the caliper bolts by hand.
- Use the correct socket from the metric socket set and the 1/2-inch torque wrench.
- Torque the caliper mounting bolts to 100 Nm (74 ft-lbs).
Step 16: Connect the Wear Sensor
- Route the new or reusable wear-sensor lead exactly like the original.
- Use the small hooked pick only if needed to seat the retaining clips.
- Push the electrical connector together until its lock clicks.
- Turn the steering from side to side and confirm the wire can’t touch the tire or rotor.
Step 17: Repeat on the Other Side
- Repeat Steps 4 through 16 on the opposite front wheel.
- Use the completed side as a visual reference, but don’t mix left-side and right-side hardware.
Step 18: Reinstall the Wheels
- Remove the temporary wheel nut holding each rotor.
- Install both wheels and start every wheel nut by hand.
- Snug the nuts in a star pattern using the 22mm deep socket and 1/2-inch breaker bar.
- Raise the truck with the 3-ton floor jack, remove the stands, and lower it until the tires touch the ground.
- Use the 22mm deep socket and 1/2-inch torque wrench.
- Torque the wheel nuts in a star pattern to 190 Nm (140 ft-lbs).
Step 19: Restore Brake Pedal Pressure
- Before starting the engine, press the brake pedal slowly several times until it becomes firm.
- Check the brake-fluid reservoir and adjust the level only with the fluid specified on the reservoir cap.
- Install the reservoir cap securely by hand.
- If the pedal remains soft or sinks, don’t drive the truck.
✅ After Repair
- ✅ Start the engine while holding the brake pedal. A small initial pedal drop is normal when brake assist activates.
- ✅ Verify the pedal remains firm and inspect both front brakes for leaks or loose wiring.
- ✅ At walking speed, test the brakes in a clear area before entering traffic.
- ✅ Bed the pads using the pad manufacturer’s exact instructions. A common process uses several moderate stops followed by a cooling drive.
- ✅ Avoid holding the brake pedal firmly while stopped immediately after bedding because hot pads can leave uneven deposits.
- ✅ Recheck wheel-nut torque after approximately 80-160 km (50-100 miles).
- ✅ Normal braking shouldn’t produce grinding, pulling, a soft pedal, or a brake warning light.
💰 DIY vs Shop Cost
Shop Cost: $650-$1,000 equivalent, depending on local parts and labor pricing
DIY Cost: $245-$400 equivalent for pads, rotors, hardware, and supplies
You Save: Approximately $300-$600 by doing it yourself!
Labor rates vary by region. This repair typically takes a shop approximately 1.5-2.5 hours.
🎯 Ready to get started?
HowToo makes it easy: same-day/2-day shipping on every part, plus all the tools and specialty tools you need! Check out the parts and tools sections below to add everything to your cart.