


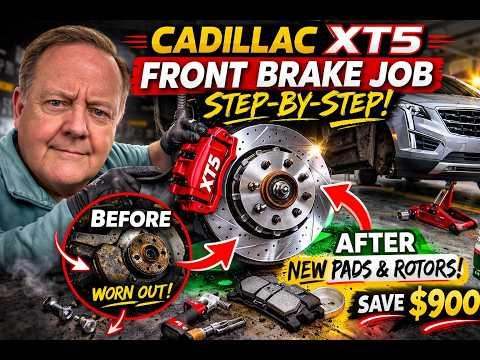






How to Replace Front Brake Pads and Rotors on a 2019-2020 Cadillac XT4 (Trim: Sport)
Step-by-step DIY guide with required tools, parts, torque specs, safety tips, and bedding instructions for 2019, 2020
How to Replace Front Brake Pads and Rotors on a 2019-2020 Cadillac XT4 (Trim: Sport)
Step-by-step DIY guide with required tools, parts, torque specs, safety tips, and bedding instructions for 2019, 2020


🔧 XT4 - Front Brake Pads and Rotor Replacement
This is a manageable first brake job if you work carefully and complete one side at a time. You’ll remove each front caliper and bracket, replace both rotors and the complete front pad set, then properly torque and bed everything in.
Difficulty Level: Intermediate | Estimated Time: 3-4 hours
Assumption: These instructions cover the stock front sliding-caliper system with approximately 321 mm vented rotors.
⚠️ Safety & Precautions
- 🛑 Support your XT4 with jack stands. Never work beneath a vehicle supported only by a jack.
- 🛑 Wear a dust mask and wet brake dust with brake cleaner. Never blow it away with compressed air.
- 🛑 Do not press the brake pedal while either caliper is removed.
- 🛑 Hang the caliper securely. Never let its weight pull on the rubber brake hose.
- 🛑 Keep grease, oil, and dirty hands away from the pad faces and rotor friction surfaces.
- 🛑 Brake fluid damages paint. Cover the area surrounding the reservoir.
- 🛑 Front brakes do not require electronic parking-brake service mode.
- 🛑 Battery disconnection is not required.
🔧 Required Tools
You'll need the following tools for this repair:
- Floor jack rated 3-ton minimum
- Jack stands rated 3-ton minimum
- Wheel chocks
- 22mm impact-rated socket
- 13mm socket
- 18mm socket
- Torx T30 bit socket
- 3/8-inch drive ratchet
- 1/2-inch drive breaker bar
- Torque wrench rated 20-200 Nm
- Open-end wrench sized for caliper guide pin
- 6-inch C-clamp or brake piston compressor
- Brake caliper hanger hook (specialty)
- Flat-blade screwdriver
- Small rubber mallet
- Hub-cleaning wire brush
- Pad-abutment wire brush
- Brake rotor micrometer (specialty)
- Brake cleaner spray
- Shop towels
- Nitrile gloves
- Safety glasses
- Dust mask
🔩 Required Parts
HowToo sells all the parts you need for this repair:
- Front ceramic brake pad set for D1886 application - Qty: 1
- Front vented brake rotors, approximately 321 mm - Qty: 2, replace in pairs
- Front brake pad hardware kit - Qty: 1, unless included with pads
- High-temperature silicone brake lubricant - Qty: 1
- Brake cleaner - Qty: 2 cans
- Medium-strength removable threadlocker - Qty: 1
- DOT 4 brake fluid - Qty: 1 small sealed container, only if topping off is necessary
Coated rotors are worth choosing in Sonīpat’s moisture, dust, and monsoon conditions. Bare rotor hats can turn orange before you’ve finished admiring your work.
📋 Before You Begin
- Park on level, solid ground. Shift into Park and apply the parking brake.
- Place wheel chocks securely behind both rear tires.
- Open the hood and inspect the brake-fluid reservoir. Remove excess fluid if it is already near the maximum line.
- Do not remove the reservoir cap completely. Loosen it slightly and protect the surrounding paint with shop towels.
- Complete one side before disassembling the other. The finished side becomes your visual reference.
- Compare the new pads and rotors with the removed parts before installation.
🔨 Step-by-Step Instructions
Follow these steps in order:
Step 1: Loosen the front wheel nuts
- Use the 22mm socket and 1/2-inch breaker bar to loosen each front wheel nut approximately half a turn.
- Do not remove the nuts while the vehicle is resting fully on the ground.
Step 2: Raise and support the front
- Use the 3-ton floor jack at the approved front lifting point.
- Place the 3-ton jack stands beneath the reinforced front support points.
- Lower the vehicle gently onto the stands and confirm it is stable before approaching the brakes.
- Use the 22mm socket to remove the wheel nuts and both front wheels.
Step 3: Inspect the brake assembly
- Use the steering wheel to turn the caliper outward for easier access.
- Inspect the brake hose, caliper boots, guide-pin boots, and any pad sensor wiring.
- Stop if the hose is cracked, the caliper is leaking, or one pad is dramatically thinner than the other. Those conditions require additional repair.
Step 4: Remove the front caliper
- Use the 13mm socket and 3/8-inch ratchet to remove the upper and lower caliper guide-pin bolts.
- If a guide pin turns, hold it with the correctly sized open-end wrench while loosening the bolt. GM brake guidance warns against letting the guide pin twist and damage its boot. static.oemdtc.com
- Lift the caliper away from the pads.
- Support it with the brake caliper hanger hook. A caliper hanger is simply a strong hook that keeps tension off the brake hose.
Step 5: Remove the old brake pads
- Slide the inner and outer pads out of the bracket by hand.
- Use the flat-blade screwdriver carefully if a pad is stuck, without damaging the piston boot.
- Note the position of any mechanical wear indicator before removing the pads.
- Remove the stainless pad clips from the bracket.
Step 6: Remove the caliper bracket
- Use the 18mm socket and 1/2-inch breaker bar to remove both caliper-bracket bolts.
- Support the bracket as the second bolt comes out. It is heavier than it looks.
- Keep the bolts clean and inspect their threads for stretching, corrosion, or damage.
Step 7: Remove the old rotor
- If fitted, use the Torx T30 bit socket and 3/8-inch ratchet to remove the rotor retaining screw.
- Pull the rotor straight off the hub.
- If rust has seized it, strike the rotor hat between the wheel studs with the small rubber mallet. Do not strike the studs or wheel-bearing hub.
- Do not use the dust shield as a pry point.
Step 8: Clean the hub and bracket
- Use the hub-cleaning wire brush to remove rust from the hub face and center pilot.
- Use brake cleaner and shop towels to leave the hub face clean and flat.
- Use the pad-abutment wire brush to clean the bracket areas beneath the stainless clips.
- A dirty hub can hold the rotor crooked and create pedal pulsation. This cleaning step matters.
Step 9: Prepare and install the new rotor
- Clean both rotor friction surfaces with brake cleaner and clean shop towels, unless the rotor manufacturer specifically says its coating stays in place.
- Slide the new rotor completely onto the clean hub.
- Reinstall the retaining screw with the Torx T30 bit socket. Tighten it only snug unless the rotor manufacturer supplies a specific torque.
- Install one wheel nut by hand to hold the rotor flush while assembling the brake.
Step 10: Reinstall the caliper bracket
- Apply a small amount of medium-strength removable threadlocker only if the replacement bolt instructions call for it.
- Position the bracket and start both bolts by hand to prevent cross-threading.
- Use the 18mm socket and torque wrench to tighten the bracket bolts to 185 Nm (136 ft-lbs). howtoo.com
Step 11: Service the guide pins and pad clips
- Pull each guide pin out by hand, one at a time, so their positions are not mixed.
- Wipe the pins clean using shop towels.
- Inspect for rust, scoring, bent pins, or torn rubber boots.
- Apply a thin coating of high-temperature silicone brake lubricant to the smooth guide-pin surfaces.
- Push each pin back through its boot until it slides freely.
- Install the new stainless pad clips fully into the clean bracket.
Step 12: Compress the caliper piston
- Place an old brake pad against the piston face.
- Use the 6-inch C-clamp or brake piston compressor to push the piston slowly and evenly into the caliper.
- Watch the brake-fluid reservoir as the piston retracts. Stop before the reservoir overflows.
- The front piston pushes straight inward. Do not rotate it.
Step 13: Install the new brake pads
- Apply a very thin film of high-temperature silicone brake lubricant where the pad ears touch the stainless clips.
- Do not apply lubricant to the rotor or pad friction surfaces.
- Install the inner and outer pads in the same orientation as the originals.
- Confirm both pads can move in the bracket without binding.
- A sliding pad is a happy pad.
Step 14: Reinstall the caliper
- Place the caliper over the new pads without twisting the brake hose.
- Start both guide-pin bolts by hand.
- Hold the guide pin with the open-end wrench if it attempts to rotate.
- Use the 13mm socket and torque wrench to tighten the guide-pin bolts to 35 Nm (26 ft-lbs). howtoo.com
- Repeat Steps 3 through 14 on the opposite side.
Step 15: Reinstall and torque the wheels
- Remove the temporary wheel nut holding each rotor.
- Install both wheels and thread all wheel nuts by hand.
- Use the 22mm socket to snug the nuts in a crisscross pattern.
- Raise the vehicle with the 3-ton floor jack, remove the stands, and lower the tires onto the ground.
- Use the 22mm socket and torque wrench to tighten the wheel nuts in a crisscross pattern to 190 Nm (140 ft-lbs). GM warns that uneven or incorrect wheel torque can cause rotor damage and brake pulsation. cadillaccanada.ca
Step 16: Restore the brake pedal
- Before starting the engine, press the brake pedal slowly several times until it becomes firm.
- Do not move the vehicle until the pedal feels firm near its normal height.
- Check the brake-fluid level and adjust only if it is outside the marked range.
- Use only fresh DOT 4 brake fluid from a sealed container if topping off is necessary.
✅ After Repair
- Start the engine while holding the brake pedal. A small initial drop is normal as brake assist activates.
- Confirm the pedal remains firm and no brake warning appears.
- Check around both calipers for leaks and confirm every hose is routed naturally.
- Perform the first test at walking speed in a clear, private area.
- Make approximately 6-10 moderate stops from 55 km/h to 15 km/h without activating ABS.
- Drive several minutes between groups of stops to let the brakes cool.
- Avoid hard stops and holding the pedal firmly while stationary during the initial bed-in period.
- Follow the pad manufacturer's bedding instructions if they differ from this general procedure.
- Recheck wheel-nut torque after approximately 80 km.
💰 DIY vs Shop Cost
Shop Cost: $450-$800 USD equivalent (parts + labor)
DIY Cost: $140-$260 USD equivalent (parts only)
You Save: $310-$540 USD equivalent by doing it yourself!
Local labor rates vary considerably. This repair normally takes a professional approximately 1.5-2.5 hours.
🎯 Ready to get started?
HowToo makes it easy: same-day/2-day shipping on every part, plus all the tools and specialty tools you need! Check out the parts and tools sections below to add everything to your cart.
