

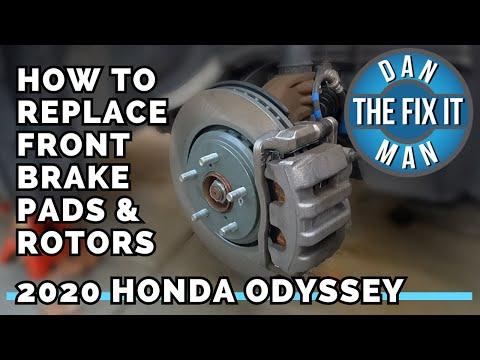







How to Replace Front Brake Pads and Rotors on a 2018-2025 Honda Odyssey
Step-by-step DIY brake guide with tools, parts, torque specs, and safety tips for 2018, 2019, 2020, 2021, 2022, 2023, 2024, 2025
How to Replace Front Brake Pads and Rotors on a 2018-2025 Honda Odyssey
Step-by-step DIY brake guide with tools, parts, torque specs, and safety tips for 2018, 2019, 2020, 2021, 2022, 2023, 2024, 2025


🔧 Odyssey - Front Brake Pad & Rotor Replacement
This repair replaces the front brake pads and front brake rotors on your Odyssey. Brake pads create stopping friction, and rotors are the metal discs the pads clamp onto; replacing both together helps prevent noise, vibration, and uneven braking.
Difficulty Level: Beginner-Intermediate | Estimated Time: 2-3 hours
⚠️ Safety & Precautions
- ⚠️ Work on a cool brake system. Hot rotors and calipers can burn you.
- ⚠️ Support your Odyssey with jack stands before removing wheels. Never rely on a jack alone.
- ⚠️ Wear safety glasses and gloves. Brake dust and rust can irritate skin and eyes.
- ⚠️ Do not press the brake pedal while a caliper is removed.
- ⚠️ Front brakes do not require electronic parking brake service mode on your Odyssey.
- ⚠️ Battery disconnect is not required for this front brake repair.
🔧 Required Tools
You'll need the following tools for this repair:
- Floor jack (rated 3-ton minimum)
- Jack stands (rated 3-ton minimum)
- Wheel chocks
- 19mm lug nut socket
- Breaker bar 1/2-inch drive
- Torque wrench 1/2-inch drive
- Ratchet 3/8-inch drive
- 12mm socket
- 17mm socket
- Phillips #3 impact screwdriver (specialty)
- Hammer 16 oz
- C-clamp 6-inch
- Brake caliper hanger hook
- Flat blade screwdriver 1/4-inch
- Wire brush
- Brake parts cleaning brush
- Brake cleaner spray nozzle
- Shop towels
- Brake fluid tester or turkey baster
- Safety glasses
- Nitrile gloves
- Dust mask
🔩 Required Parts
HowToo sells all the parts you need for this repair:
- Front brake pad set - Qty: 1
- Front brake rotors - Replace in pairs - Qty: 2
- Front brake hardware kit - Qty: 1
- Brake lubricant, silicone/ceramic-safe - Qty: 1
- Brake cleaner - Qty: 1-2 cans
- DOT 3 brake fluid - Qty: 1 small bottle
📋 Before You Begin
- 🅿️ Park your Odyssey on level ground, shift to Park, and apply the parking brake.
- 🧱 Place wheel chocks behind the rear wheels. Wheel chocks are wedges that stop the vehicle from rolling.
- 🔎 Open the hood and check the brake fluid reservoir level. If it is near MAX, remove a small amount using a brake fluid tester or turkey baster before compressing the caliper pistons.
- 🧼 Brake fluid damages paint. Wipe spills immediately with clean shop towels.
- 📌 Work on one side at a time so the other side can be used as a reference.
🔨 Step-by-Step Instructions
Follow these steps in order:
Step 1: Loosen the Front Lug Nuts
- Use a 19mm lug nut socket and breaker bar 1/2-inch drive to loosen each front lug nut about 1/2 turn while the tires are still on the ground.
- Do not remove the lug nuts yet.
- Loose first, lift second.
Step 2: Raise and Support the Front
- Use a floor jack (rated 3-ton minimum) at the front center jacking point to lift the front of your Odyssey.
- Place jack stands (rated 3-ton minimum) under the approved front support points.
- Gently lower the vehicle onto the jack stands using the floor jack.
- Lightly shake the vehicle by hand to confirm it is stable before working underneath or around the wheels.
Step 3: Remove the Front Wheels
- Use the 19mm lug nut socket and ratchet or breaker bar to remove the loosened lug nuts.
- Remove both front wheels and set them flat on the ground away from your work area.
Step 4: Remove the Caliper Slide Bolts
- Turn the steering wheel to give yourself better access to the brake caliper.
- The caliper is the clamp-shaped part that squeezes the brake pads against the rotor.
- Use a 12mm socket and ratchet 3/8-inch drive to remove the two caliper slide bolts.
- Lift the caliper off the bracket.
- Hang the caliper from the strut spring using a brake caliper hanger hook.
- Do not let the caliper hang by the rubber brake hose.
Step 5: Remove the Old Brake Pads
- Use a flat blade screwdriver 1/4-inch to gently pry the old pads out of the caliper bracket.
- Note the position of the pad with the wear indicator tab before removal.
- The wear indicator is the small metal tab that squeals when pads are worn.
Step 6: Compress the Caliper Piston
- Place one old brake pad against the caliper piston.
- Use a C-clamp 6-inch to slowly press the piston fully back into the caliper.
- Watch the brake fluid reservoir under the hood as you compress the piston.
- If fluid rises too high, remove a small amount with the brake fluid tester or turkey baster.
- Go slowly to protect seals.
Step 7: Remove the Caliper Bracket
- Use a 17mm socket and breaker bar 1/2-inch drive to remove the two caliper bracket bolts.
- Remove the caliper bracket from the steering knuckle.
- The steering knuckle is the large metal part behind the rotor that holds the hub and brake assembly.
Step 8: Remove the Rotor Retaining Screws
- Honda rotors commonly use small Phillips retaining screws to hold the rotor to the hub.
- Use a Phillips #3 impact screwdriver (specialty) and hammer 16 oz to loosen the rotor screws.
- An impact screwdriver turns when struck with a hammer, helping prevent stripped screw heads.
- Remove the screws and set them aside if they are reusable.
Step 9: Remove the Old Rotor
- Pull the rotor straight off the wheel hub by hand.
- If it is stuck from rust, tap the rotor hat area with a hammer 16 oz.
- Do not hit the wheel studs.
- If the rotor still will not move, spray brake cleaner around the hub area and keep tapping evenly around the rotor hat.
Step 10: Clean the Hub Face
- Use a wire brush to clean rust from the hub face where the rotor sits.
- Wipe the surface with shop towels and brake cleaner spray nozzle.
- A clean hub face helps prevent brake pedal pulsation.
Step 11: Install the New Rotor
- Clean both sides of the new rotor using the brake cleaner spray nozzle and shop towels.
- Slide the new rotor onto the hub.
- Install the rotor retaining screws using the Phillips #3 impact screwdriver (specialty).
- Tighten snug only; do not over-tighten the small screws.
Step 12: Service the Caliper Bracket
- Use a flat blade screwdriver 1/4-inch to remove the old pad hardware clips from the caliper bracket.
- Use a wire brush and brake parts cleaning brush to clean the bracket where the clips sit.
- Install the new clips from the front brake hardware kit by hand.
- Apply a thin layer of brake lubricant, silicone/ceramic-safe to the pad contact points on the clips.
- Do not put lubricant on the brake pad friction material or rotor surface.
Step 13: Reinstall the Caliper Bracket
- Position the caliper bracket over the rotor.
- Start both bracket bolts by hand to avoid cross-threading.
- Use a 17mm socket and torque wrench 1/2-inch drive to tighten the bracket bolts to Torque to 137 Nm (101 ft-lbs).
Step 14: Install the New Brake Pads
- Slide the new brake pads into the caliper bracket by hand.
- Make sure they move smoothly in the new hardware clips.
- If a pad feels stuck, remove it and recheck the clip seating and rust cleanup.
- Apply a thin layer of brake lubricant, silicone/ceramic-safe to the pad backing plate contact areas only.
Step 15: Reinstall the Caliper
- Lower the caliper over the new pads.
- If it does not fit, use the C-clamp 6-inch to confirm the piston is fully compressed.
- Start both caliper slide bolts by hand.
- Use a 12mm socket and torque wrench 1/2-inch drive to tighten the slide bolts to Torque to 37 Nm (27 ft-lbs).
Step 16: Repeat on the Other Side
- Repeat Steps 4 through 15 on the other front brake assembly.
- Use the same tools and keep the same safety checks.
- Always replace front pads and rotors in pairs.
Step 17: Reinstall the Wheels
- Place each front wheel back onto the hub.
- Start all lug nuts by hand.
- Use a 19mm lug nut socket to snug the lug nuts in a star pattern.
Step 18: Lower and Torque the Wheels
- Use the floor jack (rated 3-ton minimum) to slightly raise your Odyssey off the jack stands.
- Remove the jack stands (rated 3-ton minimum).
- Lower the vehicle until the tires touch the ground and cannot spin.
- Use a 19mm lug nut socket and torque wrench 1/2-inch drive to tighten lug nuts in a star pattern to Torque to 127 Nm (94 ft-lbs).
Step 19: Pump the Brake Pedal
- Before driving, sit in the driver seat and press the brake pedal several times until it feels firm.
- This moves the caliper pistons back into position against the new pads.
- Do not skip this step. The first pedal press may go low.
Step 20: Check Brake Fluid Level
- Open the hood and check the brake fluid reservoir.
- Add DOT 3 brake fluid only if the level is below the proper range.
- Use shop towels to clean any spilled fluid immediately.
✅ After Repair
- ✅ Start your Odyssey and confirm the brake pedal feels firm before shifting out of Park.
- ✅ Roll forward slowly in a safe area and test the brakes at very low speed.
- ✅ Listen for scraping, grinding, or clunking. Stop and recheck if anything sounds wrong.
- ✅ Recheck lug nut torque after the first short drive using the 19mm lug nut socket and torque wrench 1/2-inch drive.
- ✅ Bed in the new pads if your brake pad box recommends it. A common method is several moderate stops from about 35-45 mph without coming to a complete stop between each one.
- ✅ Avoid hard braking for the first 200 miles unless needed for safety.
💰 DIY vs Shop Cost
Shop Cost: $450-$750 (parts + labor)
DIY Cost: $160-$350 (parts only)
You Save: $290-$400 by doing it yourself!
Shop labor rates vary but typically run $100-$150/hour. This repair takes a shop approximately 1.5-2.5 hours.
🎯 Ready to get started?
HowToo makes it easy: same-day/2-day shipping on every part, plus all the tools and specialty tools you need! Check out the parts and tools sections below to add everything to your cart.