

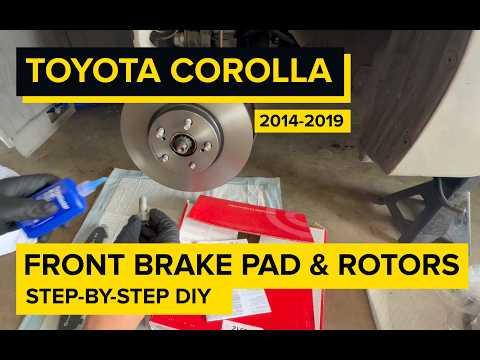





How to Replace Front Brake Pads and Rotors on a 2017-2019 Toyota Corolla (Trim: LE | Engine: Inline 4 1.8L | Body: Sedan)
Step-by-step DIY guide with tools, parts, torque specs, safety tips, and brake bedding for 2017, 2018, 2019
How to Replace Front Brake Pads and Rotors on a 2017-2019 Toyota Corolla (Trim: LE | Engine: Inline 4 1.8L | Body: Sedan)
Step-by-step DIY guide with tools, parts, torque specs, safety tips, and brake bedding for 2017, 2018, 2019


🔧 Corolla - Front Brake Pad & Rotor Replacement
This repair replaces the front brake pads and front brake rotors on your Corolla. New pads restore stopping power, and new rotors give the pads a smooth surface so the brakes stay quiet and even.
Difficulty Level: Beginner-Intermediate | Estimated Time: 2-3 hours
⚠️ Safety & Precautions
- ⚠️ Work on a flat, solid surface only. Never work under a car supported only by a jack.
- ⚠️ Use jack stands before removing the wheels. A jack stand is a fixed support that holds the vehicle safely after lifting.
- ⚠️ Wear safety glasses and gloves. Brake dust and rust can irritate skin and eyes.
- ⚠️ Do not press the brake pedal while the caliper is removed.
- ⚠️ Support the brake caliper with a hook or bungee cord. Do not let it hang by the brake hose.
- ⚠️ Brake parts may be hot if the car was recently driven. Let them cool first.
- ⚠️ Battery disconnect is not required for this front brake job.
🔧 Required Tools
You'll need the following tools for this repair:
- 21mm lug nut socket
- 14mm socket
- 17mm socket
- 3/8-inch ratchet
- 1/2-inch breaker bar
- Torque wrench rated 20-100 ft-lbs
- Torque wrench rated 50-150 ft-lbs
- Flat-blade screwdriver
- Brake caliper piston compressor tool
- Brake caliper hanger hook
- Wire brush
- Rubber mallet
- Floor jack rated 2-ton minimum
- Jack stands rated 2-ton minimum
- Wheel chocks
- Drain pan
- Nitrile gloves
- Safety glasses
- Shop towels
🔩 Required Parts
HowToo sells all the parts you need for this repair:
- Front brake pad set - Qty: 1
- Front brake rotors - Replace in pairs - Qty: 2
- Front brake pad hardware kit - Qty: 1
- Brake cleaner spray - Qty: 1-2 cans
- High-temperature brake lubricant - Qty: 1
- DOT 3 brake fluid - Qty: 1 small bottle
📋 Before You Begin
- Park your Corolla on level ground and shift to Park.
- Set the parking brake before lifting the front of the vehicle.
- Place wheel chocks behind the rear wheels. Wheel chocks are wedges that stop the car from rolling.
- Open the hood and check the brake fluid reservoir level. If it is near the MAX line, remove a small amount with a clean turkey baster or suction tool before compressing the caliper pistons.
- Do not leave the brake fluid reservoir open longer than needed. Brake fluid absorbs moisture from air.
- No infotainment menu, scan tool, EPB retraction, or ADAS calibration is required for this front brake service.
🔨 Step-by-Step Instructions
Follow these steps in order:
Step 1: Loosen the Front Lug Nuts
- Use a 21mm lug nut socket and 1/2-inch breaker bar to loosen each front lug nut about 1/2 turn.
- Do this while the tires are still on the ground so the wheels do not spin.
- Tip: Do not remove the lug nuts yet.
Step 2: Lift and Support the Front of the Corolla
- Use a floor jack rated 2-ton minimum at the front center jacking point or the proper side pinch weld lift point.
- Place jack stands rated 2-ton minimum under the front side pinch weld support points.
- Slowly lower the vehicle onto the jack stands and gently shake the car to confirm it is stable.
- Keep the floor jack lightly touching the lift point as a backup.
Step 3: Remove the Front Wheels
- Use the 21mm lug nut socket and 3/8-inch ratchet to remove the loosened lug nuts.
- Remove both front wheels and place them flat under the side of the vehicle as an extra safety backup.
Step 4: Remove the Caliper Slide Pin Bolts
- Turn the steering wheel to give yourself more room on the side you are working on.
- Use a 14mm socket and 3/8-inch ratchet to remove the two caliper slide pin bolts.
- The caliper is the clamp-shaped part that squeezes the brake pads against the rotor.
- Lift the caliper off the bracket carefully.
Step 5: Support the Brake Caliper
- Use a brake caliper hanger hook to hang the caliper from the front strut spring or another solid suspension point.
- Make sure the brake hose is not stretched, twisted, or kinked.
- Tip: Never hang it by the hose.
Step 6: Remove the Old Brake Pads
- Use a flat-blade screwdriver to gently pry the old inner and outer brake pads out of the caliper bracket.
- Note the position of any wear indicator clip. A wear indicator is a small metal tab that squeals when the pads are worn out.
- Remove the old pad hardware clips from the caliper bracket by hand or with the flat-blade screwdriver.
Step 7: Remove the Caliper Bracket
- Use a 17mm socket and 1/2-inch breaker bar to remove the two caliper bracket bolts.
- Remove the caliper bracket and set it on a clean surface.
Step 8: Remove the Old Rotor
- Pull the rotor straight off the hub by hand.
- If the rotor is stuck from rust, tap around the rotor hat with a rubber mallet.
- Place a drain pan underneath before spraying cleaner to catch runoff.
- Tip: Avoid hitting wheel studs.
Step 9: Clean the Hub Surface
- Use a wire brush to clean rust and dirt from the wheel hub face.
- The hub face must be clean so the new rotor sits flat.
- Use brake cleaner spray and shop towels to wipe the hub area clean.
Step 10: Install the New Rotor
- Clean both sides of the new rotor with brake cleaner spray and wipe it dry with shop towels.
- Slide the new rotor onto the wheel hub.
- Thread one lug nut on by hand using the 21mm lug nut socket to hold the rotor flat while you work.
Step 11: Service the Caliper Bracket Hardware
- Use a flat-blade screwdriver to remove any remaining old hardware clips.
- Use a wire brush to clean the caliper bracket where the clips sit.
- Install the new front brake pad hardware kit clips into the caliper bracket by hand.
- Apply a thin layer of high-temperature brake lubricant to the pad contact points on the hardware clips.
- Do not get lubricant on the rotor face or pad friction material.
Step 12: Reinstall the Caliper Bracket
- Place the caliper bracket back over the rotor.
- Start both caliper bracket bolts by hand to avoid cross-threading.
- Use a 17mm socket and torque wrench rated 50-150 ft-lbs to tighten the caliper bracket bolts.
- Torque to 107 Nm (79 ft-lbs).
Step 13: Compress the Caliper Piston
- Place the old inner brake pad against the caliper piston.
- Use a brake caliper piston compressor tool to slowly push the piston fully back into the caliper.
- A caliper piston compressor tool presses the piston back evenly so the thicker new pads will fit.
- Watch the brake fluid reservoir while compressing the piston. Remove excess fluid if it rises too high.
- Tip: Go slow to protect seals.
Step 14: Install the New Brake Pads
- Install the new inner and outer brake pads into the caliper bracket by hand.
- Make sure the pads slide smoothly in the new hardware clips.
- Apply a thin layer of high-temperature brake lubricant only to the pad ears where they touch the clips.
- Keep the pad friction surface completely clean.
Step 15: Reinstall the Caliper
- Lower the caliper over the new brake pads.
- Start the two caliper slide pin bolts by hand.
- Use a 14mm socket and torque wrench rated 20-100 ft-lbs to tighten the slide pin bolts.
- Torque to 34 Nm (25 ft-lbs).
Step 16: Repeat on the Other Front Side
- Repeat Steps 4 through 15 on the other front brake assembly.
- Use the same 14mm socket, 17mm socket, brake caliper piston compressor tool, wire brush, and torque wrench procedures.
- Always replace front pads and rotors in pairs.
Step 17: Reinstall the Front Wheels
- Remove the temporary lug nut holding each rotor using the 21mm lug nut socket.
- Install each wheel onto the hub.
- Thread all lug nuts by hand first.
- Use the 21mm lug nut socket and 3/8-inch ratchet to snug the lug nuts in a star pattern.
Step 18: Lower the Vehicle and Torque the Lug Nuts
- Use the floor jack rated 2-ton minimum to lift the Corolla slightly off the jack stands.
- Remove the jack stands rated 2-ton minimum.
- Lower the vehicle until the tires touch the ground.
- Use a 21mm lug nut socket and torque wrench rated 50-150 ft-lbs to tighten the lug nuts in a star pattern.
- Torque to 103 Nm (76 ft-lbs).
Step 19: Pump the Brake Pedal
- Sit in the driver seat and press the brake pedal slowly 5-10 times until it feels firm.
- This moves the caliper pistons back into position against the new pads.
- Do not drive until the pedal feels firm.
Step 20: Check Brake Fluid Level
- Open the hood and inspect the brake fluid reservoir.
- Add DOT 3 brake fluid only if the level is below the proper mark.
- Use shop towels immediately if any brake fluid spills. Brake fluid can damage paint.
✅ After Repair
- ✅ Start the Corolla and press the brake pedal again. It should stay firm.
- ✅ Check around both front calipers for leaks or loose hardware.
- ✅ Perform a slow test drive in a safe area before normal driving.
- ✅ Bed in the new brakes: make 8-10 moderate stops from about 30-35 mph down to 5 mph. Do not come to a complete stop with hot brakes if avoidable.
- ✅ Avoid hard braking for the first 200 miles unless needed for safety.
- ✅ Recheck lug nut torque after the first short drive: Torque to 103 Nm (76 ft-lbs).
💰 DIY vs Shop Cost
Shop Cost: $350-$650 (parts + labor)
DIY Cost: $120-$260 (parts only)
You Save: $230-$390 by doing it yourself!
Shop labor rates vary but typically run $100-$150/hour. This repair takes a shop approximately 1.5-2.5 hours.
🎯 Ready to get started?
HowToo makes it easy: same-day/2-day shipping on every part, plus all the tools and specialty tools you need! Check out the parts and tools sections below to add everything to your cart.