


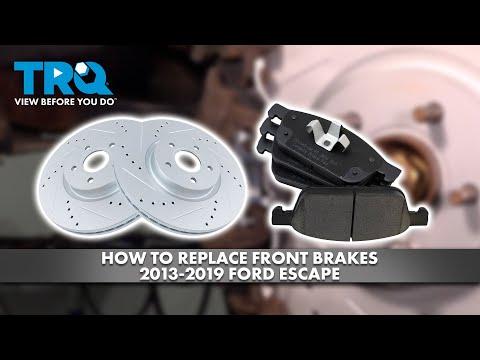






How to Replace Front Brake Pads and Rotors on a 2017-2019 Ford Escape (Trim: SE | Engine: Inline 4 2.0L)
Step-by-step DIY instructions with required tools, parts, torque specs, and safety tips for 2017, 2018, 2019
How to Replace Front Brake Pads and Rotors on a 2017-2019 Ford Escape (Trim: SE | Engine: Inline 4 2.0L)
Step-by-step DIY instructions with required tools, parts, torque specs, and safety tips for 2017, 2018, 2019


🔧 Escape - Front Brake Pad and Rotor Replacement
This is a solid intermediate DIY job. Replace both front rotors and the complete front pad set together, then carefully torque every fastener. The front brake parts aisle is open beside this guide.
Difficulty Level: Intermediate | Estimated Time: 2-4 hours
Assumption: This procedure covers the stock single-piston front brake system. Verify the torque specifications against the instructions supplied with your exact brake kit because published Escape references conflict on the bracket-bolt value.
⚠️ Safety & Precautions
- ⚠️ Never work beneath an Escape supported only by a floor jack.
- ⚠️ Support the front end with properly positioned jack stands on solid, level pavement.
- ⚠️ Wear safety glasses and a dust mask. Never blow brake dust away with compressed air.
- ⚠️ Do not press the brake pedal while either front caliper is removed.
- ⚠️ Never allow a caliper to hang from its rubber brake hose.
- ⚠️ Brake cleaner and brake fluid can damage paint. Wipe spills up immediately.
- ⚠️ The front brakes do not require electronic parking-brake service mode.
- ⚠️ Battery disconnection is not required.
🔧 Required Tools
You'll need the following tools for this repair:
- 19mm deep socket
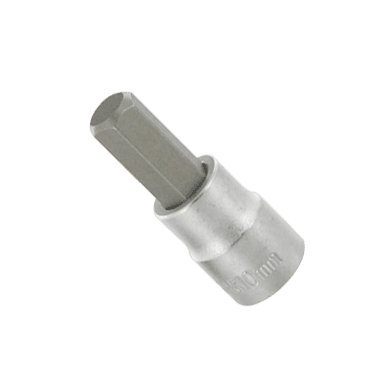
- 7mm hex-bit socket
- 18mm socket
- 3/8-inch drive ratchet
- 1/2-inch drive breaker bar
- 1/2-inch drive torque wrench rated to 200 Nm
- Brake caliper piston compression tool (specialty)
- Brake caliper hanger hook (specialty)
- 3-ton floor jack
- 3-ton jack stands
- Wheel chocks
- Flat-blade screwdriver
- Small wire brush
- Rubber mallet
- Nylon detailing brush
- Disposable shop towels
- Nitrile gloves
- Safety glasses
- Brake-dust mask
🔩 Required Parts
HowToo sells all the parts you need for this repair:
- Front brake pad set - Qty: 1
- Front brake rotors - Replace in pairs - Qty: 2
- Front brake hardware kit - Qty: 1
- High-temperature silicone brake lubricant - Qty: 1
- Non-chlorinated brake cleaner - Qty: 2 cans
- DOT 4 brake fluid - Qty: 1 small sealed bottle, only if topping off is necessary
📋 Before You Begin
- 📋 Park your Escape on solid, level ground. Shift into Park and apply the parking brake.
- 📋 Chock both rear wheels so the vehicle cannot roll.
- 📋 Open the hood and inspect the brake-fluid reservoir. Remove excess fluid first if it is already at the maximum line.
- 📋 Do not leave the reservoir cap off. Set it loosely in place so dirt cannot enter.
- 📋 Compare the new rotors and pads with the removed parts before final assembly.
- 📋 Photograph each brake assembly before taking it apart. That picture is cheap insurance.
🔨 Step-by-Step Instructions
Follow these steps in order:
Step 1: Loosen the front wheel nuts
- Use the 19mm deep socket and 1/2-inch breaker bar to loosen each front lug nut about half a turn.
- Leave all lug nuts installed until the tires are off the ground.
Step 2: Raise and support the Escape
- Use the 3-ton floor jack at the approved front lifting point.
- Place the 3-ton jack stands beneath the approved structural support points.
- Lower the vehicle onto the stands and gently test stability before removing either wheel.
Step 3: Remove both front wheels
- Use the 19mm deep socket and 3/8-inch ratchet to remove the lug nuts.
- Remove both wheels and slide one wheel beneath the side of the vehicle as an additional precaution.
Step 4: Inspect the brake assembly
- Use a flashlight to check the rubber brake hose for cracking, wetness, twisting or abrasion.
- Check the caliper for fluid leakage and inspect the old pads for uneven wear.
- If one pad is dramatically thinner than the other, stop and inspect the slide pins and caliper before installing new parts.
Step 5: Remove the caliper spring clip
- Use the flat-blade screwdriver to carefully release the external spring clip from the front of the caliper.
- Control the clip with your free hand because it may spring outward.
Step 6: Remove the caliper
- Remove the slide-pin dust caps by hand.
- Use the 7mm hex-bit socket and 3/8-inch ratchet to remove the upper and lower caliper slide-pin bolts.
- Lift the caliper away from the bracket.
- Support it with the brake caliper hanger hook. A caliper hanger is a strong hook that carries the caliper without loading its hose.
Step 7: Remove the old pads
- Remove the outer pad from the bracket by hand.
- Pull the inner pad and its retaining spring out of the caliper piston.
- Note the orientation of any wear indicator, spring or shim before discarding the pads.
Step 8: Remove the caliper bracket
- Use the 18mm socket and 1/2-inch breaker bar to loosen both bracket bolts behind the steering knuckle.
- Support the bracket while removing the final bolt with the 3/8-inch ratchet.
- Do not confuse these large bracket bolts with the smaller caliper slide-pin bolts.
Step 9: Remove the old rotor
- Pull the rotor straight off the hub by hand.
- If corrosion holds it in place, use the rubber mallet to strike the rotor hat between the wheel studs.
- Do not strike the studs, brake hose or wheel-bearing area.
Step 10: Clean the hub and bracket
- Use the small wire brush to clean rust from the hub face and center pilot.
- Keep the hub face smooth. Rust trapped here can make a new rotor run crooked and cause pedal pulsation.
- Use the nylon detailing brush and brake cleaner to clean the bracket where the pad hardware sits.
- Use brake cleaner and disposable shop towels to remove oily shipping residue from both faces of each new rotor.
- Clean hubs make smooth brakes.
Step 11: Service the slide pins
- Pull each slide pin from its rubber boot by hand, one at a time.
- Use brake cleaner and disposable shop towels to remove old grease.
- Inspect the pins for rust or scoring and ensure the rubber boots are not torn.
- Apply a thin coat of high-temperature silicone brake lubricant and reinstall each pin into its original position.
- Do not use petroleum grease because it can damage rubber brake components.
Step 12: Install the new rotor and bracket
- Place the clean new rotor over the wheel studs.
- Hold it against the hub with one lug nut installed backward by hand.
- Position the caliper bracket and start both bolts by hand.
- Use the 18mm socket and 1/2-inch torque wrench to tighten the bracket bolts.
- Torque to 175 Nm (129 ft-lbs) when confirmed by your exact service information or kit instructions. Some aftermarket references publish lower figures, so do not substitute an unverified value. howtoo.com)
Step 13: Install the new pad hardware
- Snap the new stainless hardware clips fully into the clean bracket by hand.
- Apply a very thin film of high-temperature silicone brake lubricant beneath the clips and at the pad contact points.
- Keep all lubricant off the rotor faces and pad friction material.
Step 14: Compress the caliper piston
- Place an old pad against the caliper piston.
- Use the brake caliper piston compression tool to push the piston slowly and evenly into its bore. This tool applies straight pressure without damaging the piston.
- Watch the brake-fluid reservoir while compressing the piston. Remove excess fluid if it approaches the top.
- Stop if the piston binds, tilts or requires extreme force. A seized caliper must be corrected before driving.
Step 15: Install the new pads
- Fit the inner pad into the piston with its retaining spring seated completely.
- Fit the outer pad into the bracket in the same orientation as the original.
- Confirm that both pads sit flat and can move freely on the hardware.
Step 16: Reinstall the caliper
- Remove the brake caliper hanger hook and lower the caliper over the new pads.
- Do not twist the brake hose.
- Start both slide-pin bolts by hand, then tighten them with the 7mm hex-bit socket.
- Use the 7mm hex-bit socket and 3/8-inch torque wrench to torque the slide-pin bolts to 35 Nm (26 ft-lbs). howtoo.com
- Reinstall the slide-pin dust caps and spring clip by hand.
Step 17: Repeat on the opposite side
- Repeat Steps 4 through 16 on the other front wheel.
- Compare both completed assemblies before installing the wheels.
- Remove the temporary backward-facing lug nut holding each rotor.
Step 18: Reinstall and torque the wheels
- Install each wheel and start all lug nuts by hand.
- Use the 19mm deep socket and 3/8-inch ratchet to snug the nuts in a star pattern.
- Use the 3-ton floor jack to lift the vehicle, remove the jack stands and lower it completely.
- Use the 19mm deep socket and 1/2-inch torque wrench to torque the lug nuts to 135 Nm (100 ft-lbs) in a star pattern. howtoo.com)
✅ After Repair
- ✅ Before starting the engine, press the brake pedal slowly several times until it becomes firm.
- ✅ Check the brake-fluid level and keep it between the minimum and maximum marks. Use only fresh fluid from a sealed container if topping off is necessary.
- ✅ Start the engine and press the pedal again. It should remain firm and must not slowly sink.
- ✅ Check around both calipers and hoses for leakage.
- ✅ Test the brakes at walking speed in a safe, traffic-free area before normal driving.
- ✅ Follow the pad manufacturer's bedding procedure. If none is supplied, make several moderate slowdowns with cooling time between them and avoid holding the hot pads against the rotors.
- ✅ Avoid panic stops and heavy repeated braking for roughly the first 200 miles unless an emergency requires it.
- ✅ Recheck wheel-lug torque after 50-100 miles.
- ✅ If the pedal stays soft, the vehicle pulls strongly, fluid leaks or grinding continues, do not drive it.
💰 DIY vs Shop Cost
Shop Cost: $450-$750 (parts + labor)
DIY Cost: $120-$300 (parts only)
You Save: $250-$500 by doing it yourself!
Local Sonīpat labor and parts pricing can vary considerably. This repair takes a shop approximately 1.5-2.5 hours.
🎯 Ready to get started?
HowToo makes it easy: same-day/2-day shipping on every part, plus all the tools and specialty tools you need! Check out the parts and tools sections below to add everything to your cart.
