

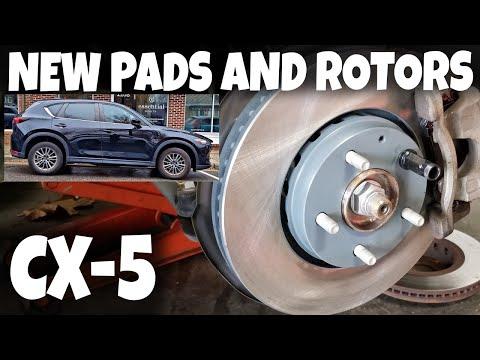






How to Replace Front Brake Pads and Rotors on a 2016-2021 Mazda CX-5 (Trim: Grand Touring)
Step-by-step DIY instructions with required tools, parts, torque specs, and safety tips for 2016, 2017, 2018, 2019, 2020, 2021
How to Replace Front Brake Pads and Rotors on a 2016-2021 Mazda CX-5 (Trim: Grand Touring)
Step-by-step DIY instructions with required tools, parts, torque specs, and safety tips for 2016, 2017, 2018, 2019, 2020, 2021


🔧 CX-5 - Front Brake Pad and Rotor Replacement
This is a solid intermediate DIY job. You’ll replace both front rotors and the complete front pad set, clean the hub surfaces, service the caliper slide pins, and reassemble everything to Mazda torque specifications.
The front brakes don’t require electronic parking brake service mode. That procedure applies to the rear brakes. I’ve opened the matching brake parts aisle for your CX-5.
Difficulty Level: Intermediate | Estimated Time: 2-3 hours
⚠️ Safety & Precautions
- ⚠️ Work on level, solid ground and support the CX-5 with jack stands. Never work under a vehicle supported only by a jack.
- ⚠️ Chock both rear wheels and engage the parking brake before lifting.
- ⚠️ Brake dust can be harmful. Don’t blow it away with compressed air.
- ⚠️ Never let the caliper hang from its rubber brake hose.
- ⚠️ Don’t press the brake pedal while a caliper is removed.
- ⚠️ Brake cleaner damages paint. Protect painted surfaces immediately.
- ⚠️ If the brake pedal remains soft after pumping it, don’t drive the vehicle.
- ⚠️ Battery disconnection isn’t required for this front brake job.
🔧 Required Tools
You'll need the following tools for this repair:
- 21mm deep socket
- 14mm socket
- 17mm socket
- 3/8-inch drive ratchet
- 1/2-inch drive breaker bar
- 3/8-inch drive torque wrench rated 10-80 ft-lbs
- 1/2-inch drive torque wrench rated 30-150 ft-lbs
- 6-inch socket extension
- Flat-blade screwdriver
- Brake caliper piston compressor (specialty)
- Brake caliper hanger hook (specialty)
- Floor jack rated 2-ton minimum
- Jack stands rated 2-ton minimum
- Wheel chocks
- Rubber mallet
- Small wire brush
- Nylon detailing brush
- Plastic drain pan
- Clean shop towels
- Nitrile gloves
- Safety glasses
🔩 Required Parts
HowToo sells all the parts you need for this repair:
- Front brake pad set - Qty: 1
- Front brake rotors - Qty: 2, replace as a pair
- Front brake hardware kit - Qty: 1
- Brake parts cleaner - Qty: 2 cans
- Silicone-based brake lubricant - Qty: 1 tube
- High-temperature brake lubricant - Qty: 1 tube
Important: Use the parts currently shown for your CX-5. Different front pad and rotor configurations appear in the catalog, so don’t mix components from separate fitment groups.
📋 Before You Begin
- 📋 Park on level pavement, shift into Park, engage the parking brake, and switch the engine off.
- 📋 Place wheel chocks firmly against the front and rear of both rear tires.
- 📋 Open the hood and check the brake-fluid reservoir. Remove a small amount only if it’s near the maximum line and might overflow when the pistons are compressed.
- 📋 Loosen each front wheel’s five lug nuts about one-quarter turn with the 21mm socket and breaker bar.
- 📋 Front brake service mode isn’t required. Don’t perform the rear electronic parking brake sequence.
🔨 Step-by-Step Instructions
Follow these steps in order:
Step 1: Lift and support the front
- Use the floor jack at the approved front-center lifting point, then position jack stands beneath the reinforced side support points.
- Lower the CX-5 gently onto the stands and give it a firm stability check before removing either wheel.
- Use the 21mm socket and ratchet to remove the lug nuts and both front wheels.
- Slide each removed wheel under the rocker area as an additional backup.
Step 2: Inspect the brake assembly
- Turn the steering wheel to give yourself better access to the caliper bolts.
- Check the rubber brake hose for cracking, wetness, twisting, or abrasion.
- Compare inner and outer pad thickness. A large difference may indicate a seized slide pin or sticking caliper.
- Check for brake-fluid leakage around the caliper piston boot and bleeder screw.
- Stop the repair if the caliper leaks, the piston boot is torn, or a slide pin is seized.
Step 3: Remove the caliper
- Use the 14mm socket and ratchet to remove the upper and lower caliper guide-pin bolts.
- If a guide pin rotates, hold its flat section carefully with an appropriate wrench while loosening the bolt.
- Lift the caliper off the bracket. Use the flat-blade screwdriver only for gentle leverage if necessary.
- Hang the caliper from the suspension using the brake caliper hanger hook.
- Don’t twist, stretch, or pull on the brake hose.
Step 4: Remove the old pads and hardware
- Pull the inner and outer pads from the bracket by hand.
- Use the flat-blade screwdriver to lift out the stainless abutment clips. These clips are the small tracks on which the pads slide.
- Note the location of any wear indicator before discarding the old pads.
- Inspect the old pads for tapering, cracking, contamination, or uneven wear.
Step 5: Remove the caliper bracket
- Use the 17mm socket and 1/2-inch breaker bar to remove the two bracket bolts.
- Support the bracket while removing the second bolt.
- Set the bracket on a clean towel. Don’t allow dirt onto the slide pins or inside their rubber boots.
Step 6: Remove the old rotor
- Pull the rotor straight off the wheel studs.
- If it’s stuck, use the rubber mallet to strike the rotor hat between the studs while rotating it.
- Don’t strike the wheel studs, hub center, or dust shield.
- Rust always negotiates better with a rubber mallet.
Step 7: Clean the hub
- Place the drain pan beneath the assembly and spray the hub face with brake cleaner.
- Use the small wire brush to remove rust and scale from the flat surface supporting the rotor.
- Wipe the hub clean with shop towels. The new rotor must sit completely flat.
- Don’t apply lubricant between the rotor and hub face.
Step 8: Prepare and install the new rotor
- Use brake cleaner and clean shop towels to remove protective residue from both rotor faces.
- Handle the rotor by its edges to avoid leaving grease on the braking surfaces.
- Slide the rotor fully onto the hub.
- Install one lug nut by hand backward, flat side against the rotor, to hold it temporarily in place.
Step 9: Service the caliper bracket
- Pull one slide pin from the bracket at a time so their positions don’t get mixed.
- Wipe the pin clean with a shop towel and inspect it for rust, scoring, or pitting.
- Use the nylon detailing brush to clean the slide-pin bore and rubber boot.
- Apply a thin coat of silicone-based brake lubricant to the pin. Don’t pack the bore full of grease.
- Reinsert the pin and confirm that it moves smoothly while the rubber boot remains properly seated.
- Repeat for the other slide pin.
- Install the new abutment clips by hand. Apply only a very thin film of high-temperature brake lubricant where the pad ears contact the clips.
- Keep lubricant completely off the pad friction material and rotor faces.
Step 10: Reinstall the bracket
- Position the bracket over the new rotor and start both bolts by hand to prevent cross-threading.
- Use the 17mm socket and ratchet to seat the bolts.
- Use the 1/2-inch torque wrench and 17mm socket to tighten each bracket bolt to 92-110 Nm (68-81 ft-lbs).
- Use the same chosen value within that range on both bolts. Don’t add lubricant or anti-seize to the threads.
Step 11: Compress the caliper piston
- Place an old brake pad against the piston face.
- Use the brake caliper piston compressor to push the piston slowly and evenly into the caliper.
- Watch the brake-fluid reservoir while compressing it. Stop before fluid overflows.
- If the piston binds or requires extreme force, stop. Forcing it can damage the caliper or push contaminated fluid through the system.
- Confirm that the piston boot folds inward cleanly and isn’t pinched.
Step 12: Install the new pads
- Use clean gloves to install the inner and outer pads into the bracket.
- Position the pad with the wear indicator in the same location as the original.
- Confirm both pads slide freely in the hardware without excessive looseness.
- Don’t grind or file new pads simply to make them fit. Correct hardware should allow smooth movement.
Step 13: Reinstall the caliper
- Lower the caliper over the new pads without twisting the brake hose.
- Align the guide pins and start both bolts by hand.
- Use the 14mm socket and ratchet to seat the bolts.
- Use the 3/8-inch torque wrench and 14mm socket to tighten each guide-pin bolt to 75 Nm (55 ft-lbs).
- Remove the temporary lug nut holding the rotor.
- Rotate the rotor by hand. Light pad contact is normal, but the rotor shouldn’t be locked.
Step 14: Repeat on the other side
- Perform Steps 2 through 13 on the opposite front brake.
- Use the same lubricant locations and torque values on both sides.
- Compare both completed assemblies before installing the wheels.
Step 15: Install the front wheels
- Use a clean shop towel to wipe the wheel-to-hub mounting surfaces.
- Install each wheel and thread all five lug nuts fully by hand.
- Use the 21mm socket and ratchet to snug the nuts in a star pattern.
- Use the floor jack to lift the CX-5, remove the jack stands, and lower the tires until they firmly contact the ground.
- Use the 1/2-inch torque wrench and 21mm socket to tighten the lug nuts in a star pattern to 108-147 Nm (80-108 ft-lbs). Mazda specifies this range in the owner’s manual. mazdausa.com)
- Lower the vehicle completely and remove the wheel chocks.
✅ After Repair
- ✅ Check the brake-fluid reservoir and correct the level if necessary. Don’t overfill it.
- ✅ With the engine off, press the brake pedal repeatedly until it becomes firm. This seats the pistons against the new pads.
- ✅ Start the engine and press the pedal again. It may drop slightly with brake assist, but it must remain firm.
- ✅ Check both front calipers, hoses, and the floor for brake-fluid leaks.
- ✅ Test the brakes first at walking speed in a safe, traffic-free area.
- ✅ Follow the pad manufacturer’s bedding procedure. If none is supplied, make several moderate slowdowns without stopping completely, then drive gently to let the brakes cool.
- ✅ Avoid hard emergency-style stops for the first 300-500 km unless safety requires one.
- ✅ Recheck the lug-nut torque after approximately 80-160 km.
💰 DIY vs Shop Cost
Shop Cost: ₹22,000-₹40,000, approximately $265-$480, for parts and labor
DIY Cost: ₹10,000-₹24,000, approximately $120-$290, for parts and consumables
You Save: ₹10,000-₹18,000, approximately $120-$215, by doing it yourself!
Labor prices around Sonīpat vary by workshop. This repair typically takes a professional approximately 1.5-2.5 hours.
🎯 Ready to get started?
HowToo makes it easy: same-day/2-day shipping on every part, plus all the tools and specialty tools you need! Check out the parts and tools sections below to add everything to your cart.