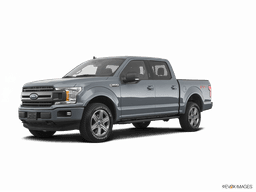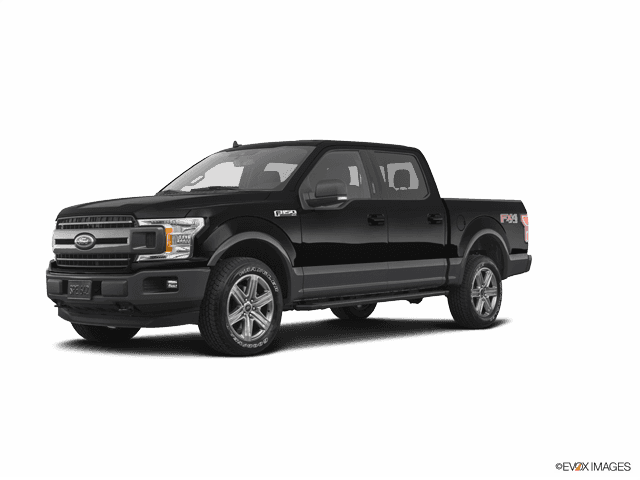

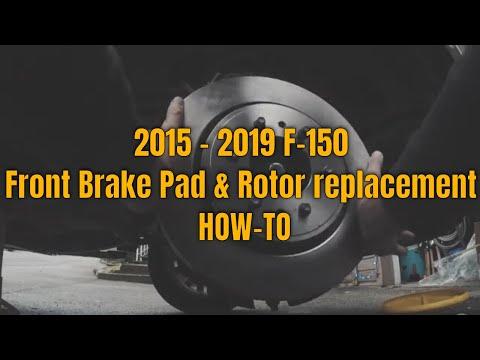







How to Replace Front Brake Pads and Rotors on a 2010-2020 Ford F-150 (Trim: Limited | Engine: V6 3.5L)
Step-by-step DIY instructions with tools, parts, torque specs, and safety tips for 2010
How to Replace Front Brake Pads and Rotors on a 2010-2020 Ford F-150 (Trim: Limited | Engine: V6 3.5L)
Step-by-step DIY instructions with tools, parts, torque specs, and safety tips for 2010


🔧 F-150 - Front Brake Pads and Rotor Replacement
This is a straightforward front brake job, but the caliper anchor bolts are extremely tight. You’ll replace both front rotors and all four front pads, service the slide pins, then properly seat the new pads.
Difficulty Level: Intermediate | Estimated Time: 3-5 hours
Assumption: These instructions cover the stock front brake system on your F-150. Use the vehicle-matched front parts shown in the brake aisle.
⚠️ Safety & Precautions
- ⚠️ Support your F-150 with appropriately rated jack stands. Never work beneath a truck supported only by a jack.
- ⚠️ Chock both rear wheels and leave the transmission in Park.
- ⚠️ Never let a caliper hang from its rubber brake hose.
- ⚠️ Brake dust can be harmful. Don’t blow it away with compressed air.
- ⚠️ Brake cleaner damages paint and some plastics. Control the spray.
- ⚠️ Keep grease, oil and dirty fingerprints off the pad faces and rotor friction surfaces.
- ⚠️ Don’t press the brake pedal while a caliper is removed.
- ⚠️ Battery disconnection and electronic parking-brake service mode aren’t required for this front brake job.
🔧 Required Tools
You'll need the following tools for this repair:
- 3-ton floor jack
- 3-ton jack stands
- Wheel chocks
- 1/2-inch drive breaker bar
- 1/2-inch drive ratchet
- 1/2-inch drive torque wrench rated to 250 ft-lbs
- 21mm deep socket
- 18mm socket
- 13mm socket
- 18mm combination wrench
- Flat-blade screwdriver
- Brake caliper piston compression tool (specialty)
- Caliper hanger hook (specialty)
- Dead-blow hammer
- Small wire brush
- Nylon cleaning brush
- Plastic drain pan
- Disposable shop towels
- Nitrile gloves
- Safety glasses
🔩 Required Parts
HowToo sells all the parts you need for this repair:
- Front brake pad set - Qty: 1
- Front brake rotors - Qty: 2, replace in pairs
- Front brake hardware kit - Qty: 1, if not included with pads
- Front caliper anchor bolts - Qty: 4, use new bolts
- Silicone brake lubricant - Qty: 1
- Aerosol brake cleaner - Qty: 2 cans
📋 Before You Begin
- 📋 Park your F-150 on firm, level ground with the transmission in Park.
- 📋 Chock both rear wheels, but don’t apply lubricant or chemicals near the tires.
- 📋 Check the brake-fluid reservoir. If it’s completely full, remove a small amount before compressing the pistons.
- 📋 Leave the reservoir cap resting loosely in place to keep contamination out.
- 📋 Open and finish one side at a time. The untouched side becomes your visual reference.
- 📋 Photograph the original pad, clip and wear-indicator positions before disassembly.
🔨 Step-by-Step Instructions
Follow these steps in order:
Step 1: Loosen the front wheel nuts
- Use the 21mm deep socket and breaker bar to loosen each front wheel nut approximately one-quarter turn.
- Don’t remove the nuts while the truck is on the ground.
Step 2: Raise and support the front end
- Use the 3-ton floor jack under an approved front lifting point.
- Place the 3-ton jack stands beneath the frame support points.
- Lower the truck onto the stands and gently rock it to confirm stability.
- Keep the floor jack lightly touching its lifting point as a backup, without carrying the truck’s weight.
Step 3: Remove the front wheel
- Use the 21mm deep socket and ratchet to remove the wheel nuts.
- Remove the wheel and slide it beneath the frame as an additional safety measure.
Step 4: Inspect the brake assembly
- Use the flashlight on your phone to inspect the rubber hose, caliper and dust boots.
- Look for wet brake fluid, torn piston boots, severe uneven pad wear or blue heat spots.
- Stop the repair if the hose is cracked, a piston boot is torn or brake fluid is leaking.
Step 5: Remove the caliper
- Use the 13mm socket and ratchet to remove the two caliper slide-pin bolts.
- Hold a spinning slide pin with the 18mm combination wrench.
- Lift the caliper off the pads. Use the flat-blade screwdriver only for gentle assistance if it’s tight.
- Hang the caliper from the suspension with the caliper hanger hook.
- The brake hose is not a coat hanger.
Step 6: Remove the old pads and hardware
- Remove both pads from the anchor bracket by hand.
- Use the flat-blade screwdriver to remove the stainless pad clips.
- Compare the inner and outer pads. A large wear difference can indicate a sticking slide pin or piston.
Step 7: Compress the caliper pistons
- Place an old pad against both pistons so they retract evenly.
- Use the brake caliper piston compression tool to slowly press both pistons fully into the caliper.
- Watch the reservoir while compressing them. Remove excess fluid with a clean suction tool if it approaches the top.
- Stop if either piston tilts, binds or requires excessive force.
Step 8: Remove the caliper anchor bracket
- Use the 18mm socket and breaker bar to remove the two anchor-bracket bolts.
- These bolts are exceptionally tight. Keep the socket squarely seated and pull smoothly.
- Remove the anchor bracket and discard the old anchor bolts.
Step 9: Remove the old rotor
- Pull the rotor straight off the wheel hub.
- If corrosion holds it in place, strike the rotor hat between the wheel studs with the dead-blow hammer.
- Don’t strike the wheel studs, hub flange or rotor friction surface near your body.
Step 10: Clean the hub and bracket
- Place the plastic drain pan beneath the assembly.
- Use the small wire brush to remove loose rust from the hub face and center pilot.
- Keep the hub face flat. Remaining rust can make the new rotor sit crooked and cause pedal pulsation.
- Use the small wire brush and brake cleaner to clean the bracket beneath the pad clips.
- Wipe everything with disposable shop towels.
Step 11: Service the slide pins
- Pull one slide pin from the bracket at a time by hand.
- Clean it with brake cleaner and the nylon cleaning brush.
- Inspect the pin and rubber boot for rust, pitting, swelling or tears.
- Apply a thin coat of silicone brake lubricant and reinstall the pin into its original position.
- Confirm both pins move freely and the boots seal around them.
Step 12: Install the new rotor
- Clean both friction faces of the new rotor thoroughly with brake cleaner and disposable shop towels.
- Install the rotor over the wheel studs.
- Temporarily install one wheel nut backward by hand to hold the rotor flush against the hub.
Step 13: Reinstall the anchor bracket
- Position the bracket over the rotor and start two new anchor bolts by hand.
- Use the 18mm socket to snug both bolts.
- Use the 1/2-inch torque wrench and 18mm socket to tighten both bolts to 250 Nm (184 ft-lbs).
- Don’t reuse damaged or stretched anchor bolts.
Step 14: Install new pad hardware
- Press the new stainless clips fully into the clean bracket by hand.
- Apply a very thin film of silicone brake lubricant where the pad ears touch the clips.
- Don’t put lubricant on the rotor, pad friction material or rubber parts unless the lubricant specifically says it’s rubber-safe.
Step 15: Install the new brake pads
- Slide the inner and outer pads into the bracket by hand.
- Match the wear-indicator position to the original pads or supplied instructions.
- Confirm both pads move in the clips without binding or excessive looseness.
Step 16: Reinstall the caliper
- Lower the caliper over the new pads without twisting the brake hose.
- Start both slide-pin bolts by hand.
- Hold the pins with the 18mm combination wrench if they rotate.
- Use the 1/2-inch torque wrench and 13mm socket to tighten the slide-pin bolts to 37 Nm (27 ft-lbs).
Step 17: Repeat on the opposite side
- Remove the temporary wheel nut using the 21mm deep socket.
- Repeat Steps 3 through 16 on the other front wheel.
- Replace pads and rotors on both sides. Never renew only one front side.
Step 18: Reinstall both wheels
- Clean the wheel and rotor mounting faces with the small wire brush. Leave them dry.
- Install each wheel and start every wheel nut by hand.
- Use the 21mm deep socket to snug the nuts in a star pattern.
- Raise the truck slightly with the 3-ton floor jack, remove the stands and lower it to the ground.
- Use the 1/2-inch torque wrench and 21mm deep socket to tighten the wheel nuts in a star pattern to 204 Nm (150 ft-lbs).
✅ After Repair
- ✅ Before starting the engine, slowly press and release the brake pedal until it becomes firm. This may take several strokes.
- ✅ Check the brake-fluid level and adjust it between the reservoir marks using the fluid specification printed on the reservoir cap.
- ✅ Start the engine and press the pedal again. It should remain firm and shouldn’t slowly sink.
- ✅ Check around both calipers for leaks and confirm each hose is untwisted.
- ✅ Test the brakes at walking speed before entering normal traffic.
- ✅ Bed the pads using the pad manufacturer’s procedure. If none is supplied, make several moderate stops with cooling time between them.
- ✅ Avoid panic stops and sitting stationary with a very hot brake pedal applied during the first 200 miles unless safety requires it.
- ✅ Recheck wheel-nut torque after 160 km (100 miles).
💰 DIY vs Shop Cost
Shop Cost: $650-$1,050 (parts + labor)
DIY Cost: $180-$500 (parts only)
You Save: $300-$650 by doing it yourself!
Shop labor rates vary but typically run $100-$150/hour. This repair takes a shop approximately 2-3 hours.
🎯 Ready to get started?
HowToo makes it easy: same-day/2-day shipping on every part, plus all the tools and specialty tools you need! Check out the parts and tools sections below to add everything to your cart.