







How to Replace Front Ball Joints on a 2015 Ram 1500
Step-by-step instructions with tools, parts, torque specs, and safety tips for 2011, 2012, 2013, 2014, 2015, 2016, 2017, 2018
How to Replace Front Ball Joints on a 2015 Ram 1500
Step-by-step instructions with tools, parts, torque specs, and safety tips for 2011, 2012, 2013, 2014, 2015, 2016, 2017, 2018


🔧 Ball Joints - Front Ball Joint Replacement
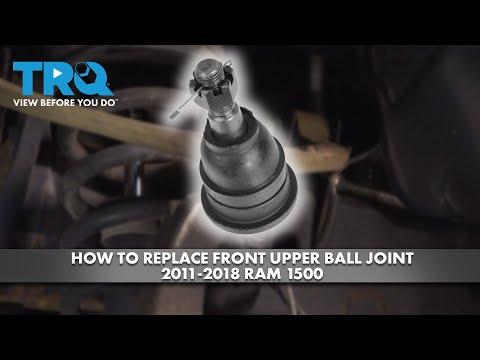
On your Ram, the front ball joints let the steering knuckle move while the suspension travels up and down. If they are worn, you may hear clunks, feel looseness in the steering, or see uneven tire wear.
Difficulty Level: Advanced | Estimated Time: 4-6 hours
⚠️ Safety & Precautions
- Support the truck securely on jack stands; never work under a vehicle held only by a jack.
- The front suspension is heavy. Keep hands clear when separating the knuckle and control arms.
- If equipped with ABS sensors, do not pull on the wiring harness.
- Have an alignment performed after replacement.
- Assumption: this procedure covers the front ball joints on both sides.
🔧 Required Tools
You'll need the following tools for this repair:
- Floor jack (rated 3-ton minimum)
- Jack stands (rated 3-ton minimum)
- Wheel chocks
- Socket set (metric)
- Wrench set (metric)
- Breaker bar
- Torque wrench
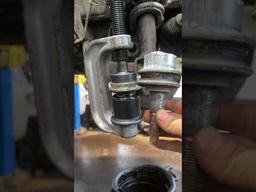
- Ball joint press kit (specialty)
- Ball joint separator (specialty)
- Hammer
- Rust penetrant
- Needle-nose pliers
- Safety glasses
- Mechanic gloves
🔩 Required Parts
HowToo sells all the parts you need for this repair:
- Front upper ball joint(s) - Qty: 2
- Front lower ball joint(s) - Qty: 2
- Ball joint hardware kit - Qty: 1
- Front wheel alignment service - Qty: 1
📋 Before You Begin
- Park on level ground, set the parking brake, and chock the rear wheels.
- Loosen the front lug nuts before lifting the truck.
- Raise the front and support it on jack stands under the frame.
- Spray rust penetrant on the ball joint nuts and retaining areas before disassembly.
🔨 Step-by-Step Instructions
Follow these steps in order:
Step 1: Remove the front wheel
- Use a lug wrench or socket set (metric) to remove the front wheel lug nuts.
- Set the wheel aside.
Step 2: Disconnect components from the steering knuckle
- Use needle-nose pliers to remove any cotter pins if equipped.
- Use the correct socket set (metric) and wrench set (metric) to remove the ball joint nut and related fasteners.
- Use a ball joint separator (specialty) to break the taper loose from the knuckle.
- Do not strike the stud directly.
Step 3: Free the knuckle for access
- Support the knuckle so the brake hose and ABS wire are not stretched.
- Use a hammer and ball joint separator (specialty) as needed to separate the joint.
Step 4: Remove the worn ball joint
- Use the ball joint press kit (specialty) to press the old ball joint out of the control arm or knuckle, depending on which joint is being replaced.
- Clean the bore with a rag and check for cracks or damage.
Step 5: Install the new ball joint
- Use the ball joint press kit (specialty) to press the new ball joint in squarely.
- Install any retaining clips or hardware from the ball joint hardware kit.
- Torque to factory specification for the ball joint fasteners and pinch hardware.
- Press it in straight to avoid damage.
Step 6: Reassemble the knuckle
- Position the knuckle back onto the ball joint stud.
- Use the correct socket set (metric) and torque wrench to tighten the nut.
- Install a new cotter pin if the design uses one.
- Torque to factory specification for all fasteners removed during disassembly.
Step 7: Reinstall the wheel
- Install the wheel and hand-tighten the lug nuts.
- Lower the truck and use a torque wrench to tighten the lug nuts to factory specification.
✅ After Repair
- Check for loose hardware and confirm the wheel turns freely.
- Start the truck and test for clunks or binding at low speed.
- Schedule a professional wheel alignment right away.
- Recheck lug nut torque after the first short drive.
💰 DIY vs Shop Cost
Shop Cost: $500-$1,000 (parts + labor)
DIY Cost: $120-$300 (parts only)
You Save: $380-$700 by doing it yourself!
Shop labor rates vary but typically run $100-$150/hour. This repair takes a shop approximately 4-6 hours.
🎯 Ready to get started?
HowToo makes it easy: same-day/2-day shipping on every part, plus all the tools and specialty tools you need! Check out the parts and tools sections below to add everything to your cart.