


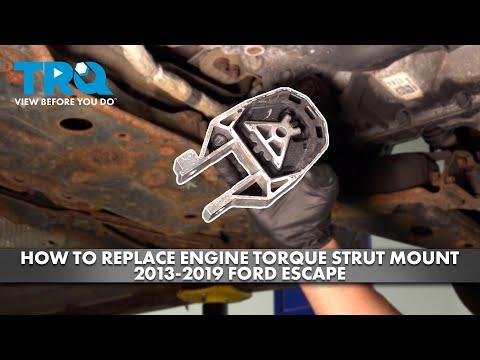



How to Replace Engine Mounts on a 2019 Ford Escape
Step-by-step DIY guide with tools, parts, torque specs, safety tips, and cost savings for 2013, 2014, 2015, 2016, 2017, 2018, 2019
How to Replace Engine Mounts on a 2019 Ford Escape
Step-by-step DIY guide with tools, parts, torque specs, safety tips, and cost savings for 2013, 2014, 2015, 2016, 2017, 2018, 2019


🔧 Escape - Engine Mount Replacement
Replacing the engine mounts on your Escape involves supporting the engine safely, removing the worn mount, and installing a new mount so the engine sits correctly again. Bad mounts can cause vibration, clunking, harsh shifting feel, or excessive engine movement.
Difficulty Level: Intermediate | Estimated Time: 2-4 hours
⚠️ Safety & Precautions
- ⚠️ Never work under a vehicle supported only by a jack. Always use jack stands.
- ⚠️ Support the engine before removing any mount. The mount holds engine weight.
- ⚠️ Use a wood block between the jack and oil pan to spread the load and avoid cracking the pan.
- ⚠️ Do not lift the engine by the plastic covers, hoses, turbo piping, or exhaust parts.
- ⚠️ Let the engine cool before starting. The turbocharger and exhaust can stay hot for a long time.
- ⚠️ Disconnect the negative battery cable before working near the starter wiring, ground straps, or tight engine-bay areas.
🔧 Required Tools
You'll need the following tools for this repair:
- 8mm socket
- 10mm socket
- 13mm socket
- 15mm socket
- 18mm socket
- 21mm socket
- 3/8-inch drive ratchet
- 1/2-inch drive ratchet
- 3/8-inch drive extension set
- 1/2-inch drive extension set
- Breaker bar 1/2-inch drive
- Torque wrench 10-150 ft-lbs
- Flat-blade screwdriver
- Trim clip removal tool
- Floor jack rated 3-ton minimum
- Jack stands rated 3-ton minimum
- Wood block 2x6-inch minimum
- Wheel chocks
- Work gloves
- Safety glasses
🔩 Required Parts
HowToo sells all the parts you need for this repair:
- Right engine mount - Qty: 1
- Left transmission mount - Qty: 1
- Lower torque strut mount - Qty: 1
- Engine mount fastener kit - Qty: 1
📋 Before You Begin
- Park your Escape on level ground and set the parking brake.
- Place wheel chocks behind the rear wheels so the vehicle cannot roll.
- Open the hood and let the engine cool completely.
- Use a 10mm socket to disconnect the negative battery cable.
- Raise the front of the vehicle with a floor jack rated 3-ton minimum and support it with jack stands rated 3-ton minimum.
- Support the engine from below using the floor jack rated 3-ton minimum and wood block 2x6-inch minimum placed flat under the oil pan.
- A torque strut mount is the lower mount that controls engine rocking when you accelerate or shift.
🔨 Step-by-Step Instructions
Follow these steps in order:
Step 1: Remove the Engine Appearance Cover
- Use your hands to lift the engine appearance cover straight upward from its rubber grommets.
- Set the cover aside where it will not be stepped on.
- Pull upward evenly.
Step 2: Disconnect the Battery
- Use a 10mm socket to loosen the negative battery terminal clamp.
- Move the negative cable away from the battery post so it cannot spring back and touch.
Step 3: Remove Upper Access Items Near the Right Engine Mount
- Use an 8mm socket or flat-blade screwdriver to loosen the air intake hose clamp.
- Use a trim clip removal tool to release any plastic retaining clips holding the intake duct.
- Use a 10mm socket to remove air cleaner box fasteners if more room is needed.
- Lift the intake duct and air cleaner box out carefully.
Step 4: Support the Engine
- Place the wood block 2x6-inch minimum on the saddle of the floor jack rated 3-ton minimum.
- Position the wood block under the flat, strongest area of the oil pan.
- Raise the jack just until it touches and lightly supports the engine.
- Do not lift the vehicle off the jack stands.
- Support, do not jack upward hard.
Step 5: Replace the Right Engine Mount
- Use a 15mm socket or 18mm socket with a 1/2-inch drive ratchet to remove the mount-to-body nuts and bolts.
- Use a 15mm socket or 18mm socket to remove the mount-to-engine bracket fasteners.
- If a bolt feels tight, use a breaker bar 1/2-inch drive to break it loose slowly.
- Raise or lower the engine slightly with the floor jack rated 3-ton minimum until the mount comes out without forcing it.
- Install the new right engine mount in the same position as the old one.
- Start all bolts by hand first to prevent cross-threading.
- Use a torque wrench 10-150 ft-lbs to tighten the mount-to-body fasteners to Torque to 80 Nm (59 ft-lbs).
- Use a torque wrench 10-150 ft-lbs to tighten the mount-to-engine bracket fasteners to Torque to 80 Nm (59 ft-lbs).
Step 6: Replace the Left Transmission Mount
- Keep the engine and transmission supported with the floor jack rated 3-ton minimum and wood block 2x6-inch minimum.
- Use a 10mm socket to move small brackets, harness retainers, or battery tray fasteners if they block access.
- Use a 13mm socket and 15mm socket to remove the battery tray if additional clearance is needed.
- Use a 15mm socket or 18mm socket to remove the transmission mount fasteners.
- Adjust the jack height slightly until the old mount slides out freely.
- Install the new left transmission mount in the same orientation.
- Start all bolts by hand before tightening.
- Use a torque wrench 10-150 ft-lbs to tighten the transmission mount fasteners to Torque to 80 Nm (59 ft-lbs).
- Use a 10mm socket, 13mm socket, and 15mm socket to reinstall any removed brackets, battery tray pieces, or retainers.
Step 7: Replace the Lower Torque Strut Mount
- Move under the front of your Escape while it is safely supported on jack stands rated 3-ton minimum.
- Use an 8mm socket or 10mm socket with a 3/8-inch drive ratchet to remove the lower splash shield fasteners.
- Use a 15mm socket, 18mm socket, or 21mm socket with a 1/2-inch drive ratchet to remove the lower torque strut mount bolts.
- Use a breaker bar 1/2-inch drive if the bolts are stubborn.
- Remove the old lower torque strut mount.
- Install the new lower torque strut mount in the same direction as the old one.
- Start both bolts by hand first.
- Use a torque wrench 10-150 ft-lbs to tighten the lower torque strut mount bolts to Torque to 115 Nm (85 ft-lbs).
Step 8: Reinstall Removed Components
- Use an 8mm socket or 10mm socket to reinstall the lower splash shield.
- Use a 10mm socket to reinstall the air cleaner box and intake duct if removed.
- Use an 8mm socket or flat-blade screwdriver to tighten the air intake hose clamp snugly.
- Push the engine appearance cover back down onto its rubber grommets by hand.
Step 9: Remove Engine Support and Reconnect Battery
- Slowly lower the floor jack rated 3-ton minimum until the engine rests fully on the new mounts.
- Remove the wood block 2x6-inch minimum and jack from under the vehicle.
- Use a 10mm socket to reconnect the negative battery cable.
- Tighten the terminal until it does not rotate by hand.
Step 10: Lower the Vehicle
- Use the floor jack rated 3-ton minimum to lift your Escape slightly off the jack stands.
- Remove the jack stands rated 3-ton minimum.
- Lower the vehicle slowly to the ground.
- Remove the wheel chocks.
✅ After Repair
- Start the engine and let it idle in Park.
- Listen for clunks, rattles, or rubbing noises.
- With your foot firmly on the brake, shift from Park to Reverse, then Drive, and feel for abnormal movement.
- Take a short, gentle test drive around the block.
- Recheck the mount areas after the test drive to confirm all fasteners are still seated and nothing is contacting the body.
- If the battery was disconnected, reset the clock, one-touch windows if needed, and radio presets if lost.
💰 DIY vs Shop Cost
Shop Cost: $650-$1,200 (parts + labor)
DIY Cost: $180-$450 (parts only)
You Save: $470-$750 by doing it yourself!
Shop labor rates vary but typically run $100-$150/hour. This repair takes a shop approximately 2-4 hours.
🎯 Ready to get started?
HowToo makes it easy: same-day/2-day shipping on every part, plus all the tools and specialty tools you need! Check out the parts and tools sections below to add everything to your cart.
