

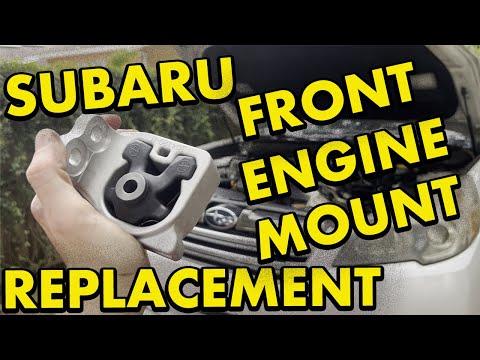







How to Replace Engine Mounts on a 2019-2024 Subaru Ascent 2.4L Turbo (Engine: Flat 4 2.4L)
Advanced step-by-step guide covering tools, parts, cradle lowering, and safety tips for 2019, 2020, 2021, 2022, 2023, 2024
How to Replace Engine Mounts on a 2019-2024 Subaru Ascent 2.4L Turbo (Engine: Flat 4 2.4L)
Advanced step-by-step guide covering tools, parts, cradle lowering, and safety tips for 2019, 2020, 2021, 2022, 2023, 2024


🔧 Ascent - Engine Mount Replacement
This isn’t a beginner driveway job. Your Ascent uses left and right load-bearing engine mounts, and factory parts listings identify them as separate driver-side and passenger-side cushions. Access may require lowering the front cradle, which is the structural crossmember supporting the engine, steering gear, and suspension. subarupartsdeal.com
Important: The mounts currently displayed in the parts list are for older Subaru models, not your Ascent. Don’t order those. The correct Ascent mounts aren’t currently shown in the live catalog.
Difficulty Level: Advanced | Estimated Time: 6-10 hours
Assumption: This procedure covers replacing both main load-bearing engine mounts, not only the upper torque-control mount.
⚠️ Safety & Precautions
- ⚠️ Support the vehicle on four properly positioned jack stands. Never work underneath a vehicle supported only by a jack.
- ⚠️ Use an engine support bar from above before loosening either main mount or the front cradle.
- ⚠️ Do not support the engine directly under the aluminum oil pan with a bare jack saddle. It can crack or deform.
- ⚠️ The front cradle carries suspension and steering loads. Improper positioning can affect alignment or damage the steering shaft and wiring.
- ⚠️ Disconnect the battery negative terminal before working around the starter, wiring, or steering system.
- ⚠️ Keep the engine lift minimal. Excess movement can damage turbocharger plumbing, exhaust joints, hoses, wiring, and CV axles.
- ⚠️ Do not start the engine while it’s hanging from the support bar.
🔧 Required Tools
You'll need the following tools for this repair:
- Vehicle lift or 3-ton floor jack
- 3-ton jack stands, set of four
- Wheel chocks
- Engine support bar rated 1,000 pounds minimum (specialty)
- Transmission jack rated 1,000 pounds minimum (specialty)
- Metric socket set, 10mm-22mm
- Metric deep socket set, 10mm-22mm
- Metric wrench set, 10mm-22mm
- 3/8-inch drive ratchet
- 1/2-inch drive breaker bar
- 3/8-inch drive extensions, 3-inch and 6-inch
- 1/2-inch drive extensions, 3-inch and 6-inch
- Torque wrench, 10-100 ft-lbs
- Torque wrench, 50-250 ft-lbs
- Paint marker
- Medium pry bar, 18-inch
- Trim-clip removal tool
- Flat-blade screwdriver, 6-inch
- Mechanic gloves
- Safety glasses
🔩 Required Parts
HowToo sells all the parts you need for this repair:
- Left engine mount - Qty: 1
- Right engine mount - Qty: 1
- Replacement cradle fasteners, if specified as single-use - Qty: As required
- Replacement exhaust gaskets and self-locking nuts - Qty: As required if the exhaust is disconnected
Factory parts diagrams list separate left and right mounts for the Ascent. Replace both if mileage, age, or deterioration is similar. subarupartsdeal.com
📋 Before You Begin
- Park on level, solid ground. Select Park and apply the parking brake.
- Center the steering wheel and keep it from rotating once steering connections are disturbed.
- Open the hood. Use a 10mm wrench to disconnect the battery negative terminal.
- Wait at least one minute before disconnecting electrical connectors.
- Record any alignment shims or component positions before disassembly.
- Use a paint marker to trace the cradle position against the body at every mounting point.
- Arrange a four-wheel alignment after the repair if the cradle is loosened or lowered.
- Obtain the current Subaru service procedure for the exact fastener torque sequence. I won’t invent critical cradle or mount torque values.
🔨 Step-by-Step Instructions
Follow these steps in order:
Step 1: Raise and Secure the Vehicle
- Block the rear wheels with wheel chocks.
- Raise your Ascent with a 3-ton floor jack.
- Place four 3-ton jack stands under approved body support points.
- Shake-test the vehicle gently before going underneath.
Step 2: Remove the Lower Covers
- Use the appropriate metric socket and trim-clip removal tool to remove the front under-cover and splash shields.
- Sort the clips and bolts by location. Subaru commonly uses several similar-looking fasteners.
- Cardboard templates keep every bolt organized.
Step 3: Support the Engine from Above
- Install the 1,000-pound engine support bar across the reinforced body edges.
- Connect its chains to approved engine lifting points. Do not hook onto intake, turbocharger, fuel, or air-conditioning components.
- Tension the support bar only until it carries the engine’s weight. Do not lift the body from the stands.
Step 4: Inspect Everything Restricting Movement
- Use a flashlight and inspect wiring, ground straps, coolant hoses, turbocharger hoses, exhaust joints, and air-conditioning lines.
- Disconnect only the brackets or retainers that prevent safe engine movement, using the matching metric socket.
- Do not open the refrigerant system.
Step 5: Mark the Cradle Position
- Use a paint marker to trace the cradle against the body around each mounting point.
- Mark steering and bracket locations before separating anything.
- Place the transmission jack securely under the cradle.
Step 6: Prepare the Steering and Suspension Connections
- Follow the Subaru service-manual path for lowering the cradle on your Ascent.
- Use the specified metric socket and wrench to release steering, wiring, brackets, and suspension connections required by that procedure.
- Never allow the steering wheel to turn with the steering shaft disconnected.
- Support components rather than allowing them to hang from hoses or wiring.
Step 7: Loosen the Engine Mount Fasteners
- Use the matching metric deep socket, extensions, and 1/2-inch breaker bar to loosen the left and right mount fasteners.
- Keep the engine fully supported throughout this step.
- Do not place your hands between the mount, engine, and cradle.
Step 8: Lower the Cradle as Required
- Use the 1/2-inch breaker bar and correct metric socket to loosen the cradle fasteners in the factory sequence.
- Lower the cradle slowly with the transmission jack.
- Stop immediately if a hose, wire, steering component, exhaust part, or CV axle becomes tight.
- Lower it only far enough to remove the mounts.
Step 9: Remove the Old Mounts
- Use the matching metric socket and wrench to remove each mount from its bracket.
- If needed, use the 18-inch pry bar gently to relieve side pressure. Do not pry against aluminum engine castings.
- Compare each old mount with its replacement before installation.
- Confirm left and right position, stud direction, locating tabs, height, and bracket shape.
Step 10: Install the New Mounts
- Position the new left and right mounts in their correct locations.
- Start every fastener by hand for several turns.
- Do not force a bolt through a misaligned mount with an impact wrench.
- Leave the mount fasteners slightly loose until the engine and cradle are correctly seated.
Step 11: Raise and Align the Cradle
- Raise the cradle slowly with the transmission jack.
- Align your paint-marker reference marks before installing the cradle bolts.
- Start every cradle fastener by hand.
- Tighten the cradle, mount, suspension, and steering fasteners using Subaru’s specified sequence and torque values.
- Do not reuse a fastener the Subaru procedure identifies as single-use.
Step 12: Settle the Powertrain
- Lower the engine support tension gradually so the engine’s weight rests naturally on both mounts.
- Check that no mount is twisted or side-loaded.
- Apply final mount torque only after everything is fully seated, following Subaru’s factory sequence.
- A twisted mount quickly becomes a noisy mount.
Step 13: Reassemble the Vehicle
- Reconnect all steering, suspension, exhaust, ground, wiring, and hose brackets using the correct metric sockets and wrenches.
- Use the appropriate torque wrench for every structural fastener.
- Install the splash shields with the trim-clip removal tool and matching metric socket.
- Reconnect the battery negative terminal using a 10mm wrench.
✅ After Repair
- Inspect the engine bay and underbody for tools, loose connectors, pinched wiring, and stretched hoses.
- Start the engine while the transmission remains in Park. Watch for abnormal movement, vibration, warning lights, exhaust leaks, or fluid leaks.
- With the brake firmly applied, shift slowly through Reverse, Neutral, and Drive. Do not race the engine.
- Stop immediately if you hear metal contact or see excessive engine movement.
- Road-test at low speed, then recheck the underbody and visible fasteners.
- Have a four-wheel alignment checked because cradle movement can alter steering and suspension geometry.
💰 DIY vs Shop Cost
Shop Cost: $1,000-$2,000 (parts + labor)
DIY Cost: $300-$700 (parts only, excluding support equipment)
You Save: $700-$1,300 by doing it yourself!
Labor varies considerably by market. This repair can require approximately 6-10 hours when cradle removal and realignment are included.
If you must buy an engine support bar, transmission jack, heavy-duty stands, and torque wrenches, professional installation may be the smarter first-time choice. Dropping a cradle is no place for optimistic jack placement.
🎯 Ready to get started?
HowToo makes it easy: same-day/2-day shipping on every available part, plus all the tools and specialty tools you need! Check the parts and tools sections below, but don’t purchase the currently displayed older-model mounts for your Ascent.