

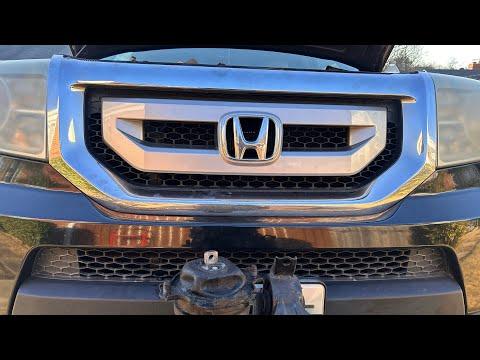







How to Replace Engine Mounts on a 2018 Honda Pilot (Front, Rear, Left & Right)
Step-by-step DIY instructions with required tools, parts list, safety tips, and OEM torque spec guidance
How to Replace Engine Mounts on a 2018 Honda Pilot (Front, Rear, Left & Right)
Step-by-step DIY instructions with required tools, parts list, safety tips, and OEM torque spec guidance


🔧 Pilot - Engine Mount Replacement
On your Pilot, “engine mounts” can mean several different mounts (right/passenger-side engine mount, left/driver-side transmission mount, rear mount, and sometimes a front mount). The exact steps and torque specs change depending on which mount(s) you’re replacing and whether your Pilot is AWD or FWD.
Difficulty Level: Advanced | Estimated Time: 2-6 hours
⚠️ Safety & Precautions
- ⚠️ Never get under the vehicle supported only by a jack; use jack stands.
- ⚠️ Support the engine before unbolting any mount; an unsupported engine can drop and damage wiring/hoses.
- ⚠️ Keep hands clear when lifting/tilting the engine; pinch hazard.
- ⚠️ Let the exhaust/catalyst cool fully before working near the rear mount area.
🔧 Required Tools
You'll need the following tools for this repair:
- Floor jack (rated 3-ton minimum)
- Jack stands (rated 3-ton minimum)
- Wheel chocks
- Safety glasses
- Mechanic gloves
- Socket set (8mm-19mm)
- Deep socket set (14mm-19mm)
- Ratchet (3/8")
- Breaker bar (1/2")
- Torque wrench (10-200 ft-lbs)
- Extensions (3", 6", 12")
- Universal swivel joint
- Trim clip removal tool
- Flat trim tool
- Pry bar
- Wood block (2x4)
- Engine support bar (specialty)
🔩 Required Parts
HowToo sells all the parts you need for this repair:
- Right-side engine mount - Qty: 1
- Left-side transmission mount - Qty: 1
- Rear engine mount - Qty: 1
- Front engine mount - Qty: 1
- New mount fasteners (if required by Honda for one-time-use) - Qty: 1 set
📋 Before You Begin
- Park on level ground, set the parking brake, and chock the rear wheels.
- Open the hood and remove loose items from the engine bay.
- Plan how you’ll support the engine: an engine support bar spans the strut towers and holds the engine from above (safer than lifting from below).
- If working near the radiator fans, disconnect the negative battery terminal using a 10mm socket.
🔨 Step-by-Step Instructions
Follow these steps in order:
Step 1: I need 2 quick details (so the steps match your Pilot)
- Is your Pilot AWD or FWD?
- Which mount(s) are you replacing: right (passenger), left (driver/trans), rear, and/or front?
Step 2: Safely raise and support the Pilot
- Place wheel chocks behind the rear tires.
- Lift the front with a floor jack (rated 3-ton minimum) at the proper front jacking point.
- Set the vehicle onto jack stands (rated 3-ton minimum).
Step 3: Support the engine
- Install the engine support bar (specialty) and take the engine’s weight slightly.
- If you must lift from below, place a wood block (2x4) on the floor jack (rated 3-ton minimum) and gently contact the oil pan area; lift only enough to “hold” the engine, not raise the vehicle.
- Go slow—small lifts make a big difference.
Step 4: Access the mount you’re replacing (varies by mount)
- Remove splash shields/undercovers using a trim clip removal tool and socket set (8mm-19mm).
- Remove any brackets or components blocking access using a ratchet (3/8"), extensions (3", 6", 12"), and universal swivel joint.
Step 5: Remove the mount fasteners and the mount
- Use a breaker bar (1/2") with the appropriate deep socket set (14mm-19mm) to loosen mount bolts/nuts.
- Adjust engine height/tilt with the engine support bar (specialty) to relieve tension on the bolts.
- Remove the mount and compare it to the replacement (same shape, bolt holes, and any vacuum/electrical ports).
- If a bolt fights you, change engine angle slightly.
Step 6: Install the new mount and hand-start all fasteners
- Position the mount and start all bolts/nuts by hand to avoid cross-threading.
- Use a pry bar only gently if you need to line up holes.
Step 7: Torque fasteners (torque specs depend on AWD/FWD and mount)
- Use a torque wrench (10-200 ft-lbs) to torque all mount and bracket fasteners.
- Torque to OEM spec once you confirm AWD/FWD and which mount(s) you’re doing (I’ll provide the exact values and bolt-by-bolt order).
Step 8: Reassemble and lower the vehicle
- Reinstall shields/undercover using a socket set (8mm-19mm) and trim clip removal tool.
- Lower the Pilot off the jack stands (rated 3-ton minimum) using the floor jack (rated 3-ton minimum).
- If disconnected, reconnect the battery negative terminal using a 10mm socket.
✅ After Repair
- Start the engine and let it idle; listen for clunks and watch for excessive engine movement.
- Shift through P-R-N-D with your foot on the brake; verify no harsh thump.
- Test drive at low speed; recheck for new vibrations, and recheck any fasteners you touched.
💰 DIY vs Shop Cost
Shop Cost: $600-$1,800 (parts + labor, depending on which mounts)
DIY Cost: $120-$800 (parts only, depending on which mounts)
You Save: $480-$1,000 by doing it yourself!
Shop labor rates vary but typically run $100-$150/hour. This repair takes a shop approximately 2-6 hours.
🎯 Ready to get started?
HowToo makes it easy: same-day/2-day shipping on every part, plus all the tools and specialty tools you need! Check out the parts and tools sections below to add everything to your cart.