

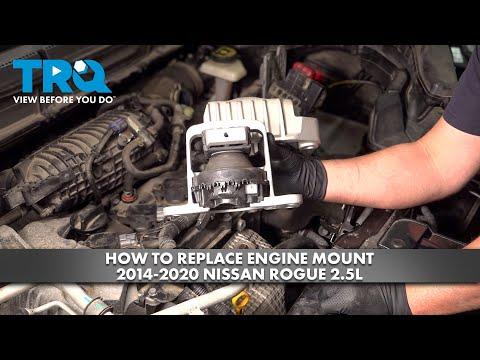



How to Replace Engine Mounts on a 2018-2024 Nissan Kicks 1.6L CVT (Engine: Inline 4 1.6L)
Step-by-step DIY guide with tools, parts, torque specs, safety tips, and cost savings for 2018, 2019, 2020, 2021, 2022, 2023, 2024
How to Replace Engine Mounts on a 2018-2024 Nissan Kicks 1.6L CVT (Engine: Inline 4 1.6L)
Step-by-step DIY guide with tools, parts, torque specs, safety tips, and cost savings for 2018, 2019, 2020, 2021, 2022, 2023, 2024


🔧 Kicks - Engine Mount Replacement
Replacing the engine mounts on your Kicks means supporting the engine, removing the worn rubber-and-metal mounts, and installing new ones so the engine sits firmly again. Bad mounts can cause vibration at idle, clunks when shifting, and excessive engine movement.
Difficulty Level: Intermediate | Estimated Time: 3-5 hours
Assumption: This guide covers the main engine/transmission mounts on your stock 1.6L CVT FWD Kicks.
⚠️ Safety & Precautions
- ⚠️ Never work under a vehicle supported only by a jack. Always use jack stands.
- ⚠️ Support the engine gently from below before removing any mount. Do not lift the engine by the oil pan without a wood block.
- ⚠️ Disconnect the negative battery cable before working near the battery tray or starter wiring area.
- ⚠️ Let the engine cool completely. You will work near metal brackets and exhaust-area components that can stay hot.
- ⚠️ Replace mounts one at a time. Removing multiple mounts at once can let the engine shift suddenly.
- ⚠️ A torque wrench is required. A torque wrench tightens bolts to an exact tightness so they do not loosen or break.
🔧 Required Tools
You'll need the following tools for this repair:
- 10mm socket
- 12mm socket
- 14mm socket
- 17mm socket
- 19mm socket
- 10mm wrench
- 14mm wrench
- 17mm wrench
- 3/8-inch drive ratchet
- 1/2-inch drive ratchet
- 1/2-inch drive breaker bar
- 3/8-inch drive 6-inch extension
- 1/2-inch drive 6-inch extension
- Torque wrench 10-150 ft-lb
- Floor jack rated 2-ton minimum
- Jack stands rated 2-ton minimum
- Wheel chocks
- Wood block 2x6-inch
- Flat trim clip remover
- Phillips screwdriver #2
- Paint marker
- Flashlight
- Mechanic gloves
- Safety glasses
🔩 Required Parts
HowToo sells all the parts you need for this repair:
- Right engine mount - Qty: 1
- Left transmission mount - Qty: 1
- Front torque rod mount - Qty: 1
- Rear torque rod mount - Qty: 1
- Engine mount fasteners - Qty: 1 set
- Plastic splash shield clips - Qty: 1 set
📋 Before You Begin
- 🅿️ Park your Kicks on level ground, shift to Park, and set the parking brake.
- 🧊 Let the engine cool for at least 45 minutes before starting.
- 🔋 Use a 10mm wrench to disconnect the negative battery cable, then move it aside so it cannot spring back onto the terminal.
- 🛞 Place wheel chocks behind the rear wheels.
- 📸 Take phone pictures of each mount before removal. This helps you match bracket direction during installation.
- ✍️ Use a paint marker to mark the position of each mount bracket before loosening bolts.
🔨 Step-by-Step Instructions
Follow these steps in order:
Step 1: Raise and Secure the Front
- Use a floor jack rated 2-ton minimum to lift the front of your Kicks at the front center jacking point.
- Place jack stands rated 2-ton minimum under the front pinch weld support points.
- Lower the vehicle gently onto the jack stands.
- Shake the vehicle lightly by hand to confirm it is stable before going underneath.
- Stability first. Never rush this step.
Step 2: Remove the Lower Splash Shield
- Put on safety glasses and mechanic gloves.
- Use a flat trim clip remover to remove the plastic clips from the lower engine splash shield.
- Use a Phillips screwdriver #2 if any shield fasteners use cross-head screws.
- Use a 10mm socket and 3/8-inch drive ratchet to remove any 10mm splash shield bolts.
- Set the shield and clips aside in order.
Step 3: Support the Engine
- Place a wood block 2x6-inch on the saddle of the floor jack.
- Position the jack and wood block under the flat reinforced area of the engine oil pan.
- Raise the jack only until the wood block touches the pan and lightly supports the engine.
- Do not lift the vehicle off the jack stands.
- Support means gentle contact, not lifting.
Step 4: Replace the Right Engine Mount
- Open the hood and locate the right engine mount on the passenger side of the engine bay.
- Use a 10mm socket and 3/8-inch drive ratchet to remove the air intake duct fasteners if the duct blocks access.
- Use a 12mm socket and 3/8-inch drive ratchet to remove any small bracket or harness retainers attached near the mount.
- Use a paint marker to mark the mount position on the body bracket.
- Use a 17mm socket, 1/2-inch drive ratchet, and 1/2-inch drive 6-inch extension to loosen the mount-to-engine bracket bolts.
- Use a 17mm socket and 1/2-inch drive breaker bar to loosen the mount-to-body bolts.
- Adjust the floor jack slightly until the bolts slide out without binding.
- Remove the old right engine mount by hand.
- Install the new right engine mount in the same orientation as the old one.
- Start all bolts by hand first to avoid cross-threading.
- Use a torque wrench 10-150 ft-lb and 17mm socket to tighten the right mount fasteners to Torque to 78 Nm (58 ft-lbs).
Step 5: Replace the Left Transmission Mount
- Locate the left transmission mount on the driver side of the engine bay near the CVT transmission.
- If the battery tray blocks access, use a 10mm socket and 3/8-inch drive ratchet to remove the battery hold-down, then lift out the battery.
- Use a 10mm socket and 3/8-inch drive ratchet to remove the battery tray fasteners.
- Use a 12mm socket and 3/8-inch drive ratchet to move any nearby wiring brackets aside.
- Support the transmission side gently by moving the floor jack and wood block under the transmission case flat area.
- Use a paint marker to mark the mount position.
- Use a 17mm socket, 1/2-inch drive ratchet, and 1/2-inch drive 6-inch extension to remove the mount fasteners.
- Use a 17mm wrench where socket access is tight.
- Remove the old left transmission mount by hand.
- Install the new left transmission mount in the same orientation.
- Start all bolts by hand before tightening.
- Use a torque wrench 10-150 ft-lb and 17mm socket to tighten the left mount fasteners to Torque to 78 Nm (58 ft-lbs).
- Use a 10mm socket and 3/8-inch drive ratchet to reinstall the battery tray fasteners and tighten snugly.
- Reinstall the battery but leave the negative cable disconnected until the end.
Step 6: Replace the Front Torque Rod Mount
- From underneath, locate the front torque rod mount. A torque rod mount limits front-to-back engine movement during acceleration.
- Use a flashlight to inspect how the mount is positioned before removal.
- Use a paint marker to mark the bracket location.
- Use a 17mm socket, 1/2-inch drive ratchet, and 1/2-inch drive 6-inch extension to remove the mount bolts.
- If a bolt is tight, use a 1/2-inch drive breaker bar with the 17mm socket.
- Remove the old front torque rod mount.
- Install the new front torque rod mount and start all bolts by hand.
- Use a torque wrench 10-150 ft-lb and 17mm socket to tighten the front torque rod fasteners to Torque to 103 Nm (76 ft-lbs).
Step 7: Replace the Rear Torque Rod Mount
- Locate the rear torque rod mount toward the rear/lower side of the engine and transmission assembly.
- Use a flashlight to confirm bolt access and mount direction.
- Use a paint marker to mark the bracket position.
- Use a 17mm socket, 1/2-inch drive ratchet, and 1/2-inch drive 6-inch extension to remove the rear torque rod bolts.
- Use a 17mm wrench if a socket does not fit squarely.
- Remove the old rear torque rod mount.
- Install the new rear torque rod mount in the same direction as the old part.
- Start all bolts by hand.
- Use a torque wrench 10-150 ft-lb and 17mm socket to tighten the rear torque rod fasteners to Torque to 103 Nm (76 ft-lbs).
Step 8: Settle the Engine and Recheck Torque
- Use the floor jack to lower the engine/transmission support very slowly.
- Watch each mount as the engine weight settles onto the new rubber mounts.
- Use a torque wrench 10-150 ft-lb and the correct socket to recheck each mount fastener.
- Confirm the mount brackets still line up with your paint marker marks.
- Hand-started bolts prevent expensive thread damage.
Step 9: Reinstall Shields and Battery Cable
- Use a flat trim clip remover by hand to reinstall the splash shield clips.
- Use a Phillips screwdriver #2 to reinstall any cross-head screws.
- Use a 10mm socket and 3/8-inch drive ratchet to reinstall any 10mm shield bolts.
- Use a 10mm wrench to reconnect the negative battery cable.
- Tighten the battery terminal snugly. Do not overtighten it.
Step 10: Lower the Vehicle
- Use the floor jack rated 2-ton minimum to lift the front slightly off the jack stands.
- Remove the jack stands by hand.
- Lower your Kicks slowly to the ground.
- Remove the rear wheel chocks.
✅ After Repair
- ✅ Start the engine and let it idle in Park. Watch for abnormal shaking or knocking.
- ✅ Hold the brake pedal firmly and shift from Park to Reverse, then Drive. The engine should move slightly, not jump.
- ✅ Listen for clunks when shifting. A soft change in engine position is normal.
- ✅ Test drive at low speed first. Avoid hard acceleration until you confirm everything feels normal.
- ✅ After the test drive, use a flashlight to inspect all mounts again for shifted brackets or loose fasteners.
- ✅ If the battery was disconnected, reset the clock, radio presets, and one-touch window function if needed.
💰 DIY vs Shop Cost
Shop Cost: $650-$1,150 (parts + labor)
DIY Cost: $180-$450 (parts only)
You Save: $470-$700 by doing it yourself!
Shop labor rates vary but typically run $100-$150/hour. This repair takes a shop approximately 3-5 hours.
🎯 Ready to get started?
HowToo makes it easy: same-day/2-day shipping on every part, plus all the tools and specialty tools you need! Check out the parts and tools sections below to add everything to your cart.