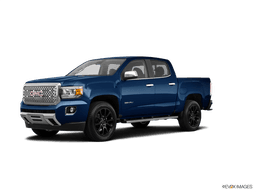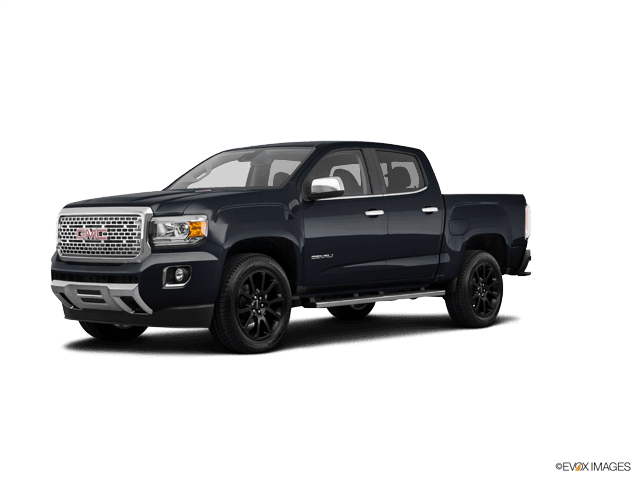

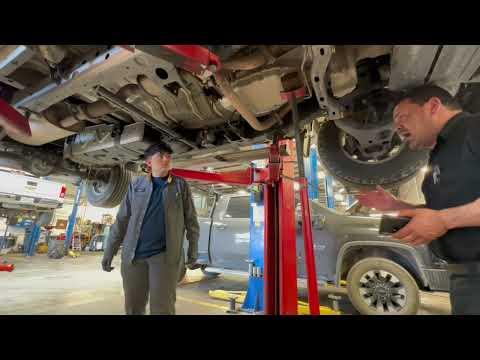







How to Replace Engine Mounts on a 2015-2022 GMC Canyon (Engine: Inline 4 2.8L)
Step-by-step instructions covering tools, parts, engine support, safety, and torque guidance for 2015, 2016, 2017, 2018, 2019, 2020, 2021, 2022
How to Replace Engine Mounts on a 2015-2022 GMC Canyon (Engine: Inline 4 2.8L)
Step-by-step instructions covering tools, parts, engine support, safety, and torque guidance for 2015, 2016, 2017, 2018, 2019, 2020, 2021, 2022


🔧 Canyon - Engine Mount Replacement
This is an advanced repair. Support the engine, remove the left and right hydraulic mounts one at a time, transfer the original brackets, then lower the engine into alignment without forcing the bolts.
The available mounts require the Canyon’s drive configuration to be matched before ordering. Don’t install a mount cataloged for the other drivetrain.
Difficulty Level: Advanced | Estimated Time: 5-8 hours
⚠️ Safety & Precautions
- ⚠️ Never work beneath an engine supported only by a hydraulic jack.
- ⚠️ Support the engine with an engine support bar from above whenever possible.
- ⚠️ Never jack directly against the aluminum oil pan.
- ⚠️ Allow the exhaust and turbocharger area to cool completely.
- ⚠️ Replace only one engine mount at a time so the powertrain stays aligned.
- ⚠️ Disconnect the negative battery cable before moving wiring or working near the starter circuit.
- ⚠️ Keep hands clear while raising or lowering the engine. A small movement can pinch hard.
- ⚠️ Do not start the engine while any support equipment is installed.
🔧 Required Tools
You'll need the following tools for this repair:
- Engine support bar rated 1,000 lb minimum (specialty)
- 3-ton floor jack
- 3-ton jack stands
- Wheel chocks
- Metric socket set, 8mm-21mm
- Metric deep socket set, 13mm-21mm
- Metric combination wrench set, 8mm-21mm
- 3/8-inch drive ratchet
- 1/2-inch drive breaker bar
- 3/8-inch drive extension set
- 1/2-inch drive extension set
- Universal-joint socket adapter
- Trim-clip removal tool
- Flat-blade screwdriver
- Torque wrench rated 10-100 ft-lb
- Paint marker
- Inspection light
- Mechanic gloves
- Safety glasses
🔩 Required Parts
HowToo sells all the parts you need for this repair:
- Front left hydraulic engine mount - Qty: 1
- Front right hydraulic engine mount - Qty: 1
- Engine-mount fasteners specified as single-use by GM - Qty: As required
Both replacement mounts reuse their original mounting brackets and don’t include installation hardware. Replacing both sides together is sensible when age-related vibration affects both, but physically remove and install them one at a time.
📋 Before You Begin
- Park the Canyon on level, solid ground and let the engine cool completely.
- Shift into Park, apply the parking brake, and chock both rear wheels.
- Open the hood and remove any engine cover or intake duct blocking the engine lifting points.
- Save radio settings if needed, switch the ignition off, and keep the key away from the vehicle.
- Use a metric socket to disconnect the negative battery terminal. Isolate the cable so it cannot spring back.
- Photograph every bracket, heat shield, ground strap, and wiring retainer before removal.
- Mark each bracket’s original position with a paint marker.
- Confirm all mount fasteners are accessible before putting any load on the engine.
🔨 Step-by-Step Instructions
Follow these steps in order:
Step 1: Raise and secure the truck
- Use the 3-ton floor jack at the approved front lifting point.
- Place the 3-ton jack stands beneath the approved frame support points.
- Lower the Canyon onto the stands, then gently shake it to confirm stability.
- Remove the lower splash shield with the appropriate metric socket and trim-clip removal tool.
Step 2: Create working clearance
- Use the appropriate metric socket and flat-blade screwdriver to remove intake ducting that blocks access.
- Release wiring retainers with the trim-clip removal tool instead of pulling on the wires.
- Remove only the shields or brackets needed to reach the selected mount.
- Use the paint marker to identify bracket positions and fastener locations.
- Photos beat memory after six hours.
Step 3: Install the engine support bar
- Position the rated engine support bar across the reinforced body ledges according to its instructions.
- Attach its chains to approved engine lifting eyes, not intake, fuel, turbocharger, or accessory brackets.
- Tighten the support bar only until the chains are snug.
- Do not lift yet. The bar should initially carry little or no engine weight.
Step 4: Check powertrain movement
- Use the inspection light to inspect both engine mounts, the rear transmission mount, hoses, exhaust connections, and wiring.
- Check that nothing will become stretched when the engine moves approximately 10-15mm.
- Loosen or reposition any bracket that would place a hose, wire, or exhaust component under tension.
Step 5: Support the first side
- Select either the left or right mount based on access. Complete that side before loosening the opposite mount.
- Turn the engine support bar adjuster until it just carries the engine’s weight.
- If extra control is necessary, place the 3-ton floor jack beneath a broad, load-spreading fixture approved for supporting the engine.
- Do not place the jack saddle directly against the oil pan.
Step 6: Loosen the selected mount
- Use the correct metric socket, extension, universal-joint adapter, and breaker bar to loosen the mount-to-frame fasteners.
- Use the correct metric socket and wrench to loosen the mount-to-engine bracket fasteners.
- Leave several threads engaged until the engine is fully supported.
- Note every fastener’s location and length. They may not be interchangeable.
Step 7: Remove the selected mount
- Use the engine support bar to raise the engine only enough to remove pressure from the mount.
- Watch the fan shroud, radiator hoses, charge-air plumbing, exhaust, wiring, and transmission connections continuously.
- Remove the loosened fasteners with the appropriate metric socket and wrench.
- Work the mount out without prying against the oil pan or hydraulic lines.
- Stop immediately if the engine must be lifted more than necessary to clear the mount.
Step 8: Transfer the original bracket
- Place the old and new mounts side by side and compare height, stud position, bolt-hole spacing, and orientation.
- Use the appropriate metric socket to remove the original bracket and heat shield from the old mount.
- Inspect the bracket for cracks, bent metal, elongated holes, or heavy corrosion.
- Install the original bracket and shield onto the replacement mount in exactly the same orientation.
- Torque to the exact GM specification for the bracket fastener and drivetrain configuration.
Step 9: Install the replacement mount
- Position the mount with its locating features seated correctly in the frame and engine bracket.
- Start every bolt and nut by hand for at least several threads.
- Use the engine support bar to lower or shift the engine slightly until the fasteners turn freely by hand.
- Never draw the engine into position by tightening a mount bolt. That can cross-thread the fastener or preload the mount.
- Snug the fasteners with the appropriate metric socket, but do not fully tighten them yet.
Step 10: Settle and torque the first mount
- Lower the engine support bar gradually until the engine’s weight is carried by the new mount.
- Confirm the mount sits flat and its locating features remain engaged.
- Use the torque wrench and correct metric socket to tighten the fasteners in the factory sequence.
- Torque each fastener to the GM service specification for its exact location, thread size, and drivetrain.
- Do not reuse any fastener identified by GM as torque-to-yield or single-use.
Step 11: Replace the opposite mount
- Repeat Steps 5 through 10 on the opposite side.
- Keep the completed mount installed and snug while supporting the engine for the second side.
- Do not loosen both sides simultaneously. That’s how a straightforward job turns into an alignment wrestling match.
Step 12: Reinstall removed components
- Use the appropriate metric sockets to reinstall brackets, heat shields, wiring retainers, and intake ducting.
- Route wires and hoses exactly as photographed before disassembly.
- Use the torque wrench to tighten structural fasteners to their applicable factory specifications.
- Reinstall the lower splash shield with the appropriate metric socket and trim-clip removal tool.
Step 13: Remove support equipment
- Confirm every mount fastener is installed and torqued before unloading the support bar.
- Slowly release the engine support bar while watching both mounts.
- Remove the chains and support bar from the engine compartment.
- Use the floor jack to raise the Canyon, remove the jack stands, and lower it to the ground.
Step 14: Reconnect the battery
- Use the appropriate metric socket to reconnect the negative battery terminal.
- Torque the battery terminal only to its GM service specification.
- Confirm the terminal cannot rotate by hand.
✅ After Repair
- Inspect the engine compartment and remove every loose tool before starting the engine.
- Start the engine with the hood open and observe both mounts from a safe distance.
- Check for abnormal vibration, knocking, exhaust contact, warning lights, leaks, or stretched wiring.
- With the brake pedal firmly applied, shift slowly through Reverse, Neutral, and Drive. Excessive movement or clunking means something needs rechecking.
- Take a short, low-speed road test and listen during acceleration, deceleration, and gear engagement.
- Reinspect all visible mount hardware, hoses, wiring, shields, and intake connections after the road test.
- Do not continue driving if the engine contacts the body, a mount shifts, or a new warning light appears.
💰 DIY vs Shop Cost
Shop Cost: $900-$1,700 equivalent, depending on drivetrain, access, and local labor
DIY Cost: $150-$450 equivalent for mounts and necessary hardware
You Save: Approximately $600-$1,250 by doing it yourself!
Labor prices around Sonīpat vary considerably. This repair commonly occupies a professional technician for approximately 4-7 hours, while a first-time DIYer should allow a full day.
🎯 Ready to get started?
HowToo has opened the engine-mount aisle for your Canyon. Match the drive configuration before ordering, and use the exact GM service information for fastener torque. Same-day/2-day shipping is available on eligible parts, plus the support equipment and specialty tools needed for the job.