

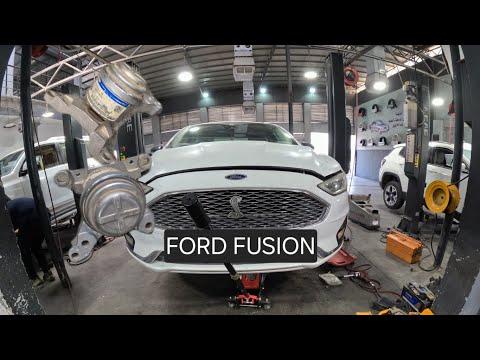




How to Replace Engine Mounts on a 2013-2020 Ford Fusion 2.5L (Engine: Inline 4 2.5L)
Step-by-step guide for all three mounts with tools, torque specs, and safety tips for 2013, 2014, 2015, 2016, 2017, 2018, 2019, 2020
How to Replace Engine Mounts on a 2013-2020 Ford Fusion 2.5L (Engine: Inline 4 2.5L)
Step-by-step guide for all three mounts with tools, torque specs, and safety tips for 2013, 2014, 2015, 2016, 2017, 2018, 2019, 2020


🔧 Fusion - Engine Mount Replacement
Your Fusion uses three main powertrain mounts: the right-side engine mount, left-side transmission mount, and lower rear roll restrictor. Replacing all three involves supporting the engine and transmission, removing each mount one at a time, and carefully aligning the new mounts before tightening them.
Difficulty Level: Advanced | Estimated Time: 4-6 hours
Assumption: This procedure covers replacement of all three mounts on the stock 2.5L powertrain.
⚠️ Safety & Precautions
- ⚠️ Never work beneath a vehicle supported only by a floor jack.
- ⚠️ Support the powertrain before loosening any mount.
- ⚠️ Use a wood block between the jack and oil pan; direct jack contact can crack or deform the pan.
- ⚠️ Replace only one mount at a time so the powertrain cannot shift excessively.
- ⚠️ Keep fingers away from gaps between mounts and brackets while moving the engine.
- ⚠️ Disconnect the negative battery cable before removing the battery and transmission mount.
- ⚠️ Allow the engine and exhaust system to cool completely.
🔧 Required Tools
You'll need the following tools for this repair:
- 8mm socket
- 10mm socket
- 13mm socket
- 15mm deep socket
- 18mm deep socket
- 21mm socket
- 3/8-inch drive ratchet
- 1/2-inch drive ratchet
- 1/2-inch drive breaker bar
- 6-inch socket extension
- 12-inch socket extension
- 7-150 ft-lb torque wrench
- Flat-blade screwdriver
- Trim-clip removal tool
- Engine support bar rated 1,000 pounds minimum
- Hydraulic floor jack rated 2-ton minimum
- Jack stands rated 2-ton minimum
- Rubber wheel chocks
- 12-inch square hardwood block
- Work light rated for automotive use
- Mechanic gloves
- Safety glasses
🔩 Required Parts
HowToo sells all the parts you need for this repair:
- Right-side engine mount - Qty: 1
- Left-side transmission mount - Qty: 1
- Lower rear roll restrictor mount - Qty: 1
- Mount fastener kit - Qty: 1
📋 Before You Begin
- 📍 Park your Fusion on firm, level ground. Shift into Park and apply the parking brake.
- 🛞 Place rubber wheel chocks tightly against both sides of a rear tire.
- 🔑 Switch the ignition off and move the key away from the vehicle.
- 🧊 Wait until the engine and exhaust are completely cool.
- 🔩 Open the hood and disconnect the negative battery cable using a 10mm socket.
- 🏗️ An engine support bar spans the upper body rails and holds the engine from above. Use it whenever an upper mount is removed.
🔨 Step-by-Step Instructions
Follow these steps in order:
Step 1: Raise and Secure the Vehicle
- Use the hydraulic floor jack at the front subframe’s reinforced center lifting area.
- Place the two jack stands beneath the reinforced front support points, then lower the vehicle onto them.
- Gently shake the body to confirm it is stable before going underneath.
- Keep the hydraulic floor jack beneath the subframe as a secondary support without lifting the vehicle.
Step 2: Support the Powertrain
- Install the 1,000-pound engine support bar across the reinforced upper body rails.
- Attach its chain to a factory engine lifting eye and remove slack without lifting the vehicle.
- Place the hardwood block on the hydraulic floor jack and position it beneath a broad, reinforced section of the oil pan.
- Raise the jack only until the wood contacts the pan. Do not lift the engine yet.
- Support weight; never crush the oil pan.
Step 3: Remove the Right-Side Engine Mount
- Use an 8mm socket or trim-clip removal tool to remove any fasteners obstructing the coolant reservoir area.
- Move the coolant reservoir aside without disconnecting or sharply bending its hoses.
- Use a 15mm deep socket and breaker bar to loosen the mount-to-engine bracket nuts.
- Use a 15mm or 18mm socket, as fitted, to remove the mount-to-body bolts.
- Use the hydraulic floor jack in very small movements until the studs are unloaded and the mount lifts out freely.
- Do not raise the engine more than necessary; watch the hoses, wiring, and exhaust flex joint.
Step 4: Install the Right-Side Engine Mount
- Compare the new mount with the removed mount. The studs, locating tabs, and bracket angle must match.
- Lower the new mount into position and start every fastener by hand.
- Use the hydraulic floor jack to align the engine naturally. Never pull the mount into alignment with its bolts.
- Use the torque wrench with the correct socket to tighten the mount-to-body fasteners to 80 Nm (59 ft-lbs).
- Use the torque wrench and 15mm deep socket to tighten the mount-to-engine bracket nuts to 80 Nm (59 ft-lbs).
- Reinstall the coolant reservoir and tighten its small fasteners snugly with the 8mm socket; do not overtighten plastic attachments.
Step 5: Remove the Battery and Air Cleaner
- Use a 10mm socket to loosen the positive battery terminal after the negative terminal is already disconnected.
- Use a 13mm socket and extension to remove the battery hold-down.
- Lift the battery straight out using both hands. Keep it upright.
- Use an 8mm socket and flat-blade screwdriver to loosen the air-intake clamp and release the intake connections.
- Remove the air-cleaner housing from its rubber retainers.
- Use a 10mm socket to remove the battery tray fasteners, then lift out the tray.
Step 6: Remove the Left-Side Transmission Mount
- Adjust the engine support bar so the transmission is fully supported without lifting it.
- Use a 15mm deep socket and breaker bar to loosen the mount-to-transmission fasteners.
- Use a 15mm or 18mm socket, as fitted, to remove the mount-to-body fasteners.
- Make tiny adjustments with the engine support bar until the fasteners slide out without binding.
- Lift the transmission mount from the engine compartment.
Step 7: Install the Left-Side Transmission Mount
- Compare the new and old mounts, checking the stud pattern and locating features.
- Position the new mount and start all fasteners by hand.
- Adjust the engine support bar until the mount sits flat and centered without sideways tension.
- Use the torque wrench with the appropriate socket to tighten the mount-to-body fasteners to 80 Nm (59 ft-lbs).
- Use the torque wrench with the appropriate deep socket to tighten the mount-to-transmission fasteners to 80 Nm (59 ft-lbs).
Step 8: Reinstall the Battery Area Components
- Use a 10mm socket to reinstall the battery tray and tighten its fasteners securely.
- Press the air-cleaner housing completely into its rubber retainers.
- Reconnect the intake duct and tighten its clamp using an 8mm socket.
- Lower the battery into the tray.
- Use a 13mm socket to reinstall the hold-down so the battery cannot move.
- Reconnect the positive terminal with a 10mm socket, but leave the negative terminal disconnected until all mounts are installed.
Step 9: Remove the Lower Rear Roll Restrictor
- From beneath the vehicle, locate the roll restrictor between the powertrain and front subframe. A roll restrictor limits forward-and-back engine movement.
- Use the work light to inspect the surrounding exhaust, wiring, and shields before loosening anything.
- Use an 18mm or 21mm socket with the breaker bar to loosen the horizontal through-bolt.
- Use the appropriate 15mm, 18mm, or 21mm socket to remove the subframe-side fastener.
- Make a very small adjustment with the hydraulic floor jack if the through-bolt binds.
- Remove the roll restrictor from the subframe opening.
Step 10: Install the Lower Rear Roll Restrictor
- Match the new restrictor’s orientation to the removed part.
- Insert the mount and start both fasteners by hand.
- Use the hydraulic floor jack only as needed to center the bolt holes.
- Use the torque wrench and appropriate socket to tighten the subframe-side fastener to 103 Nm (76 ft-lbs).
- Use the torque wrench and appropriate socket to tighten the horizontal through-bolt to 103 Nm (76 ft-lbs).
- Use the work light to verify that no wiring, hoses, or shields were trapped.
Step 11: Remove Supports and Reconnect the Battery
- Slowly release the hydraulic floor jack while watching all three mounts.
- Remove the engine support bar only after confirming the mounts carry the powertrain normally.
- Use a 10mm socket to reconnect the negative battery terminal securely.
- Use the hydraulic floor jack to raise the front, remove the jack stands, and lower your Fusion completely.
Step 12: Perform a Final Inspection
- Use the work light to check that all tools are removed and every connector, hose, and intake duct is secure.
- Use the torque wrench for a final check of all accessible mount fasteners.
- Do not place hands near the engine while another person starts it.
✅ After Repair
- ✅ Start the engine with the transmission in Park. Listen for knocking and check for excessive vibration.
- 🦶 Hold the brake pedal firmly and shift slowly through Reverse, Neutral, and Drive. Do not press the accelerator.
- 🔍 Stop immediately if the engine jumps, a mount shifts, or metal contacts the body.
- 🚗 Take a short, low-speed test drive and listen during acceleration, braking, and gear changes.
- 🔧 Reinspect all visible mounts and fasteners after the test drive.
- 🕒 The clock and automatic window functions may need resetting after the battery disconnect.
- 🪟 To relearn a window, fully close it and hold the switch upward for approximately two seconds.
💰 DIY vs Shop Cost
Shop Cost: ₹55,000-₹95,000, depending on imported-part availability and local labor
DIY Cost: ₹25,000-₹55,000 for parts
You Save: ₹30,000-₹40,000 by doing it yourself!
Panipat labor rates vary, and imported U.S.-spec Fusion parts can significantly affect the total. This repair takes a shop approximately 4-6 hours.
🎯 Ready to get started?
HowToo makes it easy: same-day/2-day shipping on every part, plus all the tools and specialty tools you need! Check out the parts and tools sections below to add everything to your cart.