

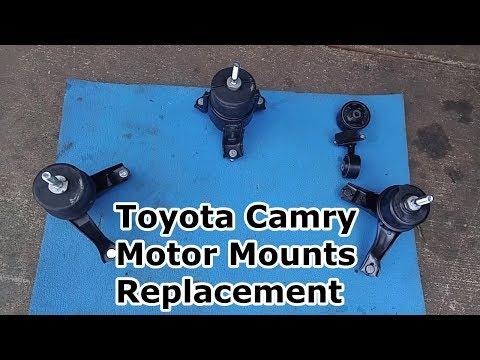







How to Replace Engine Mounts on a 2012 Toyota Camry (All Mount Locations)
Step-by-step mount-by-mount instructions, required tools/parts, safety tips, and torque spec guidance for 2012, 2013, 2014, 2015, 2016, 2017
How to Replace Engine Mounts on a 2012 Toyota Camry (All Mount Locations)
Step-by-step mount-by-mount instructions, required tools/parts, safety tips, and torque spec guidance for 2012, 2013, 2014, 2015, 2016, 2017


🔧 Camry - Engine Mount Replacement
Your Camry has multiple “engine mounts” (rubber-and-metal supports) that control engine movement: a right-side engine mount, a left-side transaxle mount, and torque mounts (front/rear) that limit twisting. The exact steps and torque specs change depending on which mount(s) you’re replacing, so I need 2 quick details to give you the correct, trim-accurate procedure.
Difficulty Level: Intermediate | Estimated Time: 1.5-5.0 hours (depends on which mount)
⚠️ Safety & Precautions
- ⚠️ Support the engine before unbolting any mount; an unsupported engine can drop and damage wiring/hoses.
- ⚠️ Never lift the engine by the oil pan with bare metal contact; use a wide wood block to spread the load.
- ⚠️ Hybrid safety: do not touch orange high-voltage cables or connectors; keep tools away from them.
- ⚠️ Work on level ground with jack stands; never rely on a floor jack alone.
- ⚠️ Let the engine cool before working near the exhaust side.
🔧 Required Tools
You'll need the following tools for this repair:
- Floor jack (rated 3-ton minimum)
- Jack stands (rated 3-ton minimum)
- Wheel chocks
- Safety glasses
- Mechanic gloves
- Flashlight
- Trim clip removal tool
- Metric socket set (8mm-19mm)
- 3/8" drive ratchet
- 1/2" drive breaker bar
- Torque wrench (20-200 Nm range)
- Extensions set (3", 6")
- Universal swivel joint
- Wrench set (10mm-19mm)
- Flat-blade screwdriver
- Wood block (2x6 or similar, 12" long)
- Engine support bar (specialty)
🔩 Required Parts
HowToo sells all the parts you need for this repair:
- Right-side engine mount - Qty: 1
- Left-side transaxle mount - Qty: 1
- Front torque mount - Qty: 1
- Rear torque mount - Qty: 1
- Engine mount fasteners (if specified as one-time-use) - Qty: 1 set
📋 Before You Begin
- Park on level ground, shift to P, set the parking brake, and chock the rear wheels.
- Raise the front and support with jack stands at the proper lift points.
- Two quick questions so I give the exact mount-by-mount steps and torque specs:
- Which mount(s) are you replacing: right (passenger side), left (driver side), front torque, rear torque, or all?
- Do you have an engine support bar (the bar that spans the fenders and holds the engine from above), or will you be supporting the engine from below with a floor jack + wood block?
🔨 Step-by-Step Instructions
Follow these steps in order:
Step 1: Identify the failed mount(s)
- Use a flashlight to look for torn rubber, collapsed mount height, or shiny “metal-to-metal” contact marks.
- Use a floor jack (rated 3-ton minimum) with a wood block under a strong engine-side area and gently take the weight (do not lift high).
- If the engine visibly “clunks” or shifts when lightly supported, that area often points to the failed mount. Only lift enough to unload the mount.
Step 2: Pause here for the correct mount procedure
- Once you answer the 2 questions above, I’ll provide the exact removal order, access panels to remove, and the correct Torque to XX Nm (YY ft-lbs) specs for your selected mount(s).
- This matters because mount bolts are different sizes/locations, and tightening order affects alignment.
✅ After Repair
- Start the car and confirm there’s no abnormal vibration at idle in P and with the brake held in D.
- Road test at low speed and listen for clunks over bumps and during light acceleration.
- Recheck that all splash shields and clips are secure.
💰 DIY vs Shop Cost
Shop Cost: $450-$1,300 (parts + labor, depends on how many mounts)
DIY Cost: $80-$500 (parts only, depends on how many mounts)
You Save: $250-$800 by doing it yourself!
Shop labor rates vary but typically run $100-$150/hour. This repair takes a shop approximately 1.5-5.0 hours.
🎯 Ready to get started?
HowToo makes it easy: same-day/2-day shipping on every part, plus all the tools and specialty tools you need! Check out the parts and tools sections below to add everything to your cart.