

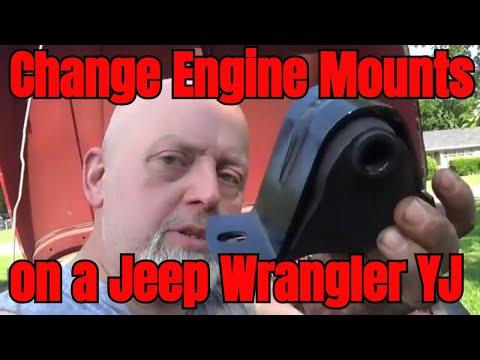



How to Replace Engine Mounts on a 2012-2017 Jeep Wrangler 3.6L V6 (Engine: V6 3.6L)
Step-by-step DIY guide with tools, parts, torque specs, safety tips, and cost savings for 2012, 2013, 2014, 2015, 2016, 2017
How to Replace Engine Mounts on a 2012-2017 Jeep Wrangler 3.6L V6 (Engine: V6 3.6L)
Step-by-step DIY guide with tools, parts, torque specs, safety tips, and cost savings for 2012, 2013, 2014, 2015, 2016, 2017


🔧 Wrangler - Engine Mount Replacement
Engine mounts hold your Wrangler’s 3.6L V6 securely to the frame while allowing a small amount of rubber cushioning for vibration. Replacing worn mounts helps reduce clunks, shaking, driveline movement, and harsh vibration at idle or when shifting between Drive and Reverse.
Difficulty Level: Intermediate | Estimated Time: 3-5 hours
⚠️ Safety & Precautions
- ⚠️ Work on a cool engine. Exhaust and engine brackets can burn you.
- ⚠️ Support the engine from below before removing any mount bolts. Never let the engine hang unsupported.
- ⚠️ Use a wide wood block between the floor jack and oil pan to spread the load. Do not jack directly on the bare oil pan.
- ⚠️ Keep fingers out from between the engine mount, brackets, and frame while raising or lowering the engine.
- ⚠️ Replace one side at a time. This keeps the engine aligned and safer to control.
- ⚠️ Disconnecting the battery is recommended because you’ll be working near the starter area and engine harness routing.
🔧 Required Tools
You'll need the following tools for this repair:
- 10mm socket
- 13mm socket
- 15mm socket
- 16mm socket
- 18mm socket
- 21mm socket
- 3/8-inch ratchet
- 1/2-inch ratchet
- 1/2-inch breaker bar
- 3/8-inch extension set
- 1/2-inch extension set
- 18mm wrench
- 21mm wrench
- Torque wrench, 10-150 ft-lb range
- Floor jack, rated 3-ton minimum
- Jack stands, rated 3-ton minimum
- Wheel chocks
- Wood block, approximately 12-inch x 12-inch
- Trim clip removal tool
- Penetrating oil
- Shop light
- Mechanic gloves
- Safety glasses
🔩 Required Parts
HowToo sells all the parts you need for this repair:
- Left engine mount - Qty: 1
- Right engine mount - Qty: 1
- Engine mount through-bolts and nuts - Qty: 2
- Engine mount bracket bolts - Qty: As needed
📋 Before You Begin
- Park your Wrangler on level ground.
- Shift into Park for automatic transmission or 1st gear for manual transmission.
- Set the parking brake firmly.
- Place wheel chocks behind the rear tires.
- Open the hood and let the engine cool fully.
- Use a 10mm socket to disconnect the negative battery cable. Move the cable away from the battery post.
- Spray penetrating oil on the engine mount fasteners and let it soak for 10-15 minutes.
- A through-bolt is the long bolt that passes through the center of the rubber engine mount.
- A torque wrench is a tool that tightens bolts to the correct tightness so they are not loose or over-tightened.
🔨 Step-by-Step Instructions
Follow these steps in order:
Step 1: Raise and Support the Wrangler
- Use a floor jack, rated 3-ton minimum to lift the front of your Wrangler from the front axle tube or front frame crossmember area.
- Place jack stands, rated 3-ton minimum under the frame rails.
- Lower the Wrangler gently onto the jack stands.
- Keep the floor jack nearby because it will be used to support the engine.
- Shake gently to confirm stability.
Step 2: Remove Lower Access Items
- If equipped with a lower splash shield or aftermarket skid plate, use a 13mm socket or 15mm socket to remove the retaining bolts.
- Use a trim clip removal tool for any plastic push clips.
- Set all bolts and clips aside in order.
Step 3: Support the Engine
- Place the wood block, approximately 12-inch x 12-inch on the saddle of the floor jack, rated 3-ton minimum.
- Position the wood block under the flat, reinforced area of the engine oil pan.
- Raise the jack slowly until the wood just contacts the oil pan.
- Lift only enough to take engine weight off the mounts. Do not raise the vehicle body.
- Small movements are safer.
Step 4: Loosen the Left Engine Mount Through-Bolt
- Start on the left side of the engine bay, driver side on a U.S.-market Wrangler.
- Use an 18mm socket and 18mm wrench to loosen the engine mount through-bolt and nut.
- If the bolt is tight, use a 1/2-inch breaker bar with the 18mm socket.
- Do not fully remove the bolt until the engine is safely supported.
Step 5: Remove the Left Engine Mount Fasteners
- Use a 15mm socket, 16mm socket, or 18mm socket as fitted to remove the mount-to-frame fasteners.
- Use a 3/8-inch extension set or 1/2-inch extension set to reach bolts blocked by the frame or engine accessories.
- Remove the through-bolt completely with the 18mm socket and 18mm wrench.
- Raise the engine slightly with the floor jack until the mount can slide out.
- Watch hoses, wiring, fan shroud clearance, and exhaust clearance while lifting.
Step 6: Install the New Left Engine Mount
- Position the new left engine mount in the same orientation as the old mount.
- Lower or raise the engine slightly with the floor jack until the bolt holes line up.
- Install the mount-to-frame bolts by hand first to avoid cross-threading.
- Install the through-bolt and nut by hand.
- Use the 15mm socket, 16mm socket, or 18mm socket to snug the mount-to-frame bolts.
- Use the 18mm socket and 18mm wrench to snug the through-bolt.
- Do not fully torque yet. Final torque is done after both mounts are installed and the engine is settled.
Step 7: Loosen the Right Engine Mount Through-Bolt
- Move to the right side of the engine bay, passenger side on a U.S.-market Wrangler.
- Use an 18mm socket and 18mm wrench to loosen the right engine mount through-bolt and nut.
- Use a shop light to check for wiring, A/C lines, and exhaust heat shield clearance.
- If needed, use a 1/2-inch breaker bar with the 18mm socket.
Step 8: Remove the Right Engine Mount Fasteners
- Use a 15mm socket, 16mm socket, or 18mm socket as fitted to remove the mount-to-frame fasteners.
- Use the 3/8-inch extension set or 1/2-inch extension set for better reach.
- Remove the through-bolt with the 18mm socket and 18mm wrench.
- Raise the engine slightly with the floor jack only as much as needed to remove the mount.
- Never force the mount out.
Step 9: Install the New Right Engine Mount
- Set the new right engine mount into place in the same orientation as the old mount.
- Adjust the engine height slowly with the floor jack until the holes align.
- Start all bolts and the through-bolt by hand.
- Use the 15mm socket, 16mm socket, or 18mm socket to snug the mount-to-frame bolts.
- Use the 18mm socket and 18mm wrench to snug the through-bolt and nut.
Step 10: Settle the Engine Before Final Tightening
- Slowly lower the floor jack until the engine weight rests fully on both new mounts.
- Check that both mounts sit flat and are not twisted.
- Gently rock the engine by hand from the top of the engine bay. Use your hands only, not a pry bar.
- Confirm that the fan shroud, hoses, wiring, and exhaust parts are not touching anything they should not touch.
Step 11: Torque the Engine Mount Fasteners
- Use a torque wrench, 10-150 ft-lb range with the correct socket for each fastener.
- Tighten the engine mount through-bolts to Torque to 95 Nm (70 ft-lbs).
- Tighten the engine mount-to-frame fasteners to Torque to 68 Nm (50 ft-lbs).
- If a bracket was loosened from the engine block, tighten those bracket bolts to Torque to 68 Nm (50 ft-lbs).
- Torque slowly and evenly.
Step 12: Reinstall Lower Access Items
- Reinstall any splash shield or skid plate removed earlier.
- Use a 13mm socket or 15mm socket to tighten the retaining bolts.
- Reinstall plastic clips using your hands or a trim clip removal tool.
Step 13: Reconnect the Battery and Lower the Wrangler
- Use a 10mm socket to reconnect the negative battery cable.
- Use the floor jack, rated 3-ton minimum to lift the front slightly off the jack stands.
- Remove the jack stands, rated 3-ton minimum.
- Lower your Wrangler carefully to the ground.
✅ After Repair
- Start the engine and let it idle.
- Look for abnormal vibration, clunks, or contact between the engine and nearby parts.
- With your foot firmly on the brake, shift from Park to Reverse and then Drive. Listen for clunks.
- Take a short, gentle test drive.
- After the test drive, recheck the mount area with a shop light for loose bolts or shifted parts.
- If the battery was disconnected, reset the clock and radio presets if needed.
💰 DIY vs Shop Cost
Shop Cost: $550-$950 (parts + labor)
DIY Cost: $120-$300 (parts only)
You Save: $430-$650 by doing it yourself!
Shop labor rates vary but typically run $100-$150/hour. This repair takes a shop approximately 2.5-4.0 hours.
🎯 Ready to get started?
HowToo makes it easy: same-day/2-day shipping on every part, plus all the tools and specialty tools you need! Check out the parts and tools sections below to add everything to your cart.