

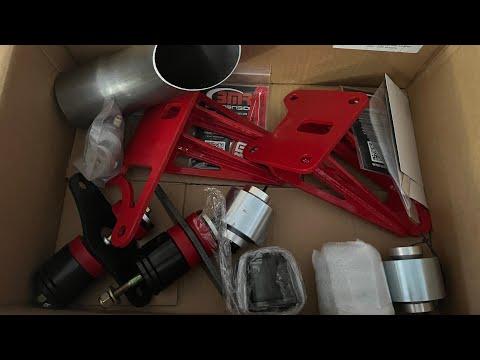



How to Replace Engine Mounts on a 2011-2026 Ford Mustang (Engine: V8 5.0L)
Step-by-step DIY guide with tools, parts, torque specs, safety tips, and cost savings for 2011, 2012, 2013, 2014, 2015, 2016, 2017
How to Replace Engine Mounts on a 2011-2026 Ford Mustang (Engine: V8 5.0L)
Step-by-step DIY guide with tools, parts, torque specs, safety tips, and cost savings for 2011, 2012, 2013, 2014, 2015, 2016, 2017


🔧 Mustang - Engine Mount Replacement
Replacing the engine mounts on your Mustang means safely supporting the 5.0L engine, lifting it slightly, removing the worn mounts, and installing new ones. Bad mounts can cause clunks, vibration, engine movement, or drivetrain harshness during acceleration and shifting.
Difficulty Level: Advanced | Estimated Time: 4-6 hours
⚠️ Safety & Precautions
- ⚠️ Support the engine only with a wide wood block under the oil pan or an engine support bar. Never lift on bare aluminum with a jack cup.
- ⚠️ Use jack stands on solid lift points before working under your Mustang. Never rely on a floor jack alone.
- ⚠️ Keep hands clear of the mount brackets while raising or lowering the engine.
- ⚠️ Let the exhaust cool fully before starting. The mounts sit near hot exhaust components.
- ⚠️ Disconnect the negative battery cable before working around the starter-side wiring and engine bay brackets.
- ⚠️ Do one side at a time if possible. This helps keep the engine aligned.
🔧 Required Tools
You'll need the following tools for this repair:
- 10mm socket
- 13mm socket
- 15mm socket
- 18mm socket
- 21mm socket
- 8mm socket
- 3/8-inch drive ratchet
- 1/2-inch drive ratchet
- 1/2-inch drive breaker bar
- 3/8-inch drive 6-inch extension
- 1/2-inch drive 10-inch extension
- Universal joint socket adapter
- Torque wrench 10-150 ft-lb
- Floor jack rated 3-ton minimum
- Jack stands rated 3-ton minimum
- Wheel chocks
- Engine support bar 1,000 lb minimum
- Wood block 2x6-inch minimum
- Trim clip removal tool
- Flathead screwdriver
- Pry bar 18-inch
- Penetrating oil
- Paint marker
- Mechanic gloves
- Safety glasses
🔩 Required Parts
HowToo sells all the parts you need for this repair:
- Left engine mount - Qty: 1
- Right engine mount - Qty: 1
- Engine mount-to-frame nuts - Qty: 4
- Engine mount-to-engine bracket bolts - Qty: 4
- Underbody shield clips - Qty: As needed
📋 Before You Begin
- 🅿️ Park your Mustang on a flat, solid surface and set the parking brake.
- 🧱 Place wheel chocks behind the rear wheels before lifting the front.
- 🔋 Use a 10mm socket to disconnect the negative battery cable. Move the cable away so it cannot spring back onto the terminal.
- ❄️ Allow the engine and exhaust to cool completely before working underneath.
- 🧰 A universal joint socket adapter lets the socket bend slightly to reach awkward bolts.
- 🧰 An engine support bar sits across the upper body rails and holds engine weight from above.
- 📌 If using a floor jack under the oil pan, use a wide wood block to spread the load and lift only slightly.
🔨 Step-by-Step Instructions
Follow these steps in order:
Step 1: Lift and Secure the Front
- Use a floor jack rated 3-ton minimum to lift the front of your Mustang at the front crossmember lift area.
- Place jack stands rated 3-ton minimum under the proper front support points.
- Gently lower the car onto the jack stands and shake the car lightly to confirm it is stable.
- Keep the floor jack nearby for supporting the engine later.
Step 2: Remove the Lower Splash Shield
- Use an 8mm socket to remove the lower splash shield screws.
- Use a trim clip removal tool to remove any plastic push clips.
- Lower the shield and set it aside.
- Tip: Keep clips grouped by location.
Step 3: Disconnect the Battery
- Open the hood and use a 10mm socket to loosen the negative battery terminal nut.
- Remove the negative cable from the battery post.
- Wrap the cable end with a clean rag so it cannot accidentally touch the battery post.
Step 4: Support the Engine
- Preferred method: install an engine support bar 1,000 lb minimum across the upper body rails and attach it to safe engine lifting points.
- Alternate method: place a wood block 2x6-inch minimum on the floor jack pad and position it under the flat, reinforced area of the oil pan.
- Use the floor jack to raise the engine only until the wood block contacts the pan and takes light weight.
- Do not raise the engine yet. Just support it.
- Tip: Lift slowly and watch everything.
Step 5: Mark Mount Position
- Use a paint marker to mark the position of each engine mount where it meets the frame perch.
- This helps you install the new mounts in the same position.
Step 6: Loosen the Left Engine Mount Fasteners
- Spray the left mount nuts and bolts with penetrating oil.
- Use a 15mm socket, 18mm socket, 1/2-inch drive ratchet, extension, and universal joint socket adapter as needed to loosen the left mount fasteners.
- Remove the lower mount-to-frame nuts first.
- Then loosen the mount-to-engine bracket bolts, but do not fully remove the mount until the engine is supported.
Step 7: Loosen the Right Engine Mount Fasteners
- Spray the right mount nuts and bolts with penetrating oil.
- Use a 15mm socket, 18mm socket, 1/2-inch drive ratchet, extension, and universal joint socket adapter as needed to loosen the right mount fasteners.
- Remove the lower mount-to-frame nuts first.
- Then loosen the mount-to-engine bracket bolts.
- Work slowly around wiring, steering shaft clearance, and exhaust heat shields.
Step 8: Raise the Engine Slightly
- Use the engine support bar adjustment nuts or floor jack to raise the engine slowly.
- Raise it only enough to unload the engine mounts, usually about 1/2 inch to 1 inch.
- Watch the fan area, intake tube, hoses, wiring, exhaust, and shifter movement while lifting.
- Stop immediately if anything stretches, binds, or contacts the body.
Step 9: Remove the Left Engine Mount
- Use a 15mm socket or 18mm socket to fully remove the left mount-to-engine bracket bolts.
- Use a pry bar 18-inch only for gentle alignment help if the mount is stuck.
- Remove the left engine mount from the frame perch.
- Compare the old and new mount before installation.
Step 10: Install the New Left Engine Mount
- Set the new left engine mount into the frame perch using your paint marks as a guide.
- Start all bolts and nuts by hand first to avoid cross-threading.
- Use a 15mm socket or 18mm socket to snug the mount-to-engine bracket bolts.
- Use a 15mm socket or 18mm socket to snug the mount-to-frame nuts.
- Do not final-torque yet. The engine needs to settle into position first.
Step 11: Remove the Right Engine Mount
- Use a 15mm socket or 18mm socket to fully remove the right mount-to-engine bracket bolts.
- Guide the right mount out carefully around the exhaust and nearby harnesses.
- Use a pry bar 18-inch only for gentle movement if needed.
- Compare the old and new mount before installation.
Step 12: Install the New Right Engine Mount
- Place the new right engine mount onto the frame perch.
- Start all bolts and nuts by hand first.
- Use a 15mm socket or 18mm socket to snug the mount-to-engine bracket bolts.
- Use a 15mm socket or 18mm socket to snug the mount-to-frame nuts.
- Do not final-torque yet.
Step 13: Lower the Engine Onto the Mounts
- Use the engine support bar or floor jack to lower the engine slowly onto both mounts.
- Make sure the mount studs sit fully through the frame perch holes.
- If alignment is slightly off, use a pry bar 18-inch gently while keeping fingers clear.
- Once seated, remove most support pressure but leave the support tool in place for safety.
Step 14: Torque the Engine Mount Fasteners
- Use a torque wrench 10-150 ft-lb with the correct socket to tighten the engine mount-to-engine bracket bolts to Torque to 85 Nm (63 ft-lbs).
- Use a torque wrench 10-150 ft-lb with the correct socket to tighten the engine mount-to-frame nuts to Torque to 63 Nm (46 ft-lbs).
- If your replacement mount hardware includes different instructions, follow the hardware maker’s torque sheet.
Step 15: Remove Engine Support
- Use the floor jack or engine support bar adjustment nuts to fully release engine support pressure.
- Remove the wood block and floor jack, or remove the engine support bar.
- Look over both mounts to confirm the rubber is not twisted and the brackets are seated flat.
Step 16: Reinstall the Lower Splash Shield
- Raise the splash shield into place by hand.
- Use a trim clip removal tool or flathead screwdriver to reinstall the plastic clips.
- Use an 8mm socket to reinstall the shield screws and snug them gently.
Step 17: Reconnect the Battery
- Use a 10mm socket to reconnect the negative battery cable.
- Tighten the terminal nut until secure. Do not overtighten.
Step 18: Lower the Vehicle
- Use the floor jack rated 3-ton minimum to lift the front slightly off the jack stands.
- Remove the jack stands.
- Lower your Mustang slowly to the ground.
- Remove the rear wheel chocks.
✅ After Repair
- ✅ Start the engine and let it idle while watching for abnormal movement.
- ✅ With your foot firmly on the brake, gently blip the throttle in neutral and listen for clunks.
- ✅ Take a short test drive and check for vibration, knocking, or shifter movement changes.
- ✅ After the test drive, recheck the mount area visually for shifted hardware or contact marks.
- ✅ If the battery was disconnected, reset the clock, radio presets, and one-touch window function if needed.
- ✅ To relearn one-touch windows, hold the window switch down fully for 2 seconds, then hold up fully for 2 seconds.
💰 DIY vs Shop Cost
Shop Cost: $650-$1,100 (parts + labor)
DIY Cost: $180-$450 (parts only)
You Save: $470-$650 by doing it yourself!
Shop labor rates vary but typically run $100-$150/hour. This repair takes a shop approximately 3-5 hours.
🎯 Ready to get started?
HowToo makes it easy: same-day/2-day shipping on every part, plus all the tools and specialty tools you need! Check out the parts and tools sections below to add everything to your cart.