
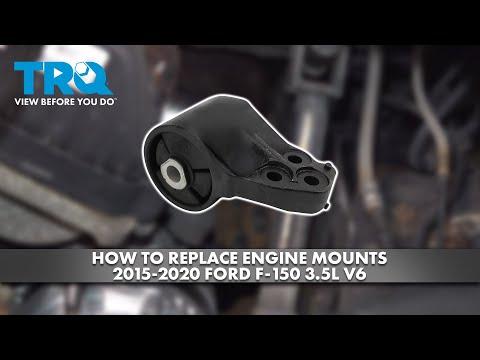







How to Replace Engine Mounts on a 2011-2025 Ford F-150 5.0L V8 (Engine: V8 5.0L)
Step-by-step guide covering tools, parts, torque specs, 4WD clearance, and safety for 2011, 2012, 2013, 2014, 2015, 2016, 2021, 2022, 2023, 2024, 2025
How to Replace Engine Mounts on a 2011-2025 Ford F-150 5.0L V8 (Engine: V8 5.0L)
Step-by-step guide covering tools, parts, torque specs, 4WD clearance, and safety for 2011, 2012, 2013, 2014, 2015, 2016, 2021, 2022, 2023, 2024, 2025


🔧 F-150 - Engine Mount Replacement
Replacing both engine mounts requires supporting the 5.0L engine, raising it slightly, and removing each mount through the wheel-well area. Access is tight, and the engine must remain securely supported throughout the repair.
Difficulty Level: Advanced | Estimated Time: 6-9 hours
Assumption: This procedure covers the left and right engine mounts; 4WD models require additional front-axle clearance described below.
⚠️ Safety & Precautions
- ⚠️ Never work beneath an engine supported only by a floor jack.
- ⚠️ Use an engine support bar before loosening either mount.
- ⚠️ Raise the engine only enough to unload the mounts; excessive movement can damage wiring, hoses, the fan, or exhaust.
- ⚠️ Keep hands out of the space between the engine, mounts, and frame while changing engine height.
- ⚠️ Support the truck on jack stands placed beneath the frame, not the suspension.
- ⚠️ Disconnect the negative battery cable because the starter and heavy-gauge electrical connections are near the right mount.
- ⚠️ Allow the exhaust system and engine to cool completely before starting.
- ⚠️ On 4WD models, front differential or axle interference can require professional lifting equipment. Do not force the mount past the axle.
🔧 Required Tools
You'll need the following tools for this repair:
- Safety glasses
- Mechanic gloves
- Wheel chocks
- 3-ton low-profile floor jack
- 3-ton jack stands
- Engine support bar rated 1,000 pounds minimum (specialty)
- Engine lifting chain rated 1,000 pounds minimum
- 1/2-inch drive torque wrench rated 20-150 ft-lbs
- 1/2-inch drive breaker bar
- 3/8-inch drive ratchet
- 1/2-inch drive ratchet
- 8mm socket
- 10mm socket
- 13mm socket
- 15mm deep socket
- 18mm deep socket
- 21mm socket
- 8mm combination wrench
- 15mm combination wrench
- 18mm combination wrench
- 6-inch socket extension
- 12-inch socket extension
- 1/2-inch drive universal-joint adapter
- Trim-clip removal tool
- Flat-blade screwdriver
- Plastic drain pan rated 2 gallons minimum
- Paint marker
- LED work light
🔩 Required Parts
HowToo sells all the parts you need for this repair:
- Left engine mount - Qty: 1
- Right engine mount - Qty: 1
- Engine-mount retaining nuts and bolts - Qty: 1 set
- Coolant meeting Ford WSS-M97B44-D2 specification - Qty: 1 gallon
- Distilled water - Qty: 1 gallon
Replace in pairs: Installing both mounts prevents uneven engine movement and repeat labor.
📋 Before You Begin
- Park your F-150 on solid, level ground. Shift to Park, apply the parking brake, and chock both rear wheels.
- Let the engine and exhaust cool completely.
- Open the hood before disconnecting the battery. No infotainment service mode is required.
- Use an 8mm socket to disconnect the negative battery terminal. Isolate the cable so it cannot spring back.
- Remove loose items from the engine compartment before installing the engine support bar.
- Inspect the fan-to-shroud clearance, radiator hoses, wiring, intake duct, and exhaust connections. These must not stretch as the engine rises.
- An engine support bar spans the fender structure and holds the engine from above. Do not rest it on plastic trim or unsupported sheet metal.
🔨 Step-by-Step Instructions
Follow these steps in order:
Step 1: Raise and Secure the Truck
- Use the 3-ton floor jack beneath an approved front frame lifting point to raise your F-150.
- Place the 3-ton jack stands beneath both frame rails, then lower the truck onto them.
- Keep the floor jack lightly touching the front crossmember as a backup, but do not rely on it for support.
- Use a 21mm socket to remove both front wheels. Mark each wheel position with the paint marker.
- Shake the truck gently to verify stability.
Step 2: Remove the Wheel-Well Liners
- Use an 8mm socket and trim-clip removal tool to remove the fasteners from both front wheel-well liners.
- Use a flat-blade screwdriver only where needed to release reusable clips without tearing the liners.
- Pull the liners outward and place their fasteners into separate left and right groups.
Step 3: Create Upper Engine Clearance
- Use an 8mm socket to loosen the air-intake duct clamps.
- Release the electrical connector and breather fittings by hand, then remove the intake duct and air-cleaner outlet tube.
- Use a 10mm socket to release any coolant reservoir or wiring brackets that could become tight when the engine moves. Do not disconnect hoses unless clearance requires it.
- If a coolant hose must be disconnected, place the 2-gallon drain pan underneath and release the clamp with mechanic gloves and the appropriate pliers supplied with the replacement clamp.
Step 4: Install the Engine Support Bar
- Position the 1,000-pound engine support bar across the reinforced fender mounting structures according to the support-bar instructions.
- Connect the 1,000-pound lifting chain to the factory engine lifting point. Do not attach it to the intake manifold, exhaust manifold, or accessory brackets.
- Tighten the support-bar screw by hand until the chain is snug and the engine’s weight is supported.
- Use the LED work light to check that the chain and support feet cannot contact wiring, hoses, or painted panels.
Step 5: Remove the Lower Mount Retainers
- Use the LED work light to locate the left and right mount-to-frame retaining nuts through the wheel wells and beneath the truck.
- Mark the installed position of each mount with the paint marker.
- Use an 18mm deep socket, 12-inch extension, universal-joint adapter, and breaker bar to loosen the lower mount retainers.
- Remove the retainers with the 18mm deep socket and ratchet. Do not raise the engine yet.
Step 6: Release Mount Brackets as Required
- Use a 15mm deep socket, extensions, and universal-joint adapter to remove the mount-to-engine bracket fasteners accessible through each wheel well.
- Use a 15mm combination wrench where the socket cannot remain straight.
- Keep the left and right fasteners separated because their access and bracket positions differ.
- Do not loosen exhaust-manifold fasteners or pry against the aluminum engine block.
Step 7: Raise the Engine Slightly
- Turn the engine support-bar screw slowly with its supplied handle until each mount is just free of frame tension.
- Watch the fan, shroud, radiator hoses, heater hoses, wiring, transmission cooler lines, and exhaust while raising the engine.
- Limit engine movement to the minimum necessary for mount removal. Stop immediately if anything stretches or contacts the body.
- A few millimeters is often enough.
Step 8: Remove the Right Engine Mount
- Use the LED work light to verify the negative battery cable remains disconnected and isolated.
- Guide the right mount away from its bracket and frame by hand while maintaining engine support.
- If the mount catches, adjust the engine support-bar screw slightly. Never force it with the flat-blade screwdriver.
- On 4WD models, stop if the mount cannot clear the front axle or differential without removing drivetrain components. Front differential removal requires separate axle-support and alignment procedures.
Step 9: Install the Right Engine Mount
- Compare the replacement mount with the removed mount. Match the locating tabs, stud direction, heat shield, and bracket shape.
- Position the new right mount by hand using the paint marks as a guide.
- Install all fasteners by hand for several turns. This prevents cross-threading.
- Use a 15mm socket and ratchet to snug the mount-to-engine bracket fasteners without fully tightening them.
- Install the lower mount retainer by hand and leave it loose.
Step 10: Replace the Left Engine Mount
- Use the engine support-bar screw to make only the small height adjustment required to unload the left mount.
- Guide the old left mount out through the wheel-well opening by hand.
- Position the new left mount with its locating features matching the original orientation.
- Install the bracket fasteners and lower retainer by hand, then snug them with the 15mm and 18mm sockets.
- Do not fully tighten either mount while the engine remains raised.
Step 11: Settle and Tighten the Mounts
- Slowly loosen the engine support-bar screw until the engine’s full weight rests naturally on both mounts.
- Confirm that both locating tabs are seated and no hose, wire, or heat shield is trapped.
- Use the torque wrench and correct socket to tighten the engine-mount bracket fasteners to 70 Nm (52 ft-lbs).
- Use the torque wrench and 18mm deep socket to tighten the mount-to-frame retainers to 63 Nm (46 ft-lbs).
- Torque specifications apply to clean, dry threads. Replace damaged or self-locking fasteners.
Step 12: Remove the Engine Support Equipment
- Verify all mount fasteners are tightened before removing support.
- Disconnect the lifting chain by hand and remove the engine support bar carefully.
- Use the LED work light to inspect the lifting point and surrounding wiring for damage.
Step 13: Reassemble the Engine Compartment
- Use a 10mm socket to reinstall any coolant reservoir and wiring brackets removed for clearance.
- Reinstall the intake duct and reconnect its breather fittings and electrical connector by hand.
- Use an 8mm socket to tighten the intake clamps until secure. Do not crush the plastic duct.
- If coolant was lost, refill the cold reservoir with a 50/50 mixture of specified Ford coolant and distilled water.
Step 14: Reinstall the Liners and Wheels
- Use the trim-clip removal tool by hand to reinstall reusable clips, then use an 8mm socket to install the wheel-well liner screws.
- Install the wheels in their marked positions and snug the lug nuts in a star pattern with a 21mm socket.
- Use the 3-ton floor jack to raise the truck, remove the jack stands, and lower it completely.
- Use the torque wrench and 21mm socket to tighten the wheel lug nuts in a star pattern to 204 Nm (150 ft-lbs).
Step 15: Reconnect the Battery
- Use an 8mm socket to reconnect the negative battery terminal.
- Tighten the terminal only until it cannot rotate by hand. Do not overtighten the terminal clamp.
- Remove all tools from the engine compartment before closing the hood.
✅ After Repair
- Start the engine with the hood open. Keep hands and tools away from the belt and fan.
- Observe the engine at idle while a helper shifts between Park, Reverse, and Drive with the brake firmly applied. Excessive lifting or knocking indicates a loose or misaligned mount.
- Check for coolant leaks and verify the cold coolant level after the engine cools again.
- Take a short, low-speed test drive. Listen for clunks during acceleration, braking, and gear changes.
- Recheck visible mount fasteners and wheel-lug torque after the test drive.
- The clock and one-touch window functions may need resetting after battery disconnection. No battery registration or coding is required.
💰 DIY vs Shop Cost
Shop Cost: ₹55,000-₹95,000 (parts + labor)
DIY Cost: ₹20,000-₹40,000 (parts only)
You Save: ₹35,000-₹55,000 by doing it yourself!
Panipat labor and imported-parts pricing vary significantly. This repair takes a shop approximately 5-8 hours, with 4WD models commonly costing more.
🎯 Ready to get started?
HowToo makes it easy: same-day/2-day shipping on every part, plus all the tools and specialty tools you need! Check out the parts and tools sections below to add everything to your cart.