
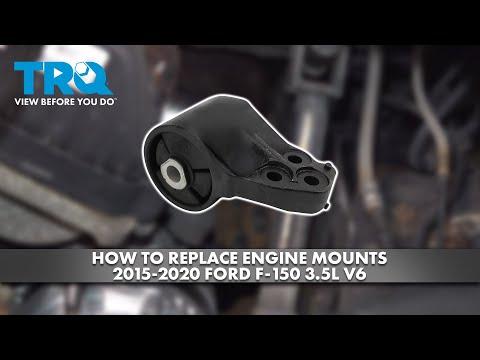



How to Replace Engine Mounts on a 2009-2025 Ford F-150 (Engine: V6 2.7L)
Step-by-step DIY guide with tools, parts, torque specs, safety tips, and cost savings for 2009, 2010
How to Replace Engine Mounts on a 2009-2025 Ford F-150 (Engine: V6 2.7L)
Step-by-step DIY guide with tools, parts, torque specs, safety tips, and cost savings for 2009, 2010


🔧 Engine Mounts - Replacement
This repair replaces the engine mounts on your F-150. Engine mounts hold the engine in place and isolate vibration; worn mounts can cause clunks, shaking at idle, or excessive engine movement during acceleration.
On your F-150, the engine must be safely supported from below before the mount fasteners are removed.
Difficulty Level: Advanced | Estimated Time: 3-5 hours
⚠️ Safety & Precautions
- ⚠️ Support the engine before removing any engine mount fasteners.
- ⚠️ Never place your hands between the engine, frame, and mount brackets while lifting or lowering the engine.
- ⚠️ Use jack stands to support the truck. Never rely on a floor jack alone.
- ⚠️ Let the exhaust and turbocharger areas cool fully before working nearby.
- ⚠️ Disconnect the negative battery cable before working around the starter, wiring, or frame grounds.
- ⚠️ Lift the engine only enough to unload the mounts. Too much lift can damage hoses, wiring, exhaust parts, and fan shroud clearance.
🔧 Required Tools
You'll need the following tools for this repair:
- 10mm socket
- 13mm socket
- 15mm socket
- 18mm socket
- 21mm socket
- 10mm wrench
- 13mm wrench
- 15mm wrench
- 18mm wrench
- 1/2-inch drive ratchet
- 3/8-inch drive ratchet
- 1/2-inch drive breaker bar
- 3/8-inch drive extension set
- 1/2-inch drive extension set
- Universal joint socket adapter
- Torque wrench rated 20-250 Nm
- Floor jack rated 3-ton minimum
- Jack stands rated 3-ton minimum
- Wheel chocks
- Wood block 2x6-inch minimum
- Engine support bar (specialty)
- Trim clip removal tool
- Pry bar 18-inch
- Paint marker
- Work light
- Nitrile gloves
- Safety glasses
🔩 Required Parts
HowToo sells all the parts you need for this repair:
- Left engine mount - Qty: 1
- Right engine mount - Qty: 1
- Engine mount fastener kit - Qty: 1
- Front underbody shield clips - Qty: As needed
📋 Before You Begin
- Park your F-150 on level ground.
- Shift to Park and set the parking brake.
- Place wheel chocks behind the rear wheels.
- Open the hood and let the engine cool completely.
- Use a 10mm socket to disconnect the negative battery cable.
- Use a paint marker to mark mount/bracket positions before removal. This helps keep alignment close during reassembly.
- An engine support bar spans the fenders and supports the engine from above; use it if access from below is tight.
🔨 Step-by-Step Instructions
Follow these steps in order:
Step 1: Raise and Support the Front of the Truck
- Place wheel chocks behind the rear wheels.
- Use a floor jack rated 3-ton minimum under the front frame crossmember to raise the front of your F-150.
- Place jack stands rated 3-ton minimum under the frame rails.
- Lower the truck gently onto the jack stands.
- Shake the truck lightly by hand to confirm it is stable before going underneath.
Step 2: Remove the Front Underbody Shield
- Use a 13mm socket and 3/8-inch drive ratchet to remove the underbody shield bolts if equipped.
- Use a trim clip removal tool to remove plastic retainers if equipped.
- Lower the shield and set it aside.
- Tip: Keep bolts grouped by location.
Step 3: Inspect Access to Both Engine Mounts
- Use a work light to locate the left and right engine mounts between the engine brackets and frame brackets.
- Check for wiring, hoses, steering shaft clearance, and front axle clearance.
- Use a paint marker to mark the mount position on the bracket before loosening fasteners.
Step 4: Support the Engine
- Place a wood block 2x6-inch minimum on the saddle of the floor jack rated 3-ton minimum.
- Position the jack and wood block under a solid, flat part of the engine oil pan area.
- Raise the jack just until the wood block contacts the engine and the engine weight is lightly supported.
- Do not lift the truck off the jack stands.
- If using an engine support bar (specialty), install it across the fender edges and lightly tension the engine support chain.
Step 5: Loosen the Right Engine Mount Fasteners
- Use an 18mm socket, 1/2-inch drive ratchet, and 1/2-inch drive extension set to loosen the mount-to-frame fasteners.
- Use a 15mm socket or 18mm socket as fitted to loosen the mount-to-engine bracket fasteners.
- Use a universal joint socket adapter where the socket does not line up straight.
- Do not remove all fasteners yet. Loosen them first so the engine stays controlled.
Step 6: Remove the Right Engine Mount
- Use the floor jack rated 3-ton minimum to raise the engine very slowly, only enough to unload the right mount.
- Use an 18mm socket and 1/2-inch drive ratchet to remove the right mount-to-frame fasteners.
- Use a 15mm socket or 18mm socket to remove the right mount-to-engine bracket fasteners.
- Use a pry bar 18-inch gently only if the mount is stuck in the bracket.
- Remove the right engine mount from the engine bay or from underneath, depending on clearance.
Step 7: Install the Right Engine Mount
- Compare the new right engine mount with the old mount before installation.
- Position the new mount into the frame and engine bracket.
- Start all fasteners by hand first to avoid cross-threading.
- Use the floor jack rated 3-ton minimum to slightly raise or lower the engine until the holes line up.
- Use a 15mm socket, 18mm socket, and 1/2-inch drive ratchet to snug the fasteners.
- Final torque is done after both mounts are installed and the engine weight is settled.
Step 8: Loosen the Left Engine Mount Fasteners
- Use an 18mm socket, 1/2-inch drive ratchet, and 1/2-inch drive extension set to loosen the left mount-to-frame fasteners.
- Use a 15mm socket or 18mm socket to loosen the left mount-to-engine bracket fasteners.
- Use a universal joint socket adapter for tight angles near the frame and front axle area.
- Keep the engine supported while these bolts are loosened.
Step 9: Remove the Left Engine Mount
- Use the floor jack rated 3-ton minimum to lift or lower the engine slightly until the left mount is unloaded.
- Use an 18mm socket and 1/2-inch drive ratchet to remove the left mount-to-frame fasteners.
- Use a 15mm socket or 18mm socket to remove the left mount-to-engine bracket fasteners.
- Use a pry bar 18-inch gently if the mount is stuck.
- Remove the left engine mount carefully.
Step 10: Install the Left Engine Mount
- Compare the new left engine mount with the old mount before installation.
- Position the new mount into place.
- Start all bolts by hand before tightening.
- Use the floor jack rated 3-ton minimum to slightly move the engine until the holes line up without force.
- Use a 15mm socket, 18mm socket, and 1/2-inch drive ratchet to snug the fasteners.
Step 11: Settle the Engine onto the Mounts
- Slowly lower the floor jack rated 3-ton minimum until the engine weight rests evenly on both new mounts.
- If using an engine support bar (specialty), slowly release tension after the engine is resting on the mounts.
- Check that the mounts sit flat and the paint marks are close to their original positions.
Step 12: Torque the Engine Mount Fasteners
- Use a torque wrench rated 20-250 Nm with the correct socket to tighten the engine mount fasteners.
- Torque mount-to-frame fasteners to 103 Nm (76 ft-lbs).
- Torque mount-to-engine bracket fasteners to 103 Nm (76 ft-lbs).
- If your replacement fastener kit gives a different torque, follow the fastener kit instructions.
Step 13: Reinstall the Front Underbody Shield
- Raise the underbody shield into position by hand.
- Use a 13mm socket and 3/8-inch drive ratchet to install the shield bolts.
- Use a trim clip removal tool by hand to help seat plastic retainers if equipped.
- Torque shield bolts to 10 Nm (89 in-lbs).
Step 14: Reconnect the Battery
- Use a 10mm socket to reconnect the negative battery cable.
- Use a torque wrench rated 20-250 Nm only if it can accurately read low torque.
- Torque to 7 Nm (62 in-lbs).
Step 15: Lower the Truck
- Use a floor jack rated 3-ton minimum to raise the truck slightly off the jack stands.
- Remove the jack stands rated 3-ton minimum.
- Lower your F-150 slowly to the ground.
- Remove the wheel chocks.
✅ After Repair
- Start the engine and let it idle while watching for unusual movement.
- Shift from Park to Reverse, then Drive, while holding the brake firmly.
- Listen for clunks and feel for vibration.
- Check that no hoses, wiring, intake tubes, or exhaust parts were stretched or left touching the body.
- Road test gently at first, then recheck the mount area for loose fasteners or unusual noises.
💰 DIY vs Shop Cost
Shop Cost: $750-$1,300 (parts + labor)
DIY Cost: $180-$450 (parts only)
You Save: $570-$850 by doing it yourself!
Shop labor rates vary but typically run $100-$150/hour. This repair takes a shop approximately 3-5 hours.
🎯 Ready to get started?
HowToo makes it easy: same-day/2-day shipping on every part, plus all the tools and specialty tools you need! Check out the parts and tools sections below to add everything to your cart.