

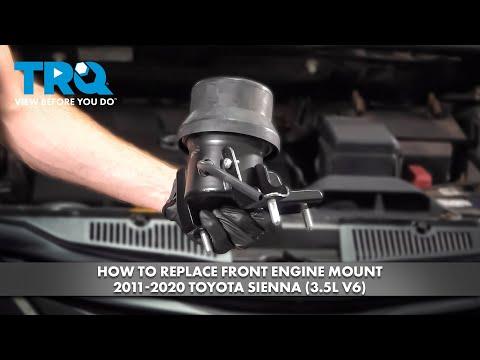



How to Replace Engine Mounts on a 2007-2020 Toyota Sienna (Engine: V6 3.5L)
Step-by-step guide for all four mounts with tools, parts, torque guidance, and safety tips for 2007, 2008, 2009, 2010, 2011, 2012, 2013, 2014, 2015, 2016, 2017, 2018, 2019, 2020
How to Replace Engine Mounts on a 2007-2020 Toyota Sienna (Engine: V6 3.5L)
Step-by-step guide for all four mounts with tools, parts, torque guidance, and safety tips for 2007, 2008, 2009, 2010, 2011, 2012, 2013, 2014, 2015, 2016, 2017, 2018, 2019, 2020


🔧 Sienna - Engine Mount Replacement
Replacing all engine mounts on your Sienna involves supporting the powertrain, then changing the right engine mount, left transmission mount, front torque mount, and rear torque mount one at a time. This is an advanced repair because the rear mount has restricted access and the engine can shift if it is not supported correctly.
Difficulty Level: Advanced | Estimated Time: 6-10 hours
Assumption: Procedures below cover the standard U.S.-market layout; AWD models require additional rear-mount access work.
⚠️ Safety & Precautions
- ⚠️ Never remove more than one mount at a time.
- ⚠️ Support the powertrain before loosening any mount.
- ⚠️ Do not place a jack directly against the aluminum oil pan.
- ⚠️ Use four jack stands on solid, level pavement. Never work under a vehicle supported only by a jack.
- ⚠️ Allow the exhaust system to cool completely before working near the rear mount.
- ⚠️ Disconnect the negative battery terminal before removing the battery tray or transmission mount.
- ⚠️ Do not start the engine while a mount is disconnected.
- ⚠️ If a mounting bracket is cracked, a bolt hole is damaged, or the engine cannot be aligned without force, stop and obtain professional assistance.
🔧 Required Tools
You'll need the following tools for this repair:
- 10mm socket
- 12mm socket
- 14mm socket
- 17mm socket
- 19mm socket
- 21mm socket
- 10mm combination wrench
- 12mm combination wrench
- 14mm combination wrench
- 17mm combination wrench
- 19mm combination wrench
- 3/8-inch drive ratchet
- 1/2-inch drive ratchet
- 1/2-inch drive breaker bar
- 3/8-inch drive extension set
- 1/2-inch drive extension set
- 3/8-inch drive universal joint
- 1/2-inch drive torque wrench rated 20-200 Nm
- Trim-clip removal tool
- Flat-tip screwdriver
- Hose-clamp pliers
- Engine support bar rated 500kg minimum (specialty)
- Floor jack rated 3-ton minimum
- Jack stands rated 3-ton minimum
- Wheel chocks
- 25mm-thick hardwood block
- Paint marker
- Mechanic’s gloves
- Safety glasses
- Work light rated for automotive use
🔩 Required Parts
HowToo sells all the parts you need for this repair:
- Right engine mounting insulator - Qty: 1
- Left transmission mounting insulator - Qty: 1
- Front engine mounting insulator - Qty: 1
- Rear engine mounting insulator - Qty: 1
- Engine mount fastener set - Qty: 1
- Air-cleaner hose clamp - Qty: 1 if damaged
- Underbody shield clips - Qty: As needed
Mounts must match the vehicle’s FWD or AWD configuration. Replace fluid-filled mounts if they are leaking, collapsed, torn, or separated.
📋 Before You Begin
- 📋 Park your Sienna on level, solid pavement. Select Park and apply the parking brake.
- 📋 Open the hood before disconnecting power. No infotainment service mode is required.
- 📋 Use wheel chocks behind both rear wheels.
- 📋 Let the engine and exhaust cool completely.
- 📋 Remove loose items from the engine compartment.
- 📋 Photograph each mount, bracket, ground cable, and hose before disassembly.
- 📋 An engine support bar spans the body above the engine and safely holds the powertrain from above.
- 📋 Plan to replace one mount completely before moving to the next mount.
🔨 Step-by-Step Instructions
Follow these steps in order:
Step 1: Disconnect the Battery
- Use a 10mm wrench to loosen the negative battery-terminal nut.
- Lift the terminal from the battery and position it where it cannot spring back.
- Wait at least 90 seconds before continuing.
Step 2: Raise and Support the Vehicle
- Use the floor jack rated 3-ton minimum at the front-center lifting point.
- Position the jack stands rated 3-ton minimum beneath the reinforced front side supports, then lower the vehicle onto them.
- Gently push the body to verify that it is stable before going underneath.
- Use the trim-clip removal tool and 10mm socket to remove the lower engine covers.
Step 3: Support the Powertrain
- Install the engine support bar rated 500kg minimum across the approved upper body ledges.
- Connect its chain to a factory engine lifting eye. Apply only enough tension to hold the engine’s weight.
- Place the 25mm-thick hardwood block on the floor jack rated 3-ton minimum, then position it under a broad reinforced area of the oil pan as a light secondary support.
- Do not lift the vehicle by the oil pan. The jack should only prevent sudden movement.
Step 4: Replace the Right Engine Mount
- Use the 10mm socket and trim-clip removal tool to remove the intake-air ducting and any upper cover blocking the passenger-side mount.
- Use the paint marker to mark the mount’s position against the body and engine bracket.
- Use the correctly fitting 17mm or 19mm socket and breaker bar to loosen the mount through-bolt and body fasteners.
- Adjust the engine support bar rated 500kg minimum in very small increments until the through-bolt moves without binding.
- Remove the fasteners and lift out the mount. Do not pry against wiring, hoses, or aluminum castings.
- Compare the replacement mount with the original. Its locating tabs and bolt sleeves must match exactly.
- Install the new mount loosely, then insert every fastener by hand before tightening.
- Center the mount using the paint marks. Lower the support tension until the engine rests naturally on the mount.
- Tighten only to the torque listed for the exact replacement mount position in current Toyota service information. Typical mount fasteners are in the 65-95 Nm (48-70 ft-lbs) range, but this range is not a substitute for the exact specification.
- Start every bolt by hand.
Step 5: Replace the Left Transmission Mount
- Use the 10mm socket to remove the battery hold-down and battery terminals, then lift out the battery using both hands.
- Use the 10mm and 12mm sockets to remove the battery tray and move attached harness retainers aside.
- Use the hose-clamp pliers, flat-tip screwdriver, and 10mm socket to remove the air-cleaner housing if it blocks the mount.
- Use the paint marker to mark the transmission mount’s installed position.
- Support the transmission with the engine support bar rated 500kg minimum. Do not place a jack against the transmission pan.
- Use the correctly fitting 17mm or 19mm socket, extensions, and breaker bar to remove the through-bolt and mounting fasteners.
- Adjust the support bar slightly if the through-bolt binds. Never hammer the bolt through a loaded mount.
- Install the replacement mount, starting all fasteners by hand.
- Settle the transmission onto the mount before final tightening.
- Tighten to the exact Toyota specification for the applicable FWD or AWD mount. Typical fasteners are in the 65-95 Nm (48-70 ft-lbs) range; verify the exact value before tightening.
- Use the 10mm and 12mm sockets to reinstall the battery tray and air-cleaner assembly.
Step 6: Replace the Front Torque Mount
- From below, locate the front mount between the engine assembly and front crossmember. A torque mount limits forward-and-back powertrain movement.
- Use the work light rated for automotive use to check for exhaust, cooling-line, or splash-shield interference.
- Use the 17mm or 19mm socket, extensions, and breaker bar to loosen the center bolt and bracket fasteners.
- Adjust the engine support bar rated 500kg minimum until the center bolt slides out without force.
- Remove the mount and inspect its bracket for cracks or elongated bolt holes.
- Install the new mount with all fasteners finger-tight.
- Let the powertrain settle naturally, then tighten to the exact Toyota specification. Depending on fastener position, typical values are approximately 65-95 Nm (48-70 ft-lbs); verify before final tightening.
Step 7: Replace the Rear Torque Mount
- Use the work light rated for automotive use to locate the rear mount above the rear portion of the front crossmember.
- Use the 17mm or 19mm socket, long extensions, and universal joint to access the rear-mount fasteners.
- On AWD models, stop if the transfer unit, propeller shaft, exhaust, or crossmember prevents straight access. Those components require model-specific removal and alignment procedures.
- On FWD models, loosen the center bolt and mounting fasteners while the powertrain remains supported.
- Adjust the engine support bar rated 500kg minimum slightly until the center bolt can be withdrawn by hand.
- Remove the old mount and compare its orientation with the replacement.
- Install all fasteners by hand, settle the powertrain, and tighten to the exact Toyota service specification. Typical rear-mount values fall near 65-95 Nm (48-70 ft-lbs), but the verified specification is required.
- Never force misaligned mount bolts.
Step 8: Reassemble the Engine Compartment
- Remove the floor jack rated 3-ton minimum from beneath the engine.
- Slowly release and remove the engine support bar rated 500kg minimum.
- Use the 10mm socket and trim-clip removal tool to reinstall all lower covers and intake ducting.
- Install the battery. Connect the positive terminal first, followed by the negative terminal.
- Use the 10mm wrench to tighten the battery-terminal nuts to 5.4 Nm (48 in-lbs).
- Use the floor jack rated 3-ton minimum to raise the front slightly, remove the jack stands, and lower your Sienna.
✅ After Repair
- ✅ Check the engine compartment for tools, loose wiring, disconnected hoses, and forgotten fasteners.
- ✅ Start the engine with the transmission in Park. Watch the engine from a safe position and listen for knocking or metal contact.
- ✅ Hold the brake firmly and shift slowly through Reverse, Neutral, and Drive. Excessive movement or a clunk indicates a loose, incorrect, or misaligned mount.
- ✅ Confirm that no warning lights remain illuminated. The clock and automatic window functions may require resetting after battery disconnection.
- ✅ Road-test at low speed first. Check for vibration during idle, acceleration, and deceleration.
- ✅ Reinspect every accessible mount fastener and look for contact between the exhaust, body, hoses, and brackets.
- ✅ Do not drive if the steering binds, the engine shifts sharply, or a heavy clunk remains.
💰 DIY vs Shop Cost
Shop Cost: ₹70,000-₹140,000 parts and labor
DIY Cost: ₹30,000-₹75,000 parts only
You Save: ₹40,000-₹65,000 by doing it yourself!
Local labor and imported-parts pricing vary significantly. This repair takes a shop approximately 6-10 hours, with AWD rear-mount work potentially taking longer.
🎯 Ready to get started?
HowToo makes it easy: same-day/2-day shipping on every part, plus all the tools and specialty tools you need! Check out the parts and tools sections below to add everything to your cart.