

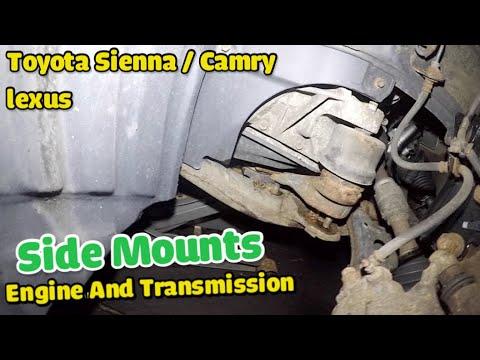



How to Replace Engine and Transmission Mounts on a 2013-2018 Toyota Avalon (Engine: V6 3.5L)
Step-by-step instructions for all four powertrain mounts, with tools, torque specs, and safety tips for 2013, 2014, 2015, 2016, 2017, 2018
How to Replace Engine and Transmission Mounts on a 2013-2018 Toyota Avalon (Engine: V6 3.5L)
Step-by-step instructions for all four powertrain mounts, with tools, torque specs, and safety tips for 2013, 2014, 2015, 2016, 2017, 2018


🔧 Avalon - Engine Mount Replacement
This procedure covers replacing the right engine mount, left transmission mount, front torque mount, and rear torque mount on your Avalon. Replace and fully tighten one mount at a time so the engine and transmission remain correctly aligned.
Difficulty Level: Advanced | Estimated Time: 6-9 hours
Assumption: All four powertrain mounts are being replaced; individual replacement mounts may use different fastener sizes, so compare them before installation.
⚠️ Safety & Precautions
- ⚠️ Support the engine before loosening any mount. A shifting engine can crush hands or damage hoses and wiring.
- ⚠️ Never place a jack directly against the aluminum oil pan. Use a wide hardwood block, and lift only enough to support the engine.
- ⚠️ Use an engine support bar whenever a mount must remain removed. An engine support bar spans the fenders and holds the engine from above.
- ⚠️ Support the vehicle with appropriately rated jack stands. Never work underneath a vehicle supported only by a jack.
- ⚠️ Allow the engine and exhaust system to cool completely before working near the rear mount.
- ⚠️ Disconnect the negative battery terminal before removing the battery tray or working near the starter cable.
- ⚠️ Do not loosen the front suspension crossmember unless the engine and transmission are securely supported.
🔧 Required Tools
You'll need the following tools for this repair:
- 10mm socket
- 12mm socket
- 14mm socket
- 17mm socket
- 19mm socket
- 21mm socket
- 10mm combination wrench
- 12mm combination wrench
- 14mm combination wrench
- 17mm combination wrench
- 3/8-inch drive ratchet
- 1/2-inch drive ratchet
- 1/2-inch drive breaker bar
- 3-inch socket extension
- 6-inch socket extension
- 12-inch socket extension
- 1/2-inch drive universal joint
- Torque wrench rated 10-80 N·m
- Torque wrench rated 40-200 N·m
- Trim-clip removal tool
- Hose-removal pliers
- Flat-tip screwdriver
- Engine support bar rated 500kg minimum (specialty)
- Hydraulic floor jack rated 2-ton minimum
- Jack stands rated 2-ton minimum
- Wheel chocks
- Hardwood support block at least 25mm thick
- Paint marker
- Work light
- Mechanic’s gloves
- Safety glasses
🔩 Required Parts
HowToo sells all the parts you need for this repair:
- Right engine mounting insulator - Qty: 1
- Left transmission mounting insulator - Qty: 1
- Front engine mounting insulator - Qty: 1
- Rear engine mounting insulator - Qty: 1
- Mount-to-body flange nuts - Qty: As required
- Mount through-bolts and locknuts - Qty: As required
- Exhaust flange gaskets - Qty: As required if exhaust components are separated
- Exhaust flange locknuts - Qty: As required if exhaust components are separated
Use mounts matched specifically to the Limited V6. The right-side mount may have a vacuum connection that must match the original mount.
📋 Before You Begin
- 📋 Park your Avalon on level, solid ground. Select Park, apply the parking brake, and chock both rear wheels.
- 📋 Open the hood and allow the engine to cool completely.
- 📋 Save any radio presets or personal settings you want to retain.
- 📋 Use a 10mm socket to disconnect the negative battery terminal. Isolate the cable so it cannot spring back onto the battery post.
- 📋 Install the engine support bar and apply light tension. Do not lift the vehicle by its fenders.
- 📋 Take photographs of each mount’s orientation, brackets, hoses, and wire clips before removal.
- 📋 Replace only one mount at a time. Start every bolt by hand before using a ratchet.
🔨 Step-by-Step Instructions
Follow these steps in order:
Step 1: Remove the upper covers and intake duct
- Pull the decorative engine cover straight upward by hand to release its rubber grommets.
- Use a 10mm socket and trim-clip removal tool to remove the air inlet duct and upper air-filter housing fasteners.
- Use a flat-tip screwdriver to loosen the intake-hose clamp. Disconnect the electrical connector from the airflow sensor before moving the housing.
- Use hose-removal pliers where a breather hose must be released. Do not pull directly on plastic fittings.
- Remove the air-filter housing to expose the left transmission mount area.
Step 2: Remove the battery and battery tray
- Use a 10mm socket to disconnect the positive battery terminal after the negative terminal is already isolated.
- Use a 10mm socket to remove the battery hold-down. Lift the battery straight out while keeping it upright.
- Use a 10mm and 12mm socket to remove the battery tray and attached wire brackets.
- Place the battery away from sparks, flames, and metal tools.
Step 3: Raise and support the front of the vehicle
- Use the hydraulic floor jack at the front center lifting point to raise the vehicle.
- Place the jack stands beneath the reinforced side support points, then lower the vehicle gently onto them.
- Use the trim-clip removal tool and 10mm socket to remove the lower engine splash shield.
- Shake the vehicle lightly to confirm it is stable before going underneath.
Step 4: Support and inspect the powertrain
- Attach the engine support bar to an approved engine lifting eye and take up slack without raising the engine.
- Place the hydraulic floor jack and hardwood support block beneath a strong, flat section adjacent to the oil pan only as secondary support. Do not load the pan heavily.
- Use a paint marker to outline each mount and bracket position. These marks help preserve factory alignment.
- Inspect wiring, coolant hoses, air-conditioning lines, and exhaust flex sections. None may become tight while the engine is moved.
Step 5: Replace the right engine mount
- From the passenger side, use a 10mm or 12mm socket to release any hose and wire brackets attached around the mount.
- If the original mount has a vacuum hose, use hose-removal pliers to release it. Mark the hose position before removal.
- Use a 17mm socket and breaker bar to loosen the mount through-bolt or upper fasteners.
- Use a 14mm or 17mm socket to remove the mount-to-body fasteners.
- Adjust the engine support bar only a few millimetres until the through-bolt slides out without force.
- Lift the old mount out and compare its locating pins, bracket shape, and vacuum connection with the replacement.
- Set the new mount onto its locating points. Start every nut and bolt by hand.
- Tighten the body-side M10 fasteners with a torque wrench to 52 N·m (38 ft-lbs).
- Tighten the engine-side bracket fasteners with a torque wrench to 64 N·m (47 ft-lbs).
- Tighten the M12 mount through-bolt and locknut with a torque wrench to 87 N·m (64 ft-lbs).
- Reconnect the vacuum hose and all brackets using hose-removal pliers and the appropriate 10mm or 12mm socket.
- Do not use bolts to pull mounts into alignment.
Step 6: Replace the left transmission mount
- Keep the transmission supported by the engine support bar. Reposition the hydraulic floor jack and hardwood block under a solid transmission case rib if extra control is needed.
- Use a 12mm socket to move wire harness brackets away from the mount.
- Use a 17mm socket and breaker bar to loosen the transmission mount through-bolt.
- Use a 14mm or 17mm socket to remove the mount-to-body fasteners.
- Adjust support height slightly until the through-bolt can be removed by hand.
- Remove the mount, compare its locating features with the replacement, and install the new mount in the same direction.
- Start all fasteners by hand before tightening anything.
- Tighten the body-side M10 fasteners with a torque wrench to 52 N·m (38 ft-lbs).
- Tighten the M12 transmission mount through-bolt and locknut with a torque wrench to 95 N·m (70 ft-lbs).
- Reinstall the wire brackets with a 12mm socket and tighten their M8 bolts to 21 N·m (15 ft-lbs).
Step 7: Replace the front torque mount
- Work from beneath the front of the vehicle with the engine still supported.
- Use a 14mm or 17mm socket and breaker bar to remove the front mount through-bolt.
- Use a 14mm or 17mm socket to remove the mount-to-crossmember fasteners.
- Move the powertrain only enough to free the mount. Watch the radiator hoses and exhaust flex joint.
- Install the new mount with its locating features in the same direction as the original.
- Start all fasteners by hand and align the paint marks.
- Tighten M10 mount-to-crossmember fasteners with a torque wrench to 52 N·m (38 ft-lbs).
- Tighten the M12 through-bolt and locknut with a torque wrench to 87 N·m (64 ft-lbs).
Step 8: Gain access to the rear torque mount
- Use a work light to inspect access behind the engine. The rear mount sits between the powertrain and front suspension crossmember.
- Use a 12mm or 14mm socket to remove obstructing heat shields and brackets.
- If an exhaust section blocks the mount, use a 14mm socket and breaker bar to remove its flange fasteners. Support the exhaust before separating it.
- Do not allow the exhaust to hang from an oxygen-sensor wire or flex joint.
- If the mount cannot be removed with the crossmember fully installed, support the crossmember with the hydraulic floor jack and mark its exact position with the paint marker.
Step 9: Replace the rear torque mount
- Use a 17mm or 19mm socket, universal joint, and extensions to loosen the rear mount through-bolt.
- Use a 14mm or 17mm socket and extensions to remove the rear mount-to-crossmember fasteners.
- Adjust the engine support bar slightly until the through-bolt releases without prying.
- Remove the old mount. Install the replacement in the identical orientation and start every fastener by hand.
- Tighten M10 mount-to-crossmember fasteners with a torque wrench to 52 N·m (38 ft-lbs).
- Tighten the M12 rear mount through-bolt and locknut with a torque wrench to 87 N·m (64 ft-lbs).
- If the crossmember was loosened, align the paint marks and tighten the M14 crossmember fasteners with a torque wrench to 157 N·m (116 ft-lbs).
- A professional wheel alignment is required if the crossmember was shifted or removed.
Step 10: Reinstall removed exhaust parts and shields
- Install new exhaust flange gaskets if any flange was separated.
- Use a 14mm socket to install new exhaust locknuts. Tighten evenly, alternating sides.
- Tighten M10 exhaust flange nuts with a torque wrench to 43 N·m (32 ft-lbs).
- Use a 12mm or 14mm socket to reinstall heat shields and brackets. Tighten M8 shield bolts to 18 N·m (13 ft-lbs).
- Confirm the exhaust, oxygen-sensor wiring, and heat shields do not contact any mount or body panel.
Step 11: Settle the mounts and complete final tightening
- Confirm all mount fasteners are installed and snug.
- Reduce tension on the engine support bar slowly so the powertrain rests naturally on the new mounts.
- Check that the through-bolts remain free of sideways stress, then verify each fastener with the appropriate torque wrench.
- Remove the hydraulic floor jack, hardwood block, and engine support bar.
Step 12: Reassemble the upper engine compartment
- Use a 10mm and 12mm socket to reinstall the battery tray and wire brackets.
- Place the battery into the tray and install the hold-down with a 10mm socket. Tighten the hold-down only until the battery cannot move.
- Connect the positive battery terminal first with a 10mm socket, then connect the negative terminal. Tighten each terminal to 5.4 N·m (48 in-lbs).
- Reinstall the air-filter housing and intake duct using a 10mm socket, trim-clip removal tool, and flat-tip screwdriver.
- Reconnect the airflow-sensor electrical connector and every breather hose.
- Press the engine cover onto its rubber grommets by hand.
Step 13: Reinstall the splash shield and lower the vehicle
- Use the trim-clip removal tool and 10mm socket to reinstall the lower splash shield.
- Use the hydraulic floor jack to raise the vehicle slightly, remove both jack stands, and lower the vehicle completely.
- Remove the wheel chocks only after testing is complete.
✅ After Repair
- ✅ Before starting, inspect the engine bay for loose tools, disconnected hoses, and unplugged electrical connectors.
- ✅ Start the engine while holding the brake pedal. Let it idle in Park and listen for knocking, rattling, or excessive vibration.
- ✅ With the brake firmly applied, shift slowly through Reverse, Neutral, and Drive. Excessive engine movement indicates a loose or misaligned mount.
- ✅ Verify that no warning lights remain illuminated and that the intake hose is fully sealed.
- ✅ The power windows may require initialization after battery disconnection. Close each window fully, then hold its switch in the UP position for approximately one second.
- ✅ Check the steering wheel position during a careful road test. Arrange a four-wheel alignment if the crossmember was loosened.
- ✅ Reinspect accessible mount fasteners, hoses, and exhaust clearances after the first short drive.
💰 DIY vs Shop Cost
Shop Cost: ₹85,000-₹1,65,000 including imported parts and labor
DIY Cost: ₹45,000-₹1,05,000 for parts only
You Save: ₹30,000-₹60,000 by doing it yourself!
Local labor and imported-part prices vary significantly. This repair takes a shop approximately 6-8 hours.
🎯 Ready to get started?
HowToo makes it easy: same-day/2-day shipping on every part, plus all the tools and specialty tools you need! Check out the parts and tools sections below to add everything to your cart.