

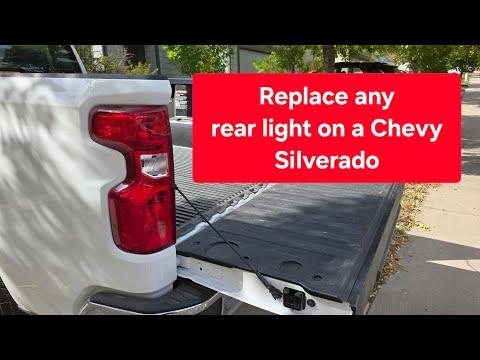







How to Replace Both Taillight Bulbs on a 2014-2023 Chevrolet Silverado 1500
Step-by-step 7443 bulb replacement with required tools, safety tips, and light testing for 2014, 2015, 2016, 2017, 2018, 2019, 2020, 2021, 2022, 2023
How to Replace Both Taillight Bulbs on a 2014-2023 Chevrolet Silverado 1500
Step-by-step 7443 bulb replacement with required tools, safety tips, and light testing for 2014, 2015, 2016, 2017, 2018, 2019, 2020, 2021, 2022, 2023


🔧 Silverado 1500 - Taillight Bulb Replacement
This is a straightforward job. Remove each rear lamp housing, change the replaceable bulb, then test the tail, brake, and turn-signal functions.
Important: These instructions apply to incandescent housings with removable bulb sockets. If your Silverado has sealed factory LED taillights and no removable socket, the complete failed lamp assembly must be replaced.
Difficulty Level: Beginner | Estimated Time: 20-40 minutes
⚠️ Safety & Precautions
- ⚠️ Switch all exterior lights off and remove the key before unplugging anything.
- ⚠️ Engage the parking brake and keep the transmission in Park.
- ⚠️ Support the housing while disconnected so it cannot scratch the paint.
- ⚠️ Do not test the brake lights while your fingers are inside a bulb socket.
- ⚠️ Battery disconnection is not required for this repair.
🔧 Required Tools
You'll need the following tools for this repair:
- Torx T15 screwdriver
- Plastic trim-removal tool
- Clean nitrile gloves
- Safety glasses
- Clean microfiber towel
🔩 Required Parts
HowToo sells all the parts you need for this repair:
- HELLA 7443 incandescent taillight bulb - Qty: 2
Replace both sides together for matching brightness. The 7443 is a dual-intensity bulb, meaning it can provide both dim tail-light and bright stop-light output.
📋 Before You Begin
- 📋 Park your Silverado on level ground and engage the parking brake.
- 📋 Turn the headlight switch to Off and remove the key.
- 📋 Open the tailgate completely to expose the lamp-housing fasteners.
- 📋 Place a microfiber towel near the housing to protect the paint.
- 📋 Confirm the replacement bulb matches the number printed on the removed bulb before installation.
🔨 Step-by-Step Instructions
Follow these steps in order:
Step 1: Remove the Driver-Side Fasteners
- Use the Torx T15 screwdriver to remove the two fasteners exposed along the inner edge of the driver-side taillight housing.
- Place the fasteners somewhere safe. They're small enough to disappear whenever the garage floor gets hungry.
Step 2: Release the Driver-Side Housing
- Hold the housing with both hands and pull it straight rearward.
- Use the plastic trim-removal tool only if the locating pins are tight.
- Do not twist the housing outward against the bedside paint.
- Do not let the housing hang by its wiring.
Step 3: Identify the Replaceable Taillight Socket
- Look behind the housing for the socket connected to the failed tail and brake-light chamber.
- Turn that socket counterclockwise approximately one-quarter turn, then pull it straight out.
- If there are no removable bulb sockets, stop. That housing uses a sealed LED assembly and the complete lamp must be replaced.
Step 4: Replace the Driver-Side Bulb
- Wear the clean nitrile gloves.
- Grip the old bulb by its plastic base and pull it straight out of the socket. Do not twist a wedge-base bulb.
- Inspect the socket for melted plastic, green corrosion, or burned terminals.
- Press one new 7443 bulb straight into the socket until fully seated.
- Never force a bulb into its socket.
Step 5: Reinstall the Driver-Side Socket
- Insert the socket into the housing with its locking tabs aligned.
- Turn the socket clockwise approximately one-quarter turn until it locks.
- Check that the socket seal sits evenly against the housing.
Step 6: Reinstall the Driver-Side Housing
- Align the housing's locating pins with the body openings.
- Press the housing straight forward until the pins seat.
- Start both fasteners by hand to avoid cross-threading them.
- Use the Torx T15 screwdriver to tighten the fasteners evenly.
- No bulb-service torque value is needed. Tighten the screws only until snug because excessive force can crack the plastic housing.
Step 7: Replace the Passenger-Side Bulb
- Repeat Steps 1 through 6 on the passenger side using the Torx T15 screwdriver, plastic trim-removal tool, and clean nitrile gloves.
- Install the second matching 7443 bulb.
- Verify both sockets are completely locked before reinstalling the housing.
Step 8: Complete a Visual Inspection
- Use the clean microfiber towel to remove fingerprints from both lenses.
- Check that both housings sit flush with the bedside.
- Confirm no wiring is pinched behind either housing.
- Close the tailgate slowly and verify adequate clearance around both lamps.
✅ After Repair
- ✅ Switch on the parking lights and confirm both taillights illuminate at equal brightness.
- ✅ Press the brake pedal while a helper watches both lamps, or position the truck where you can see their reflection.
- ✅ Test the left and right turn signals.
- ✅ Turn on the hazard lights and confirm both sides flash normally.
- ✅ If one side remains dark, rotate the bulb 180 degrees and reseat it. If it still fails, inspect the socket and connector.
- ✅ If a bulb flashes rapidly, check that the correct bulb is installed and every rear lamp is operating.
💰 DIY vs Shop Cost
Shop Cost: $60-$130 (parts + labor)
DIY Cost: $3-$25 (parts only)
You Save: $35-$105 by doing it yourself!
Shop labor rates vary but typically run $100-$150/hour. This repair takes a shop approximately 0.3-0.5 hours.
🎯 Ready to get started?
HowToo makes it easy: same-day/2-day shipping on every part, plus all the tools and specialty tools you need! Check out the parts and tools sections below to add everything to your cart.