

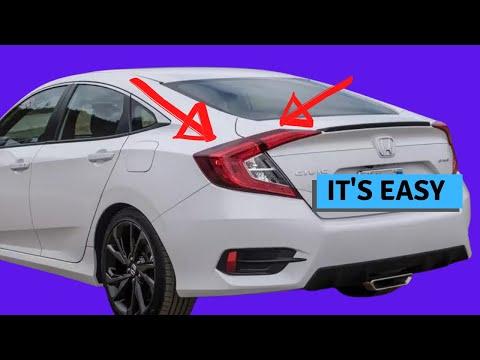







How to Replace Both Taillight Assemblies on a 2017-2021 Honda Civic (Body: Hatchback)
Step-by-step rear LED taillight repair guide with tools, parts, torque specs, and safety tips for 2017, 2018, 2019, 2020, 2021
How to Replace Both Taillight Assemblies on a 2017-2021 Honda Civic (Body: Hatchback)
Step-by-step rear LED taillight repair guide with tools, parts, torque specs, and safety tips for 2017, 2018, 2019, 2020, 2021


🔧 Civic - Rear Taillight LED Assembly Replacement
On your Civic, the rear taillight/brake light is an LED unit, not a normal twist-out bulb. If both taillights are out, first check the fuse and connector, but if the LED section has failed, the repair is replacing the taillight assembly.
Difficulty Level: Beginner | Estimated Time: 45 minutes-1.5 hours
⚠️ Safety & Precautions
- ⚠️ Park on level ground and set the parking brake before working at the rear of the car.
- ⚠️ Disconnect the negative battery terminal before unplugging taillight wiring to reduce the risk of short circuits.
- ⚠️ Use plastic trim tools only on interior panels so you do not crack the hatch trim.
- ⚠️ Do not pull hard on wiring connectors; release the locking tab first.
🔧 Required Tools
You'll need the following tools for this repair:
- 10mm socket
- 1/4-inch ratchet
- 1/4-inch 6-inch extension
- 10mm wrench
- Plastic trim removal tool
- Small flat-blade screwdriver
- Torque wrench inch-pound range
- Microfiber towel
- Nitrile gloves
- Safety glasses
🔩 Required Parts
HowToo sells all the parts you need for this repair:
- Left rear taillight assembly - Qty: 1
- Right rear taillight assembly - Qty: 1
- Taillight mounting gaskets - Qty: 2
- Replacement trim clips - Qty: As needed
📋 Before You Begin
- Park your Civic on level ground with the parking brake fully engaged.
- Open the hatch and remove loose cargo from the rear area.
- Turn all lights off and remove the key from the vehicle.
- Use a 10mm wrench to disconnect the negative battery cable.
- Assumption: This procedure is for failed taillight/brake LED sections, which are serviced by replacing the assemblies.
🔨 Step-by-Step Instructions
Follow these steps in order:
Step 1: Open the hatch and protect the paint
- Open the rear hatch fully.
- Place a microfiber towel near the taillight edge to protect the paint while you work.
- Put on safety glasses and nitrile gloves.
- Work slowly around painted edges.
Step 2: Remove the rear trim access panel
- Use a plastic trim removal tool to gently pry open the interior access cover behind the taillight.
- A trim tool is a non-metal pry tool that helps remove panels without scratching them.
- If a clip resists, use a small flat-blade screwdriver to lift the center of the clip, then remove it by hand.
Step 3: Disconnect the taillight electrical connector
- Find the wiring connector going into the rear taillight assembly.
- Use your finger or a small flat-blade screwdriver to press the connector locking tab.
- Pull the connector straight back; do not pull on the wires.
Step 4: Remove the taillight mounting nuts
- Use a 10mm socket, 1/4-inch ratchet, and 1/4-inch 6-inch extension to remove the taillight mounting nuts.
- Hold the nut with your fingers as it comes loose so it does not fall inside the trim area.
- Set the nuts somewhere safe.
Step 5: Remove the old taillight assembly
- Support the outside of the taillight with one hand.
- Gently pull the taillight straight rearward from the body.
- If it feels stuck, wiggle it lightly by hand; do not pry against the paint with metal tools.
- Remove the old gasket if it stayed on the body.
Step 6: Install the new taillight assembly
- Make sure the new taillight mounting gasket is seated flat on the replacement assembly.
- Guide the new taillight into place by hand, lining up the locating pins and mounting studs.
- Push evenly until the assembly sits flush with the body.
Step 7: Tighten the mounting nuts
- Start the mounting nuts by hand first to avoid cross-threading.
- Use a 10mm socket, 1/4-inch ratchet, and 1/4-inch 6-inch extension to snug the nuts.
- Use a torque wrench inch-pound range to tighten evenly.
- Torque to 4.5 Nm (40 in-lbs)
- Do not overtighten plastic lamp housings.
Step 8: Reconnect the wiring
- Push the wiring connector into the taillight until it clicks.
- Lightly tug the connector by hand to confirm it is locked.
Step 9: Repeat on the other side
- Use the same plastic trim removal tool, small flat-blade screwdriver, 10mm socket, 1/4-inch ratchet, 1/4-inch 6-inch extension, and torque wrench inch-pound range on the opposite taillight.
- Replace the opposite taillight assembly the same way.
- Torque to 4.5 Nm (40 in-lbs)
Step 10: Reinstall trim panels and reconnect the battery
- Snap the interior access panels back into place by hand.
- Replace any damaged trim clips with replacement trim clips.
- Use a 10mm wrench to reconnect the negative battery cable.
- Torque battery terminal snugly; do not overtighten.
✅ After Repair
- Turn the parking lights on and confirm both taillights illuminate.
- Press the brake pedal and confirm both brake lights brighten correctly.
- Check turn signals, reverse lights, and hazard lights before driving.
- Spray a small amount of water around each taillight and check inside the hatch trim for leaks.
- If both taillights were out at the same time and still do not work, check the rear lighting fuse and body wiring before replacing more parts.
💰 DIY vs Shop Cost
Shop Cost: $500-$900+ (parts + labor)
DIY Cost: $300-$700 (parts only)
You Save: $150-$250 by doing it yourself!
Shop labor rates vary but typically run $100-$150/hour. This repair takes a shop approximately 1-1.5 hours.
🎯 Ready to get started?
HowToo makes it easy: same-day/2-day shipping on every part, plus all the tools and specialty tools you need! Check out the parts and tools sections below to add everything to your cart.