
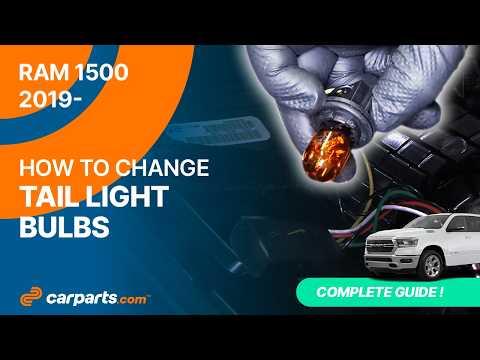







How to Replace Both Tail Light Bulbs on a 2011-2022 Ram 1500
Step-by-step rear bulb replacement guide with tools, parts, safety tips, and testing for 2011, 2012, 2013, 2014, 2015, 2016, 2017, 2019, 2020, 2021, 2022
How to Replace Both Tail Light Bulbs on a 2011-2022 Ram 1500
Step-by-step rear bulb replacement guide with tools, parts, safety tips, and testing for 2011, 2012, 2013, 2014, 2015, 2016, 2017, 2019, 2020, 2021, 2022


🔧 1500 - Tail Light Bulb Replacement
Replacing both rear tail light bulbs on your 1500 is a beginner-friendly job. Each rear lamp assembly is removed from the bedside so you can access the bulb sockets from the back.
Difficulty Level: Beginner | Estimated Time: 20-40 minutes
⚠️ Safety & Precautions
- ⚠️ Turn the ignition off and remove the key before starting.
- ⚠️ Keep the light switch in the OFF position while changing bulbs.
- ⚠️ Wear gloves or handle bulbs by the plastic base only. Skin oil can shorten bulb life.
- ⚠️ Support the tail lamp with one hand when removing it so it does not drop or scratch the paint.
- ⚠️ Battery disconnect is not normally required for this bulb replacement.
🔧 Required Tools
You'll need the following tools for this repair:
- T25 Torx screwdriver
- Plastic trim removal tool
- Nitrile gloves
- Safety glasses
- Clean microfiber towel
🔩 Required Parts
HowToo sells all the parts you need for this repair:
- Rear tail light bulbs - Replace both sides - Qty: 2
📋 Before You Begin
- Park your 1500 on level ground.
- Shift to Park and set the parking brake.
- Turn all exterior lights off.
- Open the tailgate fully to access the tail lamp screws.
- A Torx screwdriver has a star-shaped tip. Use the exact size so you do not strip the screw head.
- A plastic trim removal tool helps pry gently without scratching paint.
🔨 Step-by-Step Instructions
Follow these steps in order:
Step 1: Open the Tailgate
- Lower the tailgate completely so you can see the two screws on the inner edge of the tail lamp.
- Use safety glasses to protect your eyes while working around the body panel gaps.
Step 2: Remove the Driver-Side Tail Lamp Screws
- Use a T25 Torx screwdriver to remove the two tail lamp retaining screws on the driver-side lamp.
- Set the screws on a clean microfiber towel so they do not roll away.
- Tip: Press inward while turning.
Step 3: Pull the Driver-Side Tail Lamp Straight Rearward
- Hold the lamp with both hands and pull it straight back from the truck.
- If it feels stuck, use a plastic trim removal tool at the outer edge and gently help release the alignment pins.
- Do not twist the lamp hard. The plastic guide pins can break.
Step 4: Remove the Tail Light Bulb Socket
- Locate the tail light bulb socket on the back of the lamp assembly.
- Use your gloved hand with nitrile gloves and rotate the socket counterclockwise about a quarter turn.
- Pull the socket straight out of the lamp housing.
- A bulb socket is the plastic holder that locks the bulb into the lamp.
Step 5: Replace the Driver-Side Bulb
- Use nitrile gloves and pull the old bulb straight out of the socket.
- Push the new rear tail light bulb straight into the socket until fully seated.
- If the bulb is a dual-filament style, it may serve both tail and brake light functions in the same bulb.
- Tip: Do not touch the glass.
Step 6: Reinstall the Driver-Side Bulb Socket
- Insert the socket back into the lamp housing.
- Use your gloved hand with nitrile gloves and rotate the socket clockwise until it locks.
- Make sure the socket seal sits flat to help keep moisture out.
Step 7: Reinstall the Driver-Side Tail Lamp
- Line up the lamp guide pins with the holes in the bedside.
- Push the lamp straight forward until it sits flush with the body.
- Use the T25 Torx screwdriver to reinstall the two screws.
- Tighten snugly by hand only. Do not overtighten into the plastic lamp housing.
Step 8: Repeat on the Passenger Side
- Use the T25 Torx screwdriver to remove the two passenger-side tail lamp screws.
- Use the plastic trim removal tool only if the lamp needs gentle help releasing.
- Remove the socket by turning it counterclockwise with nitrile gloves.
- Replace the second rear tail light bulb.
- Reinstall the socket, lamp assembly, and screws the same way as the driver side.
Step 9: Check Your Work
- Turn the light switch to parking lamps and verify both tail lights illuminate.
- Press the brake pedal and verify both rear brake lights illuminate.
- Turn on the hazard flashers and confirm both rear signal bulbs work normally.
- If a bulb does not light, turn the lights off, remove the socket, and make sure the bulb is fully seated.
✅ After Repair
- Close the tailgate carefully and make sure it does not contact either lamp.
- Check the dash for any bulb-out warning message.
- After the next rain or wash, inspect the lamp lenses for moisture. Moisture may mean a socket seal was not seated flat.
- No scan tool reset is normally needed after replacing tail light bulbs on your 1500.
💰 DIY vs Shop Cost
Shop Cost: $80-$180 parts + labor
DIY Cost: $10-$35 parts only
You Save: $70-$145 by doing it yourself!
Shop labor rates vary but typically run $100-$150/hour. This repair takes a shop approximately 0.3-0.6 hours.
🎯 Ready to get started?
HowToo makes it easy: same-day/2-day shipping on every part, plus all the tools and specialty tools you need! Check out the parts and tools sections below to add everything to your cart.