

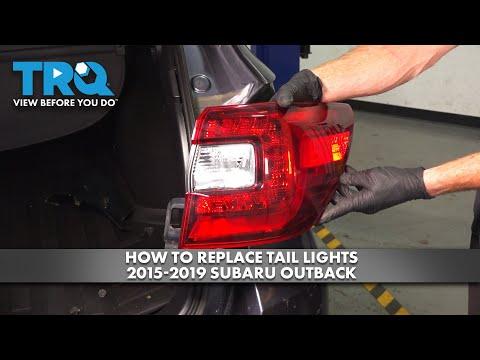







How to Replace Both Tail Light Assemblies on a 2019-2025 Subaru Ascent (Trim: Limited | Body: Sport Utility)
Step-by-step LED rear lamp replacement with tools, parts, torque specs, and safety tips for 2019, 2020, 2021, 2022, 2023, 2024
How to Replace Both Tail Light Assemblies on a 2019-2025 Subaru Ascent (Trim: Limited | Body: Sport Utility)
Step-by-step LED rear lamp replacement with tools, parts, torque specs, and safety tips for 2019, 2020, 2021, 2022, 2023, 2024


🔧 Ascent - Tail Light Assembly Replacement
Your Ascent doesn’t have replaceable bulbs for the red tail and brake lights. Those functions use LEDs built into each outer rear light assembly. If the red running light has failed on both sides, replace both assemblies rather than trying to install bulbs. The backup, rear turn-signal, and side-marker bulbs are individually replaceable. static.nhtsa.gov)
Difficulty Level: Beginner | Estimated Time: 30-60 minutes
⚠️ Safety & Precautions
- ⚠️ Switch off all exterior lights and remove the key from the vehicle.
- ⚠️ Turn off the power rear gate before working beside the open liftgate.
- ⚠️ Support each lamp while disconnecting it so it cannot strike the paint.
- ⚠️ Pull the lamp straight rearward. Twisting it can break its plastic guide pins.
- ⚠️ Battery disconnection isn’t normally required for this repair.
🔧 Required Tools
You'll need the following tools for this repair:
- 10mm socket
- 1/4-inch drive ratchet
- 1/4-inch drive extension (3-inch)
- Inch-pound torque wrench (specialty)
- Plastic trim removal tool
- Clean nitrile gloves
- Safety glasses
- Painter’s tape (1-inch)
🔩 Required Parts
HowToo sells all the parts you need for this repair:
- Left outer rear combination light assembly - Qty: 1
- Right outer rear combination light assembly - Qty: 1
- Rear combination light seals - Qty: 2, if not included
If you meant the serviceable bulbs inside the housings, use two bulbs of the correct function: W5W side-marker, WY21W amber turn-signal, or W16W backup. Don’t substitute one type for another.
📋 Before You Begin
- 📋 Park your Ascent on level ground and select Park.
- 📋 Open the liftgate and switch the exterior lights off.
- 📋 Apply painter’s tape around the inner edge of each lamp to protect the paint.
- 📋 Compare the new left and right assemblies with the originals before removing anything.
🔨 Step-by-Step Instructions
Follow these steps in order:
Step 1: Remove the left lamp covers
- Use the plastic trim removal tool to lift the small covers beside the left rear combination light.
- Work gently around each edge rather than prying hard from one point.
- Warm plastic clips release more easily.
Step 2: Remove the left mounting bolts
- Use the 10mm socket, extension, and ratchet to remove the upper and lower mounting bolts.
- Hold the lamp with one hand while removing the final bolt.
- Put the hardware somewhere safe. It has a remarkable talent for disappearing.
Step 3: Release the left assembly
- Grip the housing with both hands and pull it straight toward the rear of the vehicle.
- Use steady pressure to release the guide pins and clips.
- Don’t lever the painted edge with a screwdriver.
Step 4: Disconnect the electrical connector
- Support the assembly with one hand.
- Press the connector’s locking tab with your fingers and pull the connector straight apart.
- Inspect the connector for moisture, green corrosion, or overheated terminals.
Step 5: Replace a serviceable bulb if applicable
- If you’re replacing a turn-signal, side-marker, or backup bulb, turn the appropriate socket counterclockwise by hand.
- Pull the old wedge-style bulb straight out of its socket using clean nitrile gloves.
- Push the identical replacement bulb fully into the socket.
- Insert the socket and turn it clockwise until it locks. Subaru identifies these three serviceable positions as backup, side-marker, and rear turn-signal bulbs. cdn.dealereprocess.org
Step 6: Install the new left LED assembly
- Connect the electrical plug until its locking tab clicks.
- Align the guide pins, catches, and clips with their openings in the body.
- Push the lamp straight forward until it sits evenly against the body.
- Make sure the wiring isn’t trapped behind the housing.
Step 7: Secure the left assembly
- Start both bolts by hand to prevent cross-threading.
- Use the 10mm socket and inch-pound torque wrench to tighten the mounting bolts to 7.5 Nm (66 in-lbs or 5.5 ft-lbs). static.nhtsa.gov
- Reinstall the plastic covers by aligning their clips and pressing them into place.
Step 8: Repeat on the right side
- Use the same plastic trim tool, 10mm socket, ratchet, and torque wrench for the right assembly.
- Pull the housing straight rearward and transfer any serviceable bulbs only when required.
- Tighten the right lamp mounting bolts to 7.5 Nm (66 in-lbs or 5.5 ft-lbs).
✅ After Repair
- ✅ Switch on the parking lights and verify that both red tail lights illuminate evenly.
- ✅ Press the brake pedal while a helper checks both brake lights.
- ✅ Test the left and right turn signals.
- ✅ Shift briefly into Reverse with the brake firmly applied and verify both backup lights.
- ✅ Check that both housings sit flush and that every trim cover is secure.
- ✅ If a new LED assembly still doesn’t work, inspect the connector and fuse before replacing more parts.
💰 DIY vs Shop Cost
Shop Cost: $600-$900 for two complete LED assemblies, parts and labor
DIY Cost: $430-$650 for two assemblies
You Save: $150-$300 by doing it yourself!
Shop labor rates vary but typically run $100-$150/hour. This repair takes a shop approximately 0.5-1.0 hour.
🎯 Ready to get started?
HowToo makes it easy: same-day/2-day shipping on every part, plus all the tools and specialty tools you need! Check out the parts and tools sections below to add everything to your cart.