







How to Replace Both Oxygen Sensors on a 2019 Chevrolet Equinox
Step-by-step instructions with tools, parts, torque specs, and safety tips for 2018, 2019, 2020
How to Replace Both Oxygen Sensors on a 2019 Chevrolet Equinox
Step-by-step instructions with tools, parts, torque specs, and safety tips for 2018, 2019, 2020


🔧 Oxygen Sensor - Replacement
On your Equinox, replacing all oxygen sensors means replacing both sensors in the exhaust: the upstream sensor before the catalytic converter and the downstream sensor after it. These sensors help the engine computer control fuel mixture and check catalytic converter efficiency.
Difficulty Level: Intermediate | Estimated Time: 1.5-2.5 hours
⚠️ Safety & Precautions
- Let the exhaust cool completely before starting. The manifold, catalyst, and sensors can stay very hot.
- Disconnect the negative battery cable if you will be using a scan tool to clear codes after the repair.
- Use jack stands on level ground if you need access under the vehicle. Never rely on a jack alone.
- Do not pull on the sensor wiring. Unplug the connector first.
- Use care around the turbo and exhaust plumbing. Space is tight and edges can be sharp.
🔧 Required Tools
You'll need the following tools for this repair:
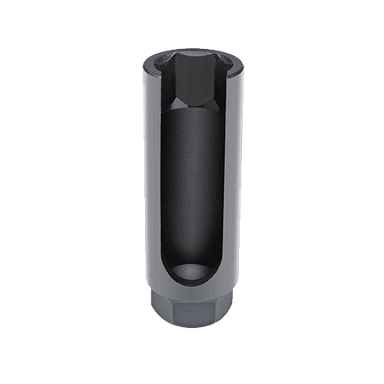
- Oxygen sensor socket 22mm
- Ratchet
- 3/8-inch drive breaker bar
- Extensions
- Penetrating oil
- Jack stands
- Floor jack
- Wheel chocks
- Safety glasses
- Mechanic gloves
- Torque wrench
- OBD-II scan tool
🔩 Required Parts
HowToo sells all the parts you need for this repair:
- Upstream oxygen sensor - Qty: 1
- Downstream oxygen sensor - Qty: 1
📋 Before You Begin
- Park on level ground, set the parking brake, and let the exhaust fully cool.
- Raise the vehicle only if needed for the downstream sensor. Support it with jack stands.
- Spray the sensor threads with penetrating oil and let it soak for a few minutes.
- If the check engine light is on, note the codes before clearing them.
🔨 Step-by-Step Instructions
Follow these steps in order:
Step 1: Locate both oxygen sensors
- Find the upstream sensor threaded into the exhaust before the catalytic converter.
- Find the downstream sensor threaded into the exhaust after the catalytic converter.
- Trace the wires before unplugging.
Step 2: Unplug the upstream sensor
- Use your hands to release the connector lock and unplug the upstream sensor harness.
- Move the wiring clip free if it is attached to a bracket.
Step 3: Remove the upstream sensor
- Use the oxygen sensor socket 22mm and ratchet with extensions if needed.
- Break the sensor loose carefully, then spin it out by hand.
- Do not twist the harness while removing the sensor.
Step 4: Install the upstream sensor
- Thread the new sensor in by hand first to avoid cross-threading.
- Use the oxygen sensor socket 22mm and torque wrench.
- Torque to 40 Nm (30 ft-lbs).
- Reconnect the electrical connector until it clicks.
Step 5: Unplug the downstream sensor
- Use your hands to release the connector lock and unplug the downstream sensor harness.
- Free the wire from any clips before removal.
Step 6: Remove the downstream sensor
- Use the oxygen sensor socket 22mm, ratchet, and breaker bar if needed.
- Turn the sensor counterclockwise until it comes out.
- Short bursts help if it is stubborn.
Step 7: Install the downstream sensor
- Thread the new sensor in by hand first.
- Use the oxygen sensor socket 22mm and torque wrench.
- Torque to 40 Nm (30 ft-lbs).
- Reconnect the connector and secure the wiring in its clips.
Step 8: Clear codes and verify repair
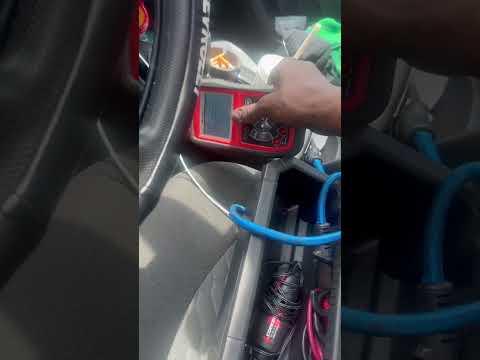
- Use the OBD-II scan tool to clear any stored fault codes.
- Start the engine and check for exhaust leaks and warning lights.
- Make sure the wiring is not touching the exhaust.
✅ After Repair
- Drive the vehicle normally and watch for the check engine light to return.
- Re-scan for codes after a short drive cycle if the light stays off.
- Check again for loose connectors or exhaust leaks after the test drive.
💰 DIY vs Shop Cost
Shop Cost: $350-$700 (parts + labor)
DIY Cost: $120-$280 (parts only)
You Save: $230-$420 by doing it yourself!
Shop labor rates vary but typically run $100-$150/hour. This repair takes a shop approximately 1.5-2.5 hours.
🎯 Ready to get started?
HowToo makes it easy: same-day/2-day shipping on every part, plus all the tools and specialty tools you need! Check out the parts and tools sections below to add everything to your cart.