

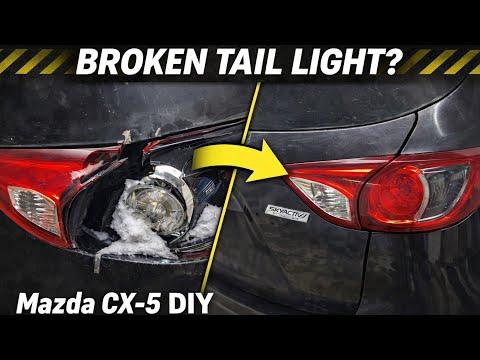







How to Replace Both LED Taillight Assemblies on a 2017-2021 Mazda CX-5
Step-by-step removal, fuse checks, required tools, parts, and safety tips for 2017, 2018, 2019, 2020, 2021
How to Replace Both LED Taillight Assemblies on a 2017-2021 Mazda CX-5
Step-by-step removal, fuse checks, required tools, parts, and safety tips for 2017, 2018, 2019, 2020, 2021


🔧 CX-5 - Taillight Replacement
Your Grand Touring doesn’t have replaceable taillight bulbs. Its brake, taillight, and rear side-marker LEDs are built into each outer lamp assembly. If both sides have failed, replace both assemblies only after checking the shared taillight fuse and electrical supply. Mazda identifies these lights as integrated LEDs rather than individual bulbs. mazdausa.com)
Difficulty Level: Beginner | Estimated Time: 45-90 minutes
Assumption: You mean the red outer lamps beside the liftgate.
⚠️ Safety & Precautions
- ⚠️ Switch the ignition and all exterior lights completely off.
- Wear safety glasses and gloves because a damaged housing can have sharp plastic edges.
- Never pull the lamp outward sideways. Pull it straight toward the rear to protect its locating pins.
- Do not touch connector terminals with a screwdriver because that can cause a short circuit.
- Battery disconnection normally isn’t required, provided the ignition and lights remain off.
- If both lamps stopped together, diagnose the circuit before purchasing two expensive assemblies.
🔧 Required Tools
You'll need the following tools for this repair:
- Small flathead screwdriver
- Plastic trim-removal tool
- Phillips No. 2 screwdriver
- 1/4-inch drive ratchet
- 8mm and 10mm socket set
- Microfiber cloth
- Masking tape
- Electrical contact cleaner
- Safety glasses
- Nitrile work gloves
🔩 Required Parts
HowToo sells all the parts you need for this repair, although the catalog list may take a moment to update:
- Left LED outer taillight assembly - Qty: 1
- Right LED outer taillight assembly - Qty: 1
- Taillight mounting clips or grommets - Qty: As needed
Match the replacement housings to the Grand Touring LED design. Standard bulb-style housings aren’t interchangeable without wiring and configuration changes.
📋 Before You Begin
- Park your CX-5 on level ground, select Park, and engage the parking brake.
- Open the liftgate and remove loose cargo near the rear corners.
- Confirm the lamps are actually defective. Turn on the parking lights and press the brake pedal with a helper watching.
- If neither taillight illuminates, inspect the 15A TAIL fuse first. Mazda lists that fuse as supplying the taillights, parking lights, and license-plate lights. mazdausa.com
- Compare the new assemblies with the originals before removing anything.
🔨 Step-by-Step Instructions
Follow these steps in order:
Step 1: Protect the Bodywork
- Use masking tape to cover the painted edges surrounding the first taillight.
- Wrap the small flathead screwdriver in the microfiber cloth.
- Tape is cheaper than paintwork.
Step 2: Remove the Fastener Cover
- Use the wrapped small flathead screwdriver or plastic trim-removal tool to lift the cover beside the taillight.
- Pry only at the cover’s intended notch. Do not force the tool deeply behind the lamp.
- Mazda specifically directs using a cloth-wrapped screwdriver to prevent cover damage. mazdausa.com
Step 3: Remove the Lamp Fasteners
- Use the Phillips No. 2 screwdriver to remove screw-type fasteners.
- If your replacement location uses hex-head fasteners, remove them with the matching 8mm or 10mm socket and 1/4-inch drive ratchet.
- Keep the fasteners organized for installation.
Step 4: Release the Taillight Assembly
- Hold the lamp with both gloved hands.
- Pull the assembly straight toward the rear, parallel with the vehicle’s centerline.
- Do not twist the lamp or pry it sideways against the painted quarter panel.
- Mazda’s removal direction is rearward after removing the fasteners. mazdausa.com)
Step 5: Disconnect the Wiring
- Support the loose assembly with one hand so it cannot hang from its wiring.
- Press the connector’s locking tab with your fingers and pull the connector straight apart.
- Use electrical contact cleaner only if the terminals show dirt or light oxidation. Allow them to dry fully.
- Stop if you find melted plastic, green corrosion, or water inside the connector.
Step 6: Install the New Assembly
- Push the electrical connector into the new assembly until its lock clicks.
- Switch the parking lights on briefly and verify that the new lamp works.
- Switch the lights and ignition off again before securing the lamp.
- Align every locating pin with its body grommet, then press the assembly straight forward by hand.
Step 7: Reinstall the Fasteners
- Start each fastener by hand to prevent cross-threading.
- Tighten screw-type fasteners with the Phillips No. 2 screwdriver until seated and lightly snug.
- Mazda’s owner procedure doesn’t publish a torque value for these lamp screws. Do not overtighten them because the plastic mounting tabs can crack.
- Reinstall the trim cover using finger pressure.
Step 8: Replace the Opposite Assembly
- Repeat Steps 1 through 7 on the other side using the same tools.
- Before tightening, compare the gaps around both lamp assemblies for even alignment.
✅ After Repair
- Test the parking lights, brake lights, hazard lights, turn signals, and rear side markers.
- Check that both lamps have similar brightness and operate without flickering.
- Verify that the license-plate lights work. If they’re also out, inspect the shared TAIL circuit.
- Spray water gently around each lamp and inspect the cargo area for leaks.
- No infotainment reset, coding, or battery registration is normally required for like-for-like assemblies.
💰 DIY vs Shop Cost
Shop Cost: Approximately ₹55,000-₹1,20,000 for two LED assemblies plus labor
DIY Cost: Approximately ₹45,000-₹1,00,000 for two assemblies
You Save: Approximately ₹5,000-₹20,000 by doing it yourself!
Prices in Haryana vary significantly between genuine Mazda, imported, used, and aftermarket assemblies. This repair usually takes a shop approximately 0.5-1.0 hour.
🎯 Ready to get started?
HowToo makes it easy: same-day/2-day shipping on every available part, plus all the tools and specialty tools you need! Check the parts and tools sections below to add everything to your cart.