


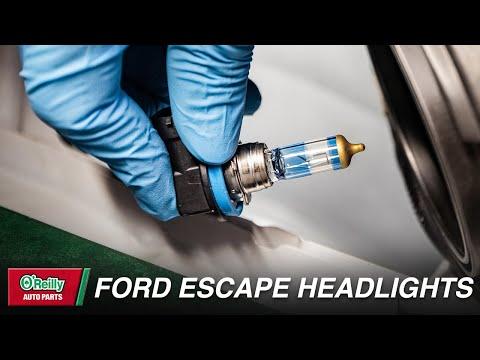






How to Replace Both Headlight Bulbs on a 2017-2025 Ford Escape
Step-by-step H11LL low-beam bulb replacement with parts, tools, and safety tips for 2017, 2018, 2019, 2020, 2021, 2022, 2023, 2024, 2025
How to Replace Both Headlight Bulbs on a 2017-2025 Ford Escape
Step-by-step H11LL low-beam bulb replacement with parts, tools, and safety tips for 2017, 2018, 2019, 2020, 2021, 2022, 2023, 2024, 2025


🔧 Escape - Low-Beam Headlight Bulb Replacement
Replace both low-beam bulbs together so their brightness and color match. On the standard halogen reflector lamps, your Escape uses H11LL low-beam bulbs. This procedure assumes the original halogen housings, not the optional HID system. fordservicecontent.com
Difficulty Level: Beginner | Estimated Time: 20-40 minutes
⚠️ Safety & Precautions
- 🌡️ Switch the lights off and let both bulbs cool completely.
- 🧤 Hold each new bulb only by its plastic base. Skin oil can create a hot spot and shorten its life.
- 🧼 If you touch the glass, clean it with rubbing alcohol and a lint-free cloth.
- ⚡ Battery disconnection is not required, but the ignition and exterior lights must remain off.
- 💡 Stop if the original bulb is marked D3S. That identifies the high-voltage HID system, which uses a different procedure.
🔧 Required Tools
You'll need the following tools for this repair:
- Nitrile gloves
- Safety glasses
- LED work light
- Lint-free cloth
🔩 Required Parts
HowToo sells all the parts you need for this repair:
- H11LL halogen low-beam headlight bulbs - Qty: 2
- Isopropyl rubbing alcohol - Qty: 1 small bottle
Use matching bulbs from the same series and replace them as a pair. One fresh bulb beside one tired bulb always looks a little wonky.
📋 Before You Begin
- 🅿️ Park your Escape on level ground, select Park, apply the parking brake and switch off the ignition.
- 🔦 Turn the lighting control to Off and open the hood.
- 📦 Open the bulb packages without touching the glass.
- 🔍 Look through the rear access area and confirm each replacement matches the removed bulb’s connector and locking tabs.
🔨 Step-by-Step Instructions
Follow these steps in order:
Step 1: Locate the low-beam bulb
- Use the LED work light to look behind the headlamp assembly.
- The low beam sits behind a round service cap on the rear of each housing.
- Do not confuse it with the separate high-beam bulb.
Step 2: Create access on the passenger side
- Put on the safety glasses and nitrile gloves.
- Lift the coolant reservoir tank slightly and rotate it inward for more hand clearance. Ford specifies this access step for the right-side low beam. Do not disconnect its hoses. fordservicecontent.com
- Move it only as far as needed.
Step 3: Remove the rear service cap
- Grip the low-beam service cap by hand.
- Rotate or release the cap, then remove it from the housing.
- Set it somewhere clean so dirt cannot enter the headlamp.
Step 4: Disconnect the old bulb
- Press the electrical connector’s locking tab by hand.
- Pull the connector straight from the bulb’s plastic base.
- Pull on the connector, not the wires.
Step 5: Remove the old bulb
- Grip the bulb’s plastic base with your gloved hand.
- Rotate the bulb counterclockwise until its locking tabs release.
- Pull the bulb straight out of the housing. Ford uses this twist-lock procedure for the halogen low beam. fordservicecontent.com
Step 6: Install the new bulb
- Compare the new bulb with the removed bulb before installation.
- Hold the new bulb only by its plastic base using the nitrile gloves.
- Align its locking tabs with the openings in the headlamp housing.
- Insert it fully, then rotate it clockwise until firmly locked.
- Do not force it. Misaligned tabs can damage the bulb or housing.
Step 7: Reconnect and seal the housing
- Push the electrical connector onto the bulb until its lock engages.
- Reinstall the service cap and make sure it seals evenly around the housing.
- A loose cap can allow dust and moisture inside the headlamp.
Step 8: Replace the opposite bulb
- Repeat Steps 3 through 7 on the driver-side headlamp.
- Return the passenger-side coolant reservoir to its original seated position.
- Check that no wiring or hoses are pinched.
✅ After Repair
- 💡 Close the hood, start the Escape and switch on the low beams.
- 👀 Confirm that both bulbs illuminate with matching brightness and color.
- 🔄 Test the high beams separately to ensure the correct bulbs were replaced.
- 🏠 Aim the vehicle toward a flat wall and verify both low-beam patterns sit at approximately the same height.
- 💧 Check both service caps again if condensation appears inside either housing.
💰 DIY vs Shop Cost
Shop Cost: $80-$180 (parts + labor)
DIY Cost: $18-$65 (parts only)
You Save: $62-$115 by doing it yourself!
Shop labor rates vary but typically run $100-$150/hour. This repair takes a shop approximately 0.3-0.5 hours.
🎯 Ready to get started?
HowToo makes it easy: same-day/2-day shipping on every part, plus all the tools and specialty tools you need! Check out the parts and tools sections below to add everything to your cart.
