
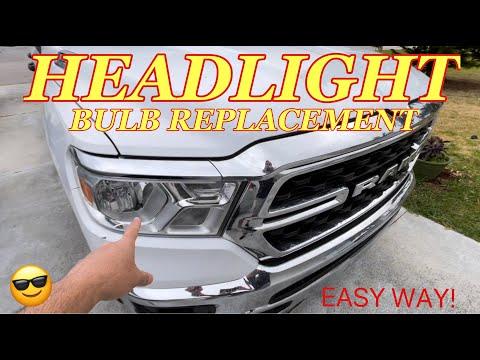






How to Replace Both Headlight Bulbs on a 2016-2022 Ram 1500 (Trim: Laramie | Engine: V8 5.7L)
Step-by-step guide with grille removal, tools, parts, torque specs, and safety tips for 2016, 2017, 2018, 2021
How to Replace Both Headlight Bulbs on a 2016-2022 Ram 1500 (Trim: Laramie | Engine: V8 5.7L)
Step-by-step guide with grille removal, tools, parts, torque specs, and safety tips for 2016, 2017, 2018, 2021


🔧 1500 - Headlight Bulb Replacement
Replacing both headlight bulbs on your 1500 requires removing the front grille and pulling each headlamp assembly forward for access. This is normal on this truck because the bulbs are not easily reachable from behind the housings.
Difficulty Level: Beginner | Estimated Time: 1-2 hours
⚠️ Safety & Precautions
- ⚠️ Turn the headlights and ignition off before starting.
- ⚠️ Let the headlight bulbs cool before touching nearby parts.
- ⚠️ Disconnect the negative battery cable to prevent accidental shorts while unplugging lamp connectors.
- ⚠️ Your 1500 has a mild-hybrid eTorque system; do not touch orange high-voltage wiring or connectors.
- ⚠️ Never touch the glass part of a halogen bulb with bare fingers. Skin oil can create hot spots and shorten bulb life.
- ⚠️ Support the headlamp assembly with one hand when removing the last bolt so it does not drop or scratch the bumper.
🔧 Required Tools
You'll need the following tools for this repair:
- 10mm socket
- 8mm socket
- Ratchet handle
- 6-inch socket extension
- Trim clip removal tool
- Flat-blade screwdriver
- Needle-nose pliers
- Painter's tape
- Clean nitrile gloves
- Microfiber towel
- Safety glasses
🔩 Required Parts
HowToo sells all the parts you need for this repair:
- Low beam headlight bulbs - Replace in pairs - Qty: 2
- High beam headlight bulbs - Replace in pairs - Qty: 2
- Front grille push clips - Qty: As needed
📋 Before You Begin
- Park your 1500 on level ground, shift to Park, and set the parking brake.
- Turn the headlight switch to OFF.
- Open the hood and allow the front lamps to cool.
- Use painter's tape along the upper bumper edge and grille edges to help prevent scratches.
- Disconnect the negative battery cable using a 10mm socket. A negative battery cable is the black cable marked with a minus symbol.
- Keep the doors closed after battery disconnect to reduce unnecessary electrical wake-up cycles.
🔨 Step-by-Step Instructions
Follow these steps in order:
Step 1: Protect the Painted Surfaces
- Use painter's tape to cover the upper bumper edge below each headlamp and the grille-to-fender edges.
- Place a microfiber towel on the bumper while working near each lamp.
- Take your time here.
Step 2: Remove the Upper Radiator Cover Clips
- Use a trim clip removal tool to lift the center pin of each plastic push clip across the upper radiator cover.
- Remove the clips by hand once the center pins are raised.
- A trim clip removal tool is a small fork-shaped pry tool that lifts plastic clips without breaking them.
- Set the clips aside in order so they go back into the same locations.
Step 3: Remove the Upper Radiator Cover
- Lift the upper radiator cover straight up by hand.
- If a clip sticks, use the trim clip removal tool gently under the edge.
- Do not bend the cover sharply because the plastic can crack.
Step 4: Remove the Grille Fasteners
- Use a 10mm socket, 6-inch extension, and ratchet handle to remove the upper grille bolts.
- Use an 8mm socket and ratchet handle if any smaller grille screws are fitted at the upper corners.
- Keep all bolts in a small cup so they do not fall into the engine bay.
Step 5: Release and Remove the Grille
- Hold the grille with both hands near the left and right sides.
- Pull straight forward with steady pressure to release the lower retaining clips.
- Use a flat-blade screwdriver wrapped in a microfiber towel only if a clip is stubborn.
- Set the grille face-up on a clean towel.
- Do not twist the grille.
Step 6: Remove the Driver-Side Headlamp Bolts
- Use a 10mm socket, 6-inch extension, and ratchet handle to remove the visible headlamp retaining bolts.
- Support the headlamp assembly with your free hand while removing the last bolt.
- Keep the bolts separated from the grille bolts.
Step 7: Release the Driver-Side Rear Headlamp Lock
- Look behind the inner fender area at the rear of the headlamp for the sliding lock tab.
- Use needle-nose pliers to pull or slide the lock tab to the released position.
- The lock tab is a plastic retainer that secures the rear of the headlamp assembly to the truck body.
- Do not force the lamp forward until this lock is fully released.
Step 8: Pull the Driver-Side Headlamp Assembly Forward
- Use both hands to pull the headlamp assembly straight forward from the body.
- If it feels stuck, gently rock it by hand while pulling forward.
- Do not pry against painted surfaces with a screwdriver.
Step 9: Disconnect the Driver-Side Headlamp Wiring
- Press the connector lock tab by hand and unplug the main headlamp electrical connector.
- Use a flat-blade screwdriver only to gently help depress the connector tab if it is tight.
- Do not pull on the wires; pull on the connector body only.
Step 10: Replace the Driver-Side Low Beam Bulb
- Put on clean nitrile gloves before handling the new bulb.
- Remove the round rear dust cap by turning it counterclockwise by hand.
- Turn the low beam bulb socket counterclockwise by hand and pull it out of the housing.
- Unplug the old bulb from the connector by hand.
- Plug in the new low beam bulb by hand until it clicks.
- Install the bulb into the housing and turn it clockwise by hand until locked.
- Reinstall the dust cap by turning it clockwise by hand until seated.
Step 11: Replace the Driver-Side High Beam Bulb
- Remove the high beam dust cap by turning it counterclockwise by hand.
- Turn the high beam bulb socket counterclockwise by hand and remove it.
- Disconnect the old bulb by hand.
- Connect the new high beam bulb by hand.
- Install the new bulb into the housing and turn it clockwise by hand until fully locked.
- Reinstall the high beam dust cap by hand.
Step 12: Reinstall the Driver-Side Headlamp Assembly
- Reconnect the headlamp wiring connector by hand until the lock clicks.
- Slide the headlamp assembly straight into position by hand.
- Use a 10mm socket, 6-inch extension, and ratchet handle to reinstall the headlamp bolts.
- Torque to 7 Nm (62 in-lbs)
- Use needle-nose pliers to return the rear headlamp lock tab to the locked position.
Step 13: Repeat on the Passenger Side
- Use a 10mm socket, 6-inch extension, and ratchet handle to remove the passenger-side headlamp bolts.
- Use needle-nose pliers to release the rear headlamp lock tab.
- Pull the headlamp assembly straight forward by hand.
- Disconnect the wiring connector by hand.
- Replace the low beam and high beam bulbs the same way as the driver side.
- Reinstall the passenger-side headlamp assembly using the 10mm socket and ratchet handle.
- Torque to 7 Nm (62 in-lbs)
- Lock the rear headlamp tab with needle-nose pliers.
Step 14: Test the Headlights Before Installing the Grille
- Reconnect the negative battery cable using a 10mm socket.
- Torque to 5 Nm (44 in-lbs)
- Turn the ignition to RUN without starting the engine.
- Turn on low beams, high beams, parking lamps, and turn signals.
- If any bulb does not work, turn lights OFF and check the connector seating by hand.
Step 15: Reinstall the Grille
- Line up the grille tabs by hand with the lower retainers.
- Press the grille straight rearward by hand until the lower clips snap into place.
- Use a 10mm socket, 6-inch extension, and ratchet handle to reinstall the upper grille bolts.
- Torque to 6 Nm (53 in-lbs)
- Use an 8mm socket and ratchet handle to reinstall any smaller upper corner screws if equipped.
- Torque to 3 Nm (27 in-lbs)
Step 16: Reinstall the Upper Radiator Cover
- Place the upper radiator cover back into position by hand.
- Push each plastic clip body into place by hand.
- Press the center pin down by hand until it sits flush.
- Remove the painter's tape and wipe the area with a microfiber towel.
✅ After Repair
- ✅ Start your 1500 and verify both low beams and high beams work.
- ✅ Check that the turn signals and parking lamps still work after reconnecting the lamp assemblies.
- ✅ Park 25 feet from a wall on level ground and confirm both beams are even and not aimed too high.
- ✅ If the light pattern looks uneven, recheck that each bulb is fully locked into the housing.
- ✅ If a battery message appears after reconnecting the battery, drive normally for a short trip so the modules can relearn.
💰 DIY vs Shop Cost
Shop Cost: $180-$380 (parts + labor)
DIY Cost: $40-$160 (parts only)
You Save: $140-$220 by doing it yourself!
Shop labor rates vary but typically run $100-$150/hour. This repair takes a shop approximately 1-1.5 hours.
🎯 Ready to get started?
HowToo makes it easy: same-day/2-day shipping on every part, plus all the tools and specialty tools you need! Check out the parts and tools sections below to add everything to your cart.