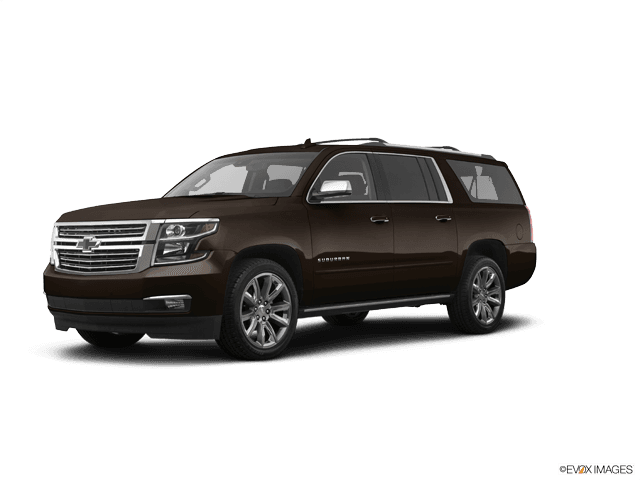







How to Replace Both Headlight Bulbs on a 2015-2020 Chevrolet Suburban (Trim: Premier)
Step-by-step D3S HID low-beam replacement with tools, parts, and safety tips for 2015, 2016, 2017, 2018, 2019, 2020
How to Replace Both Headlight Bulbs on a 2015-2020 Chevrolet Suburban (Trim: Premier)
Step-by-step D3S HID low-beam replacement with tools, parts, and safety tips for 2015, 2016, 2017, 2018, 2019, 2020


🔧 Suburban - Both Low-Beam Headlight Bulb Replacement
This procedure replaces the left and right factory HID low-beam bulbs on your Suburban. The Premier uses high-voltage D3S 35-watt HID bulbs; replacing both together keeps the color and brightness matched.
Difficulty Level: Intermediate | Estimated Time: 1-2 hours
Assumption: “Both headlight bulbs” means both factory HID low-beam bulbs, not the separate high beams.
⚠️ Safety & Precautions
- ⚡ HID headlights produce dangerously high voltage. Switch the lights off, disconnect the battery, and never power a bulb outside the housing.
- 🧤 Allow the headlights to cool for at least 10 minutes before touching nearby components.
- 🔋 Disconnecting the negative battery cable is required before opening either HID bulb housing.
- 👓 Wear safety glasses and nitrile gloves. A damaged HID bulb can shatter.
- 🚫 Never touch the new bulb’s glass capsule. Skin oil can shorten its life.
- 💡 Replace both bulbs as a matched pair, even if only one has failed.
- ⚠️ Do not substitute LED or halogen bulbs in the factory HID housings.
🔧 Required Tools
You'll need the following tools for this repair:
- 10mm socket
- 1/4-inch drive ratchet
- 1/4-inch drive 6-inch extension
- 7mm socket
- Torx T15 screwdriver
- Plastic trim-clip removal tool
- Small flat-blade screwdriver
- LED work light
- Nitrile gloves
- Safety glasses
🔩 Required Parts
HowToo sells all the parts you need for this repair:
- D3S 35-watt HID low-beam headlight bulbs - Qty: 2
- Front wheelhouse liner push clips - Qty: 4
Use name-brand bulbs with matching color temperature, ideally near the factory specification of approximately 4300K. Replace in pairs.
📋 Before You Begin
- 🅿️ Park your Suburban on level ground, select Park, apply the parking brake, and switch all exterior lights off.
- 🔑 Keep the key fob away from the vehicle so the lighting system cannot be activated accidentally.
- 🛞 Turn the steering wheel fully away from the side being serviced to create space at the front wheelhouse liner.
- 🔋 Open the hood. Use a 10mm socket and ratchet to disconnect the negative battery cable, then isolate it from the terminal.
- ⏱️ Wait at least 10 minutes after disconnecting the battery before opening either HID housing.
🔨 Step-by-Step Instructions
Follow these steps in order:
Step 1: Create Access at the Left Headlight
- Turn the steering wheel fully to the right. This opens working space ahead of the left-front tire.
- Use a 7mm socket and ratchet or a Torx T15 screwdriver, as fitted, to remove the forward wheelhouse-liner screws.
- Use a plastic trim-clip removal tool to release the forward push clips without tearing the liner.
- Pull only the front section of the liner backward. Full liner or wheel removal is normally unnecessary.
- Place every fastener in a labeled cup.
Step 2: Remove the Left Headlight Rear Cover
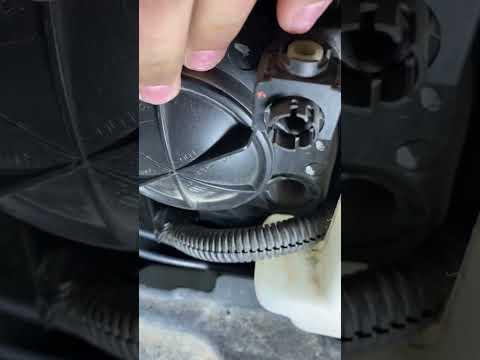
- Use an LED work light to locate the round low-beam dust cover behind the outboard projector lamp.
- Turn the cover counterclockwise by hand and remove it.
- Inspect the cover seal. It must remain clean and fully seated to prevent condensation.
- Do not use pliers on the cover because the plastic can crack.
Step 3: Remove the Left HID Bulb
- Use your gloved hand to release the bulb’s electrical connector. If its lock is difficult to reach, gently lift the lock with a small flat-blade screwdriver.
- Do not pull on the wires.
- Rotate the D3S bulb base counterclockwise until it unlocks, then withdraw it straight out.
- Note the bulb-tab position before removal. The replacement must sit in the same orientation.
Step 4: Install the New Left HID Bulb
- Keep nitrile gloves on and remove the new D3S bulb from its packaging by holding only the plastic base.
- Align the bulb tabs with the projector opening. Insert the bulb straight in without letting the glass touch the housing.
- Rotate the bulb clockwise by hand until it stops and locks securely.
- Reconnect the electrical connector by hand until its lock clicks.
- Do not apply grease to the bulb, connector, or seal.
Step 5: Seal and Reassemble the Left Side
- Position the round dust cover over the opening and rotate it clockwise by hand until fully locked.
- Confirm the cover seal is even all the way around. A loose cover can allow water into the headlamp.
- Return the wheelhouse liner to its original position.
- Use the plastic trim-clip removal tool by hand to install reusable clips, replacing any damaged clips.
- Use the Torx T15 screwdriver or 7mm socket and ratchet to reinstall the original screws.
- Tighten the small liner screws only until seated. No published service torque is required; do not overtighten the plastic liner.
Step 6: Create Access at the Right Headlight
- Turn the steering wheel fully to the left. This opens working space ahead of the right-front tire.
- Use a 7mm socket and ratchet or Torx T15 screwdriver, as fitted, to remove the forward liner screws.
- Use a plastic trim-clip removal tool to release the forward push clips.
- Pull the front section of the liner backward carefully.
Step 7: Replace the Right HID Bulb
- Use an LED work light to locate the round cover behind the right low-beam projector.
- Turn the cover counterclockwise by hand and remove it.
- Release the bulb connector by hand, using a small flat-blade screwdriver only if needed to lift its lock.
- Rotate the old D3S bulb counterclockwise and remove it straight out.
- While wearing nitrile gloves, align the new bulb’s tabs and insert it without touching the glass.
- Rotate the bulb clockwise until locked, then reconnect the electrical connector until it clicks.
Step 8: Seal and Reassemble the Right Side
- Install the dust cover by hand and turn it clockwise until fully locked.
- Return the wheelhouse liner to position and install the push clips by hand.
- Use the Torx T15 screwdriver or 7mm socket and ratchet to reinstall the liner screws.
- Tighten the small screws only until seated. Do not crush or distort the plastic liner.
Step 9: Reconnect the Battery
- Confirm both headlight covers and wheelhouse liners are secure.
- Use a 10mm socket and ratchet to reconnect the negative battery cable.
- Tighten the terminal clamp until secure and unable to rotate by hand. Do not overtighten the battery terminal.
✅ After Repair
- 💡 Start your Suburban and switch on the low beams. Confirm both HID bulbs ignite and reach equal brightness and color after approximately 30 seconds.
- 🔍 Check that both beams remain steady without flickering.
- 💧 Inspect both rear dust covers again. Each cover must be completely locked to prevent moisture intrusion.
- 🧭 Park approximately 25 feet from a level wall and compare the beam pattern. Bulb replacement normally does not require aiming unless a headlamp housing was moved.
- ⚠️ If one new bulb does not illuminate, switch the lights off and disconnect the battery before checking its connector. Do not probe an energized HID circuit.
- 🕒 The clock and some saved settings may need to be restored after battery disconnection.
💰 DIY vs Shop Cost
Shop Cost: ₹18,000-₹38,000 (parts + labor)
DIY Cost: ₹8,000-₹24,000 (matched bulb pair)
You Save: ₹10,000-₹14,000 by doing it yourself!
Local labor and imported HID-bulb prices vary. This repair takes a shop approximately 1-1.5 hours.
🎯 Ready to get started?
HowToo makes it easy: same-day/2-day shipping on every part, plus all the tools and specialty tools you need! Check out the parts and tools sections below to add everything to your cart.