
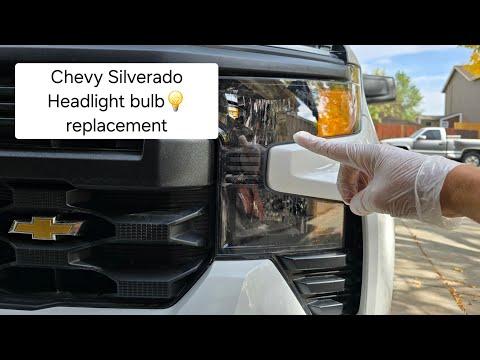







How to Replace Both Headlight Bulbs on a 2007-2023 Chevrolet Silverado 1500
Step-by-step instructions for halogen H11 or HID D5S bulbs, with tools and safety tips for 2007, 2019, 2020, 2021, 2022, 2023
How to Replace Both Headlight Bulbs on a 2007-2023 Chevrolet Silverado 1500
Step-by-step instructions for halogen H11 or HID D5S bulbs, with tools and safety tips for 2007, 2019, 2020, 2021, 2022, 2023


🔧 Silverado 1500 - Headlight Bulb Replacement
Replace both low-beam bulbs together. Assuming your Silverado has factory halogen headlights, it uses two H11 low-beam bulbs. Factory HID headlights instead use two D5S bulbs, so match the number printed on the removed bulb before opening the replacements.
Difficulty Level: Beginner | Estimated Time: 30-60 minutes
⚠️ Safety & Precautions
- ⚠️ Turn the headlights off and let them cool completely.
- 🧤 Never touch a halogen or HID bulb’s glass with bare fingers. Skin oil creates a hot spot and shortens bulb life.
- 🔌 Disconnect the negative battery cable before unplugging the bulbs.
- ⚡ Factory HID systems produce dangerous starting voltage. Never power the headlights with a bulb or connector exposed.
- 🛑 Don’t convert halogen housings to non-street-legal LED bulbs. Glare is miserable for everyone coming the other way.
🔧 Required Tools
You'll need the following tools for this repair:
- 10mm socket
- 1/4-inch-drive ratchet
- Plastic trim removal tool
- LED work light
- Nitrile gloves
- Safety glasses
- Clean microfiber towel
🔩 Required Parts
HowToo sells all the parts you need for this repair:
- H11 low-beam halogen bulb set - Qty: 1 pair, with factory halogen headlights
- D5S HID headlight bulbs - Qty: 2, with factory HID headlights
The SYLVANIA XtraVision H11 Halogen Light Bulb 2 Pack is my practical pick for factory halogen headlights. It’s street legal, reasonably priced, and packaged as the pair you need. For factory HID headlights, use two SYLVANIA Basic D5S HID Headlight Bulbs.
📋 Before You Begin
- 🚙 Park your Silverado on level ground, select Park, apply the parking brake, and switch off all exterior lights.
- 🧊 Allow the bulbs and nearby engine components to cool.
- 📦 Keep both new bulbs inside their packaging until installation.
- 🔍 Look through the rear of each headlamp. An H11 connector indicates the halogen setup; a D5S marking indicates factory HID.
- 📏 Park facing a wall and note the existing beam height before starting. Bulb replacement normally doesn’t require headlight adjustment.
🔨 Step-by-Step Instructions
Follow these steps in order:
Step 1: Disconnect the Battery
- Open the hood and support it fully.
- Put on safety glasses and nitrile gloves.
- Use the 10mm socket and 1/4-inch-drive ratchet to loosen the negative battery terminal.
- Lift the terminal from the battery post and position it where it cannot spring back.
- No battery-terminal torque is required until reassembly.
Step 2: Locate the Rear Headlamp Covers
- Use the LED work light to look behind the driver-side headlamp assembly.
- Find the round rear dust cover aligned with the low-beam projector.
- If a small plastic shield blocks access, release its clips carefully with the plastic trim removal tool. Don’t force the clips.
- Take a phone photo before unplugging anything.
Step 3: Remove the Driver-Side Dust Cover
- Grip the round cover by hand while wearing nitrile gloves.
- Turn it counterclockwise until it releases, then pull it straight back.
- Inspect the rubber seal. It must be clean, flexible, and seated evenly.
Step 4: Disconnect the Old Bulb
- Use the LED work light to locate the electrical connector.
- Press the connector’s locking tab by hand and pull on the connector body, not the wires.
- With an H11 halogen bulb, rotate the bulb counterclockwise approximately one-quarter turn.
- With a D5S HID bulb, release the factory connector and bulb retainer as fitted. Don’t touch exposed HID electrical contacts.
- Pull the bulb straight out without striking its glass against the housing.
Step 5: Verify the Replacement Bulb
- Use the LED work light to compare the old and new bulb bases.
- Confirm that the bulb number, locating tabs, connector, and sealing ring match exactly.
- Halogen headlights require an H11 bulb. Factory HID headlights require a D5S bulb.
- If the numbers don’t match, stop and use the number printed on the original bulb.
Step 6: Install the New Driver-Side Bulb
- Handle the new bulb only by its plastic or metal base while wearing nitrile gloves.
- If the glass is accidentally touched, clean it gently with the clean microfiber towel before installation.
- Align the bulb’s locating tabs with the housing slots.
- Insert an H11 bulb squarely and rotate it clockwise until fully locked.
- For a D5S bulb, seat it completely and secure its factory retainer without forcing it.
- Reconnect the electrical plug until its locking tab clicks.
- The bulb uses a locking base, so no fastener torque applies.
Step 7: Refit the Driver-Side Dust Cover
- Inspect the housing opening with the LED work light for dirt or a pinched seal.
- Fit the dust cover over the opening and turn it clockwise by hand until secure.
- Confirm that it sits evenly around the entire housing. A loose cover invites condensation.
Step 8: Replace the Passenger-Side Bulb
- Move to the passenger-side headlamp with the LED work light.
- If an intake duct or plastic access panel blocks your hand, release only its removable clips using the plastic trim removal tool.
- Repeat Steps 3 through 7 using the same bulb type.
- Reinstall any access panel or intake duct by hand, making sure every clip is fully seated.
- Don’t mix bulb brands or product lines. Matching bulbs give even color and output.
Step 9: Reconnect the Battery
- Place the negative battery terminal fully onto the battery post.
- Use the 10mm socket and 1/4-inch-drive ratchet to tighten it until secure.
- Don’t overtighten or crush the battery-terminal clamp.
✅ After Repair
- 💡 Switch on the low beams and confirm that both bulbs illuminate evenly.
- 🔦 Test the high beams, turn signals, daytime running lights, and parking lights.
- 🧱 Check the beam pattern against the wall. Both cutoff lines should remain close to their original positions.
- 💧 Confirm that both rear dust covers are completely sealed to prevent moisture inside the headlamps.
- 🚗 Take a short nighttime test drive and check for flickering, warning messages, or uneven light output.
- 🛠️ If one new bulb remains dark, switch everything off and recheck its connector and locking position before replacing other components.
💰 DIY vs Shop Cost
Shop Cost: $90-$300 for two halogen bulbs, or $350-$850 for two HID bulbs
DIY Cost: $18-$65 for a halogen pair, or approximately $210-$680 for two HID bulbs
You Save: Approximately $70-$235 by doing it yourself!
Shop labor rates vary but typically run $100-$150/hour. This repair takes a shop approximately 0.5-1.0 hour.
🎯 Ready to get started?
HowToo makes it easy: same-day/2-day shipping on every part, plus all the tools and specialty tools you need! Check out the parts and tools sections below to add everything to your cart.