

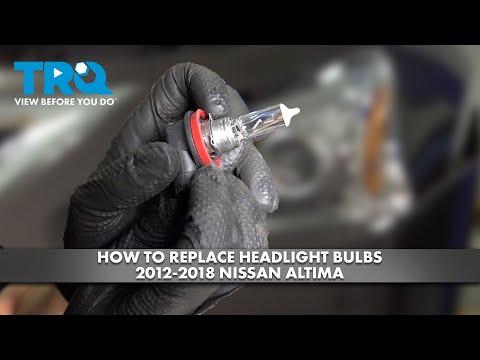







How to Replace Both Headlight Bulbs on a 2002-2015 Nissan Altima
Step-by-step HID low beam replacement guide with tools, safety tips, and torque specs for 2002, 2003, 2004, 2005, 2006, 2007, 2008, 2009, 2012, 2013, 2014, 2015
How to Replace Both Headlight Bulbs on a 2002-2015 Nissan Altima
Step-by-step HID low beam replacement guide with tools, safety tips, and torque specs for 2002, 2003, 2004, 2005, 2006, 2007, 2008, 2009, 2012, 2013, 2014, 2015


🔧 Altima - Low Beam Headlight Bulb Replacement
This repair replaces both front low beam headlight bulbs on your Altima. The 3.5L SL sedan uses HID low beam lighting from the factory, so the bulbs are high-voltage discharge bulbs and must be handled carefully.
Difficulty Level: Intermediate | Estimated Time: 1.5-2.5 hours
⚠️ Safety & Precautions
- ⚠️ HID headlight systems can carry high voltage. Always turn the headlights OFF and disconnect the negative battery cable before working.
- ⚠️ Do not touch the glass part of the HID bulb. Skin oil can create hot spots and shorten bulb life.
- ⚠️ Let the bulbs and housings cool for at least 10 minutes before removal.
- ⚠️ Replace HID bulbs in pairs so both headlights have matching brightness and color.
- ⚠️ Support the vehicle with jack stands if you lift the front. Never rely on a floor jack alone.
🔧 Required Tools
You'll need the following tools for this repair:
- 10mm socket
- Ratchet handle
- Flathead screwdriver
- Trim clip removal tool
- Floor jack (rated 2-ton minimum)
- Jack stands (rated 2-ton minimum)
- Wheel chocks
- Nitrile gloves
- Safety glasses
- Clean microfiber cloth
- Torque wrench
🔩 Required Parts
HowToo sells all the parts you need for this repair:
- HID low beam headlight bulbs - Replace in pairs - Qty: 2
📋 Before You Begin
- 🅿️ Park your Altima on level ground and turn the steering wheel straight.
- 🧊 Turn the headlights OFF and let them cool for at least 10 minutes.
- 🔋 Open the hood and use a 10mm socket to disconnect the negative battery cable.
- 💡 A trim clip removal tool is a small pry tool used to remove plastic push clips without breaking them.
- 💡 A torque wrench tightens bolts to a measured amount so they are not too loose or too tight.
🔨 Step-by-Step Instructions
Follow these steps in order:
Step 1: Disconnect Battery Power
- Use a 10mm socket and ratchet handle to loosen the negative battery terminal nut.
- Lift the negative cable off the battery post and move it aside so it cannot spring back.
- Put on safety glasses and nitrile gloves before touching the headlight area.
- Power off prevents HID shock risk.
Step 2: Raise the Front Safely
- Place wheel chocks behind the rear wheels.
- Use a floor jack at the front center jacking point to raise the front of your Altima.
- Place jack stands under the approved front side support points.
- Lower the vehicle gently onto the jack stands.
- Keep the floor jack lightly touching as backup, but do not work under a car held only by a jack.
Step 3: Access the Driver-Side Headlight Bulb
- Turn the steering wheel fully to the right to create space behind the driver-side front wheel area.
- Use a trim clip removal tool to remove the plastic clips from the front section of the driver-side inner fender liner.
- Use a flathead screwdriver only to gently help lift stubborn clip centers.
- Pull the inner fender liner back enough to reach the rear of the headlight housing.
- Do not crease the liner sharply.
Step 4: Remove the Driver-Side Rear Headlight Cover
- Reach behind the headlight housing through the fender opening.
- Turn the round rear bulb cover counterclockwise by hand and remove it.
- Use a clean microfiber cloth to wipe dirt around the opening if needed.
Step 5: Remove the Driver-Side HID Bulb Connector
- Hold the HID igniter connector at the back of the bulb.
- Turn the connector counterclockwise by hand until it unlocks.
- Pull the connector straight back from the bulb.
- An HID igniter connector is the locking electrical plug that powers the HID bulb.
- Do not use metal tools on the HID connector.
Step 6: Remove the Driver-Side HID Bulb
- Release the bulb retaining spring by hand.
- Carefully slide the HID bulb straight out of the headlight housing.
- Do not bump the bulb against the reflector inside the housing.
- If the old bulb is broken, use nitrile gloves and a clean microfiber cloth to handle pieces safely.
Step 7: Install the New Driver-Side HID Bulb
- Open the new HID bulb package while wearing nitrile gloves.
- Hold the bulb only by the base, not the glass tube.
- Align the bulb tabs with the headlight housing slot.
- Slide the bulb straight into place.
- Lock the retaining spring by hand so the bulb sits flat and secure.
- If you accidentally touch the glass, wipe it gently with a clean microfiber cloth.
- Correct seating prevents bad beam aim.
Step 8: Reconnect the Driver-Side HID Connector
- Push the HID igniter connector straight onto the bulb base.
- Turn the connector clockwise by hand until it locks.
- Reinstall the round rear bulb cover by turning it clockwise by hand until snug.
- Do not leave the rear cover loose because moisture can enter the headlight.
Step 9: Refit the Driver-Side Fender Liner
- Move the inner fender liner back into its original position.
- Use the trim clip removal tool or your fingers to reinstall the plastic clips.
- Push the clip centers flush so the liner is secure.
Step 10: Access the Passenger-Side Headlight Bulb
- Turn the steering wheel fully to the left to create space behind the passenger-side front wheel area.
- Use a trim clip removal tool to remove the plastic clips from the front section of the passenger-side inner fender liner.
- Use a flathead screwdriver gently if a clip center is stuck.
- Pull the liner back enough to reach the rear of the headlight housing.
Step 11: Remove the Passenger-Side HID Bulb
- Turn the rear bulb cover counterclockwise by hand and remove it.
- Turn the HID igniter connector counterclockwise by hand and pull it straight off.
- Release the bulb retaining spring by hand.
- Slide the old HID bulb straight out of the housing.
Step 12: Install the Passenger-Side HID Bulb
- Use nitrile gloves and hold the new HID bulb by the base only.
- Align the bulb tabs with the housing.
- Slide the bulb straight in and secure the retaining spring by hand.
- Push the HID igniter connector onto the bulb and turn it clockwise by hand until locked.
- Reinstall the rear bulb cover by turning it clockwise by hand until snug.
Step 13: Refit the Passenger-Side Fender Liner
- Move the passenger-side inner fender liner back into place.
- Use your fingers or the trim clip removal tool to reinstall the plastic clips.
- Make sure the liner edge sits behind the bumper and splash shield correctly.
Step 14: Lower the Vehicle
- Use the floor jack to raise the front slightly off the jack stands.
- Remove the jack stands.
- Lower your Altima slowly to the ground with the floor jack.
Step 15: Reconnect the Battery
- Place the negative battery cable back onto the negative battery post.
- Use a 10mm socket and torque wrench to tighten the terminal nut snugly.
- Torque to 5 Nm (44 in-lbs)
- Do not overtighten the battery terminal because it can crack the clamp.
✅ After Repair
- 💡 Turn the headlights ON and confirm both low beams light up.
- 💡 Check that both beams look even against a wall or garage door.
- 💧 After the first drive, look for moisture inside the headlight lenses. Moisture usually means a rear cover is loose.
- 🔋 If the auto window function acts oddly after battery disconnect, fully lower and fully raise each front window once to relearn the limits.
- 🚗 HID bulbs may take a few seconds to reach full brightness and color. That is normal.
💰 DIY vs Shop Cost
Shop Cost: $350-$650 (parts + labor)
DIY Cost: $90-$250 (parts only)
You Save: $260-$400 by doing it yourself!
Shop labor rates vary but typically run $100-$150/hour. This repair takes a shop approximately 1.0-1.8 hours.
🎯 Ready to get started?
HowToo makes it easy: same-day/2-day shipping on every part, plus all the tools and specialty tools you need! Check out the parts and tools sections below to add everything to your cart.