






How to Replace an Outer Tie Rod End on a 2015-2023 Nissan Murano
Step-by-step DIY guide with required tools, parts, torque specs, safety tips, and alignment advice for 2015, 2016, 2017, 2018, 2019, 2020, 2021, 2022, 2023
How to Replace an Outer Tie Rod End on a 2015-2023 Nissan Murano
Step-by-step DIY guide with required tools, parts, torque specs, safety tips, and alignment advice for 2015, 2016, 2017, 2018, 2019, 2020, 2021, 2022, 2023


🔧 Murano - Outer Tie Rod End Replacement
Assumption: This procedure covers one outer tie rod end; the inner tie rod requires different tools and steps.
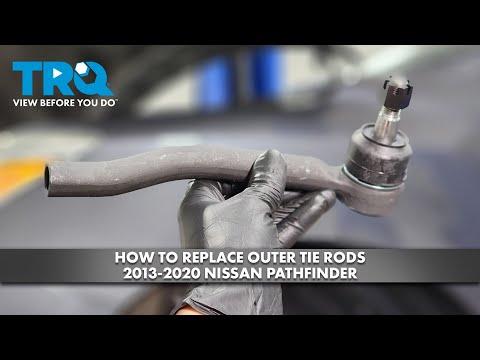
The outer tie rod end connects the steering rack to the steering knuckle. Replace it if its ball joint is loose, its boot is torn, or it causes steering play, uneven tire wear, or a knocking noise.
Difficulty Level: Intermediate | Estimated Time: 1-2 hours per side, plus alignment
⚠️ Safety & Precautions
- ⚠️ Support your Murano with a jack stand. Never work beneath a vehicle supported only by a floor jack.
- 🛞 Do not drive normally until a professional wheel alignment has been completed.
- 🔩 Counting turns only approximates the old alignment; it does not replace alignment equipment.
- 🧤 Wear safety glasses and gloves because rust and debris may release suddenly.
- 🔋 Battery disconnection is not required.
- 🚫 Do not strike the threaded stud or steering knuckle with excessive force.
🔧 Required Tools
You'll need the following tools for this repair:
- 21mm impact socket
- 19mm six-point socket
- 22mm open-end wrench
- 19mm open-end wrench
- 1/2-inch drive breaker bar
- 1/2-inch drive ratchet
- 1/2-inch drive torque wrench rated 20-150 ft-lbs
- Outer tie rod separator (specialty)
- Needle-nose pliers
- Wire brush
- Paint marker
- Steel ruler graduated in millimetres
- Penetrating oil aerosol
- Floor jack rated 2-ton minimum
- Jack stands rated 2-ton minimum
- Wheel chocks
- Mechanic's gloves
- Safety glasses
🔩 Required Parts
HowToo sells all the parts you need for this repair:
- Outer tie rod end matching the replacement side - Qty: 1
- Outer tie rod end retaining nut - Qty: 1
- New cotter pin - Qty: 1
Replace both sides if they have similar mileage and wear, but each side can be serviced individually.
📋 Before You Begin
- 🅿️ Park your Murano on level, solid ground. Select Park, apply the parking brake, and keep the steering wheel centered.
- 🧱 Place wheel chocks firmly against the front and rear of a rear tire.
- 📏 Photograph the original tie rod position. Measure from a fixed point on the inner tie rod to the center of the outer stud and record the measurement.
- 🖊️ Mark the outer tie rod and locknut positions with a paint marker.
- 📱 No infotainment, scan-tool, battery-registration, EPB, or ADAS service mode is required.
🔨 Step-by-Step Instructions
Follow these steps in order:
Step 1: Loosen the Wheel Nuts
- Use a 21mm impact socket and 1/2-inch drive breaker bar to loosen each front wheel nut about one-quarter turn.
- Do not remove the nuts while the tire is supporting the vehicle.
Step 2: Raise and Support the Front Corner
- Position the 2-ton floor jack beneath the specified front lifting point on the side being repaired.
- Raise your Murano and place a 2-ton jack stand beneath the reinforced side support point.
- Lower the vehicle onto the stand, then gently push the body to verify that it is stable.
Step 3: Remove the Wheel
- Use the 21mm impact socket and 1/2-inch drive ratchet to remove all five wheel nuts.
- Remove the wheel and slide it beneath the rocker area as an additional safety measure.
Step 4: Inspect and Record the Original Position
- Use a wire brush to clean the outer tie rod threads, locknut, and stud.
- Apply penetrating oil aerosol to the locknut and stud nut. Allow it to soak for several minutes.
- Use a steel ruler graduated in millimetres to verify and record the reference measurement.
- Use a paint marker to add a clear reference line across the locknut and threaded rod.
- Accurate marks make the initial toe setting safer.
Step 5: Loosen the Tie Rod Locknut
- The locknut, also called a jam nut, locks the outer end onto the threaded inner tie rod.
- Hold the outer tie rod with a 19mm open-end wrench.
- Use a 22mm open-end wrench to loosen the locknut only about one-quarter turn.
- Do not move the locknut farther along the threads.
Step 6: Remove the Stud Nut
- Use needle-nose pliers to straighten and remove the old cotter pin from the stud nut.
- Discard the cotter pin. Never reuse it.
- Use a 19mm six-point socket and 1/2-inch drive ratchet to loosen and remove the stud nut.
- If the supplied replacement nut uses a different hex size, use the correctly fitting six-point socket and follow the part manufacturer's torque requirement.
Step 7: Separate the Tie Rod End
- Install the outer tie rod separator around the steering-knuckle boss and stud. This tool presses the tapered stud out without hammering the threads.
- Tighten the separator with the correctly fitting 19mm socket and 1/2-inch drive ratchet until the taper releases.
- Keep fingers away from the joint because it may release suddenly.
- Do not use a pickle fork if the removed part may need inspection; it destroys the rubber boot.
Step 8: Remove the Old Outer Tie Rod End
- Turn the outer tie rod end counterclockwise by hand while counting every complete revolution.
- Record the number of turns, including any partial final turn.
- Keep the locknut in its marked position.
Step 9: Install the New Outer Tie Rod End
- Compare the old and new parts. Confirm that the stud taper, thread direction, overall shape, and installation side match.
- Thread the new end onto the inner tie rod using exactly the recorded number of turns.
- Use the steel ruler graduated in millimetres to compare the new position with the measurement recorded earlier.
- Turn the tie rod end only enough to align its stud with the steering knuckle.
- Do not tighten the locknut yet.
Step 10: Secure the Stud to the Steering Knuckle
- Insert the new stud fully into the steering-knuckle taper.
- Install the new retaining nut by hand to prevent cross-threading.
- Use the 19mm six-point socket and 1/2-inch drive torque wrench to tighten the OEM-style castellated nut to 35 Nm (26 ft-lbs).
- If the cotter-pin holes do not align, tighten the nut slightly farther until the next slot aligns. Never loosen the nut to align it and do not exceed 49 Nm (36 ft-lbs).
- Use needle-nose pliers to install and bend a new cotter pin securely around the nut.
- If the replacement part uses a prevailing-torque locknut instead of a castellated nut, follow the torque printed by that part's manufacturer; no cotter pin is used.
Step 11: Tighten the Tie Rod Locknut
- Confirm that the tie rod end is not twisted and that its rubber boot is not pinched.
- Hold the outer tie rod end with the 19mm open-end wrench.
- Use the 22mm open-end wrench and an appropriate torque-wrench crowfoot setup to tighten the locknut to 88 Nm (65 ft-lbs).
- If a crowfoot is positioned at 90 degrees to the torque wrench, no torque-length correction is required.
Step 12: Reinstall the Wheel
- Fit the wheel and start all five nuts by hand.
- Use the 21mm impact socket and 1/2-inch drive ratchet to snug the nuts in a star pattern.
- Use the 2-ton floor jack to raise your Murano slightly, remove the jack stand, and lower the tire to the ground.
- Use the 21mm impact socket and 1/2-inch drive torque wrench to tighten the wheel nuts in a star pattern to 113 Nm (83 ft-lbs).
✅ After Repair
- 🔍 Verify that the cotter pin is installed, the boot is undamaged, and both nuts are secure.
- ↔️ Start your Murano and turn the steering slowly from side to side. Listen for contact, binding, or unusual noises.
- 🚗 Take only a short, low-speed test drive. Stop immediately if the steering wheel is badly off-center, the vehicle pulls, or the steering feels loose.
- 📐 Obtain a professional four-wheel alignment immediately. Outer tie rod replacement changes front toe, which is the inward or outward direction the tires point.
- 🔩 Recheck wheel-nut torque to 113 Nm (83 ft-lbs) after approximately 80-160 km.
💰 DIY vs Shop Cost
Shop Cost: ₹5,500-₹12,000 per side, including the part, labor, and alignment
DIY Cost: ₹1,800-₹5,000 for the part and alignment, excluding reusable tools
You Save: ₹3,000-₹7,000 by doing it yourself!
Labor around Sonīpat varies by workshop. This repair generally takes a shop approximately 0.7-1.2 hours, plus wheel alignment.
🎯 Ready to get started?
HowToo makes it easy: same-day/2-day shipping on every part, plus all the tools and specialty tools you need! Check out the parts and tools sections below to add everything to your cart.