


How to Replace All Wheel Bearings on a 2013-2019 Ford Escape
Step-by-step guide covering front pressed bearings, rear hub assemblies, tools, and torque specs for 2013, 2014, 2015, 2016, 2017, 2018, 2019
How to Replace All Wheel Bearings on a 2013-2019 Ford Escape
Step-by-step guide covering front pressed bearings, rear hub assemblies, tools, and torque specs for 2013, 2014, 2015, 2016, 2017, 2018, 2019
🔧 Escape - All Wheel Bearing Replacement
Replacing all wheel bearings on your Escape means servicing both front wheel bearings and both rear hub/bearing assemblies. The front bearings are pressed into the steering knuckles, so this job requires a hydraulic press or a portable hub/bearing press kit.
Difficulty Level: Advanced | Estimated Time: 6-10 hours
Assumption: This guide covers replacing both front wheel bearings and both rear wheel hub/bearing assemblies on your Escape.
⚠️ Safety & Precautions
- ⚠️ Support your Escape with jack stands only. Never work under a vehicle held by a jack.
- ⚠️ Wheel bearings are safety-critical. If a bearing is installed crooked or loose, the wheel can become unsafe.
- ⚠️ The front axle nuts are very tight and must be replaced after removal.
- ⚠️ Do not let brake calipers hang by the brake hoses. Hang them with a bungee cord or wire.
- ⚠️ If your Escape has AWD, do not pull or overextend the rear axle shafts while removing rear hubs.
- ⚠️ Disconnecting the battery is not normally required for this repair.
- ⚠️ After repair, pump the brake pedal before driving so the brake pads seat back against the rotors.
🔧 Required Tools
You'll need the following tools for this repair:
- Floor jack rated 3-ton minimum
- Jack stands rated 3-ton minimum
- Wheel chocks
- Safety glasses
- Mechanic gloves
- 1/2-inch drive breaker bar
- 1/2-inch drive torque wrench rated to 250 ft-lbs
- 3/8-inch drive torque wrench rated to 100 ft-lbs
- Impact wrench 1/2-inch drive
- 19mm socket
- 21mm socket
- 18mm socket
- 15mm socket
- 13mm socket
- 10mm socket
- 32mm axle nut socket
- Ratchet 3/8-inch drive
- Ratchet 1/2-inch drive
- Metric wrench set 10mm-21mm
- Flat-blade screwdriver
- Trim clip removal tool
- Needle-nose pliers
- Dead blow hammer
- Ball peen hammer
- Pry bar 18-inch
- Hub puller kit (specialty)
- Front wheel bearing press kit (specialty)
- Hydraulic shop press 12-ton minimum (specialty)
- Bearing race/seal driver kit (specialty)
- Snap ring pliers (specialty)
- Ball joint separator (specialty)
- Slide hammer hub adapter (specialty)
- Brake caliper hanger hook
- Wire brush
- Brake cleaner
- Shop towels
- Paint marker
🔩 Required Parts
HowToo sells all the parts you need for this repair:
- Front wheel bearing - Qty: 2
- Front wheel hub - Qty: 2
- Front axle nut - Qty: 2
- Front wheel bearing snap ring - Qty: 2
- Rear wheel hub and bearing assembly - Qty: 2
- Rear hub mounting bolts - Qty: 8
- Brake cleaner - Qty: 2 cans
- Anti-seize compound - Qty: 1 tube
- Penetrating oil - Qty: 1 can
📋 Before You Begin
- 🅿️ Park your Escape on level ground and set the parking brake.
- 🧱 Place wheel chocks behind the wheels that stay on the ground.
- 🔩 Loosen the 19mm lug nuts slightly before lifting the vehicle.
- 🛠️ Spray penetrating oil on the axle nuts, hub bolts, and brake bracket bolts before starting.
- 📌 A hydraulic press pushes the bearing in and out using steady force. If you do not have one, remove the front knuckles and have a machine shop press the bearings.
- 📌 A snap ring is a spring steel retaining clip. It locks the front bearing inside the knuckle.
🔨 Step-by-Step Instructions
Follow these steps in order:
Step 1: Loosen the Wheel Lug Nuts
- Use a 19mm socket and 1/2-inch drive breaker bar to loosen each wheel’s lug nuts about one turn.
- Do not remove the lug nuts yet.
- Loosen before lifting.
Step 2: Lift and Support the Vehicle
- Use a floor jack rated 3-ton minimum to lift the front of your Escape.
- Place jack stands rated 3-ton minimum under the proper front support points.
- Repeat for the rear if you are doing all four bearings at once.
- Gently shake the vehicle to confirm it is stable before working.
Step 3: Remove the Wheels
- Use a 19mm socket to remove the lug nuts.
- Remove all four wheels and set them flat on the ground.
Step 4: Remove the Front Axle Nuts
- Use a 32mm axle nut socket and 1/2-inch drive breaker bar to remove the front axle nut on each side.
- If the axle turns, have a helper press the brake pedal while you loosen the nut.
- Discard the old axle nuts. They are one-time-use fasteners.
Step 5: Remove the Front Brake Calipers and Rotors
- Use a 13mm socket to remove the front caliper slide pin bolts.
- Lift the caliper off the bracket and hang it with a brake caliper hanger hook.
- Use an 18mm socket to remove the front caliper bracket bolts.
- Remove the brake rotor by hand. If stuck, tap around the rotor hat with a dead blow hammer.
- During installation, tighten front caliper bracket bolts to Torque to 175 Nm (129 ft-lbs).
- During installation, tighten front caliper slide pin bolts to Torque to 35 Nm (26 ft-lbs).
Step 6: Disconnect the Front Wheel Speed Sensor
- Use a 10mm socket or trim clip removal tool to release the wheel speed sensor wire brackets from the knuckle.
- Move the wire safely aside.
- Do not pull on the wire itself.
Step 7: Free the Front Axle from the Hub
- Thread the old axle nut back on a few turns to protect the axle threads.
- Use a dead blow hammer to tap the axle inward until it moves freely in the hub.
- Remove the old axle nut again.
- If stuck, use a hub puller kit instead of hitting harder.
Step 8: Remove the Front Steering Knuckle
- Use a paint marker to mark the strut-to-knuckle position before removal.
- Use an 18mm socket and 21mm wrench to remove the strut-to-knuckle bolts.
- Use a 15mm socket to remove the outer tie rod nut.
- Use a ball joint separator to separate the tie rod from the knuckle.
- Use an 18mm socket to remove the lower ball joint pinch bolt.
- Use a pry bar 18-inch to carefully separate the lower ball joint from the knuckle.
- Remove the knuckle from the vehicle.
- During installation, tighten the front strut-to-knuckle bolts to Torque to 175 Nm (129 ft-lbs).
- During installation, tighten the outer tie rod nut to Torque to 48 Nm (35 ft-lbs).
- During installation, tighten the lower ball joint pinch bolt to Torque to 63 Nm (46 ft-lbs).
Step 9: Press Out the Front Hub
- Place the knuckle in a hydraulic shop press 12-ton minimum.
- Use a bearing race/seal driver kit to support the knuckle correctly.
- Press the wheel hub out of the bearing.
- The inner bearing race may stay on the hub. Remove it with a bearing race/seal driver kit and press tools.
- Support only the metal areas.
Step 10: Remove the Front Bearing Snap Ring
- Use snap ring pliers to remove the snap ring from the knuckle.
- Clean the snap ring groove with a wire brush and brake cleaner.
Step 11: Press Out the Front Bearing
- Use the hydraulic shop press 12-ton minimum and front wheel bearing press kit to press the old bearing out of the knuckle.
- Make sure the knuckle is fully supported and square in the press.
- Do not press against thin aluminum edges.
Step 12: Press In the New Front Bearing
- Use brake cleaner and shop towels to clean the bearing bore in the knuckle.
- Use the hydraulic shop press 12-ton minimum and front wheel bearing press kit to press the new bearing into the knuckle.
- Press only on the outer race of the bearing. The race is the solid outer metal ring of the bearing.
- Install the new snap ring with snap ring pliers.
- Confirm the snap ring is fully seated in its groove.
Step 13: Press In the New Front Hub
- Use the hydraulic shop press 12-ton minimum and front wheel bearing press kit to press the new hub into the bearing.
- Support the inner bearing race while pressing the hub in.
- If you do not support the inner race, the new bearing can be damaged before installation.
Step 14: Reinstall the Front Knuckles
- Guide the axle shaft through the new hub by hand.
- Use a pry bar 18-inch carefully to position the lower ball joint into the knuckle.
- Install the lower ball joint pinch bolt with an 18mm socket and tighten to Torque to 63 Nm (46 ft-lbs).
- Install the strut-to-knuckle bolts with an 18mm socket and 21mm wrench, then tighten to Torque to 175 Nm (129 ft-lbs).
- Install the outer tie rod nut with a 15mm socket and tighten to Torque to 48 Nm (35 ft-lbs).
Step 15: Install New Front Axle Nuts
- Install new front axle nuts by hand first.
- Use a 32mm axle nut socket and 1/2-inch drive torque wrench rated to 250 ft-lbs.
- Tighten each front axle nut to Torque to 350 Nm (258 ft-lbs).
- Do not use an impact wrench for final tightening.
Step 16: Reinstall the Front Brakes
- Clean the rotor mounting face with a wire brush.
- Apply a very light coat of anti-seize compound to the hub face only.
- Install the brake rotor by hand.
- Install the caliper bracket with an 18mm socket and tighten to Torque to 175 Nm (129 ft-lbs).
- Install the caliper with a 13mm socket and tighten slide pin bolts to Torque to 35 Nm (26 ft-lbs).
- Reattach wheel speed sensor wire brackets with a 10mm socket or trim clip removal tool.
Step 17: Remove the Rear Brake Calipers and Rotors
- Use a 13mm socket to remove the rear caliper slide pin bolts.
- Hang the caliper with a brake caliper hanger hook.
- Use a 15mm socket to remove the rear caliper bracket bolts.
- Remove the rear rotor by hand.
- If the rotor is stuck, use a dead blow hammer to tap around the rotor hat.
- During installation, tighten rear caliper bracket bolts to Torque to 103 Nm (76 ft-lbs).
- During installation, tighten rear caliper slide pin bolts to Torque to 35 Nm (26 ft-lbs).
Step 18: Disconnect the Rear Wheel Speed Sensor
- Use a 10mm socket or trim clip removal tool to release the rear wheel speed sensor wire brackets.
- Move the harness out of the way so it cannot be stretched.
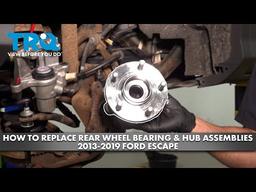
Step 19: Remove the Rear Hub and Bearing Assemblies
- Use a 15mm socket to remove the four rear hub mounting bolts from the back of the knuckle.
- If the hub is rusted in place, use a slide hammer hub adapter to pull it out evenly.
- Clean the hub mounting bore with a wire brush and brake cleaner.
- Do not grind the mounting surface. It must stay flat.
Step 20: Install the New Rear Hub and Bearing Assemblies
- Apply a thin coat of anti-seize compound to the knuckle bore, not to the bolt threads.
- Slide the new rear hub and bearing assembly into the knuckle by hand.
- Install new rear hub mounting bolts.
- Use a 15mm socket and tighten the rear hub mounting bolts evenly in a crisscross pattern.
- Tighten rear hub mounting bolts to Torque to 133 Nm (98 ft-lbs).
Step 21: Reinstall the Rear Brakes
- Install the rear rotor by hand.
- Use a 15mm socket to install the rear caliper bracket and tighten to Torque to 103 Nm (76 ft-lbs).
- Use a 13mm socket to install the rear caliper slide pin bolts and tighten to Torque to 35 Nm (26 ft-lbs).
- Reattach the rear wheel speed sensor wire brackets with a 10mm socket or trim clip removal tool.
Step 22: Reinstall the Wheels
- Install all four wheels by hand.
- Use a 19mm socket to snug the lug nuts in a star pattern.
- Lower your Escape until the tires just touch the ground.
- Use a 1/2-inch drive torque wrench rated to 250 ft-lbs and 19mm socket.
- Tighten wheel lug nuts to Torque to 135 Nm (100 ft-lbs).
Step 23: Final Safety Check
- Use a flashlight if available to inspect all brake hoses and wheel speed sensor wires.
- Make sure no wires are twisted, stretched, or touching the rotor.
- Use a torque wrench to recheck all lug nuts after lowering the vehicle fully.
✅ After Repair
- ✅ Pump the brake pedal several times before shifting out of Park.
- ✅ Start your Escape and check for ABS, traction control, or brake warning lights.
- ✅ Test drive slowly at first. Listen for grinding, clicking, or humming.
- ✅ If the steering wheel is off-center or the vehicle pulls, get a wheel alignment. Front knuckle removal can affect alignment.
- ✅ Recheck lug nut torque after 25-50 miles: Torque to 135 Nm (100 ft-lbs).
- ✅ If an ABS light appears, inspect each wheel speed sensor connector and harness routing first.
💰 DIY vs Shop Cost
Shop Cost: $1,600-$2,800 (parts + labor)
DIY Cost: $450-$950 (parts only)
You Save: $1,150-$1,850 by doing it yourself!
Shop labor rates vary but typically run $100-$150/hour. This repair takes a shop approximately 6-9 hours.
🎯 Ready to get started?
HowToo makes it easy: same-day/2-day shipping on every part, plus all the tools and specialty tools you need! Check out the parts and tools sections below to add everything to your cart.
