


How to Replace All Wheel Bearings on a 2009-2018 Toyota Corolla (Engine: Inline 4 1.8L)
Step-by-step guide with tools, parts, torque specs, safety tips, and DIY cost for 2009, 2010, 2011, 2012, 2013, 2014, 2015, 2016, 2017, 2018
How to Replace All Wheel Bearings on a 2009-2018 Toyota Corolla (Engine: Inline 4 1.8L)
Step-by-step guide with tools, parts, torque specs, safety tips, and DIY cost for 2009, 2010, 2011, 2012, 2013, 2014, 2015, 2016, 2017, 2018
🔧 Corolla - All Wheel Bearing Replacement
Replacing all four wheel bearings on your Corolla means removing both front steering knuckles so the front bearings can be pressed out, then replacing both rear hub-and-bearing assemblies. The front bearings are a press-fit design, so a shop press or hub bearing press kit is required.
Assumption: Your Corolla has rear drum brakes, which is typical for the L trim.
Difficulty Level: Advanced | Estimated Time: 6-9 hours
⚠️ Safety & Precautions
- ⚠️ Support your Corolla with jack stands only; never work under a car held by a jack.
- ⚠️ The front coil spring and strut stay installed, but the knuckle is heavy—keep hands clear when removing bolts.
- ⚠️ Front wheel bearings require pressing force. A press can injure you if parts are not supported squarely.
- ⚠️ Do not let the brake calipers hang by the rubber brake hoses.
- ⚠️ Disconnecting the battery is not required for this repair.
- ⚠️ Replace both front axle nuts. They are staked locking nuts and should not be reused.
🔧 Required Tools
You'll need the following tools for this repair:
- Floor jack rated 2-ton minimum
- Jack stands rated 2-ton minimum
- Wheel chocks
- Safety glasses
- Mechanic gloves
- 21mm socket
- 30mm axle nut socket
- 10mm socket
- 12mm socket
- 14mm socket
- 17mm socket
- 19mm socket
- Breaker bar 1/2-inch drive
- Ratchet 3/8-inch drive
- Ratchet 1/2-inch drive
- Torque wrench 10-150 ft-lb
- Torque wrench 50-250 ft-lb
- Pry bar 18-inch
- Flat blade screwdriver
- Needle nose pliers
- Hammer 2-lb
- Brass punch set
- Ball joint separator tool
- Tie rod end puller
- Hub puller 5-lug universal (specialty)
- Hydraulic shop press 12-ton minimum (specialty)
- Front wheel bearing press adapter kit (specialty)
- Snap ring pliers heavy-duty (specialty)
- Bungee cord 24-inch
- Paint marker
- Brake cleaner aerosol
- Wire brush
🔩 Required Parts
HowToo sells all the parts you need for this repair:
- Front wheel bearings - Qty: 2
- Front wheel bearing snap rings - Qty: 2
- Front axle nuts - Qty: 2
- Rear hub and bearing assemblies - Qty: 2
- Rear hub mounting bolts - Qty: 8
- Brake cleaner - Qty: 2 cans
- High-temperature wheel bearing grease - Qty: 1 tube
- Anti-seize compound - Qty: 1 small tube
📋 Before You Begin
- Park your Corolla on flat, solid ground.
- Set the parking brake before loosening the front axle nuts.
- Use wheel chocks behind the rear wheels while working on the front.
- Release the parking brake before removing the rear brake drums.
- A “press-fit” bearing means the bearing is tightly squeezed into the steering knuckle and must be pushed in and out with a press.
- A “hub assembly” means the bearing and wheel mounting flange come as one bolt-on unit.
- Use a paint marker to mark front strut-to-knuckle bolt positions before removal. This helps keep alignment close enough to drive to an alignment shop.
🔨 Step-by-Step Instructions
Follow these steps in order:
Step 1: Loosen the Wheels and Front Axle Nuts
- Use a 21mm socket and breaker bar to loosen all four wheel lug nuts one turn while the car is on the ground.
- Use a flat blade screwdriver or punch to lift the staked part of each front axle nut. “Staked” means the nut edge is bent into a groove to lock it.
- Use a 30mm axle nut socket and breaker bar to loosen both front axle nuts while the front wheels are still touching the ground.
- Break axle nuts loose before lifting.
Step 2: Raise and Support the Vehicle
- Use a floor jack rated 2-ton minimum to lift the front of your Corolla at the front center jacking point.
- Place jack stands rated 2-ton minimum under the front side pinch welds.
- Use the floor jack rated 2-ton minimum to lift the rear and place jack stands rated 2-ton minimum under the rear side pinch welds.
- Use a 21mm socket to remove all four wheels.
Step 3: Remove the Front Brake Calipers and Rotors
- Use a 14mm socket to remove the front brake caliper slide bolts.
- Hang each caliper from the strut spring using a 24-inch bungee cord.
- Use a 17mm socket to remove the front brake caliper bracket bolts.
- Remove the front brake rotors by hand. If stuck, tap around the rotor hat with a 2-lb hammer.
- During installation later, tighten front caliper bracket bolts to Torque to 107 Nm (79 ft-lbs).
- During installation later, tighten front caliper slide bolts to Torque to 34 Nm (25 ft-lbs).
Step 4: Disconnect the Front ABS Wheel Speed Sensors
- Use a 10mm socket to remove the ABS sensor wire bracket bolts from each front knuckle.
- Use a 10mm socket to remove each ABS sensor retaining bolt.
- Gently twist and pull the sensor out by hand. Do not pry on the plastic sensor body.
- ABS sensors break easily.
Step 5: Disconnect the Front Tie Rod Ends
- Use needle nose pliers to remove the cotter pin from each outer tie rod end.
- Use a 17mm socket to remove the tie rod end castle nut.
- Use a tie rod end puller to separate the tie rod from the steering knuckle.
- During installation later, tighten the tie rod end nut to Torque to 49 Nm (36 ft-lbs), then install a new cotter pin if equipped.
Step 6: Separate the Front Lower Ball Joints
- Use a 17mm socket to remove the lower ball joint fasteners at the control arm.
- Use a ball joint separator tool only if the joint is stuck.
- Use a pry bar 18-inch to gently separate the lower control arm from the ball joint area.
- During installation later, tighten the lower ball joint fasteners to Torque to 89 Nm (66 ft-lbs).
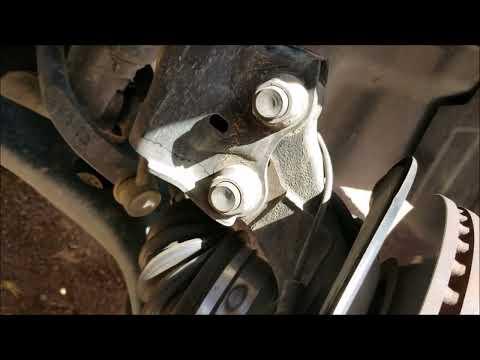
Step 7: Remove the Front Steering Knuckles
- Use a paint marker to outline the strut-to-knuckle bolt positions.
- Use a 19mm socket and breaker bar to remove the two strut-to-knuckle bolts and nuts on each side.
- Push the front axle inward through the hub by hand. If stuck, tap the axle end with a brass punch and 2-lb hammer.
- Remove each steering knuckle from the vehicle.
- During installation later, tighten strut-to-knuckle bolts to Torque to 240 Nm (177 ft-lbs).
Step 8: Press Out the Front Hubs
- Place one steering knuckle in a hydraulic shop press 12-ton minimum.
- Use the front wheel bearing press adapter kit to support the knuckle around the hub area.
- Press the wheel hub out of the bearing. The inner bearing race may stay stuck on the hub.
- If the inner race stays on the hub, use the hub puller 5-lug universal or proper press adapters to remove it.
- Repeat for the other front knuckle.
Step 9: Remove the Front Bearing Snap Rings
- Use brake cleaner aerosol and a wire brush to clean the snap ring groove.
- Use heavy-duty snap ring pliers to remove the snap ring from each knuckle.
- A snap ring is a spring steel retaining clip that locks the bearing in place.
Step 10: Press Out the Front Bearings
- Use the hydraulic shop press 12-ton minimum and front wheel bearing press adapter kit to support the knuckle squarely.
- Press the old bearing out of the knuckle from the correct side using an adapter that contacts only the outer bearing race.
- Clean the bearing bore with brake cleaner aerosol and a wire brush.
- Support the knuckle evenly.
Step 11: Press In the New Front Bearings
- Apply a very light film of high-temperature wheel bearing grease to the knuckle bore by hand.
- Use the hydraulic shop press 12-ton minimum and front wheel bearing press adapter kit to press each new bearing into the knuckle.
- Press only on the outer race of the new bearing. Pressing on the inner race can ruin the bearing.
- Use heavy-duty snap ring pliers to install each new snap ring fully into its groove.
Step 12: Press the Front Hubs Into the New Bearings
- Use the hydraulic shop press 12-ton minimum and front wheel bearing press adapter kit to support the inner race of the new bearing.
- Press the wheel hub into the bearing until fully seated.
- Do not press through the bearing without supporting the inner race.
- Repeat for the other front knuckle.
Step 13: Reinstall the Front Steering Knuckles
- Guide the front axle through the hub by hand.
- Use a 19mm socket to install the strut-to-knuckle bolts and align your paint marks.
- Tighten the strut-to-knuckle bolts to Torque to 240 Nm (177 ft-lbs).
- Use a 17mm socket to install the lower ball joint fasteners and tighten to Torque to 89 Nm (66 ft-lbs).
- Use a 17mm socket to install the tie rod end nut and tighten to Torque to 49 Nm (36 ft-lbs).
Step 14: Reinstall the Front ABS Sensors and Brakes
- Use a 10mm socket to install each front ABS sensor bolt snugly.
- Use a 10mm socket to reinstall the ABS wire brackets.
- Install the front brake rotors by hand.
- Use a 17mm socket to install caliper bracket bolts and tighten to Torque to 107 Nm (79 ft-lbs).
- Use a 14mm socket to install caliper slide bolts and tighten to Torque to 34 Nm (25 ft-lbs).
Step 15: Remove the Rear Brake Drums
- Make sure the parking brake is released.
- Pull each rear brake drum off by hand.
- If stuck, tap around the drum face with a 2-lb hammer.
- If the shoes are holding the drum, use a flat blade screwdriver through the backing plate access hole to back off the adjuster.
Step 16: Remove the Rear Hub and Bearing Assemblies
- Use a 10mm socket to remove the rear ABS sensor bolt, then gently move the sensor aside.
- Use a 14mm socket to remove the four rear hub mounting bolts from the back of each axle beam flange.
- Pull the rear hub assembly straight off by hand.
- If stuck, use a 2-lb hammer to tap the hub flange evenly from side to side.
- Clean the mounting surface with brake cleaner aerosol and a wire brush.
Step 17: Install the New Rear Hub and Bearing Assemblies
- Apply a thin film of anti-seize compound to the axle beam mounting face by hand.
- Slide each new rear hub assembly into place by hand.
- Use a 14mm socket to install the four rear hub mounting bolts.
- Tighten rear hub mounting bolts evenly in a crisscross pattern to Torque to 80 Nm (59 ft-lbs).
- Use a 10mm socket to reinstall each rear ABS sensor bolt snugly.
Step 18: Reinstall Rear Brake Drums
- Clean the drum contact surface with brake cleaner aerosol.
- Slide each rear brake drum over the new hub by hand.
- Spin each drum by hand. It should rotate with light, even shoe contact.
Step 19: Install New Front Axle Nuts
- Thread each new front axle nut on by hand.
- Use a 30mm axle nut socket to snug the axle nuts while the vehicle is still raised.
- Do not final-torque the axle nuts until the wheels are on the ground.
Step 20: Reinstall Wheels and Lower the Vehicle
- Install all four wheels by hand.
- Use a 21mm socket to snug the lug nuts in a star pattern.
- Use the floor jack rated 2-ton minimum to lift the car slightly, remove the jack stands rated 2-ton minimum, and lower the vehicle to the ground.
Step 21: Final Torque the Wheels and Axle Nuts
- Use a 21mm socket and torque wrench to tighten all wheel lug nuts to Torque to 103 Nm (76 ft-lbs).
- Use a 30mm axle nut socket and high-range torque wrench to tighten both front axle nuts to Torque to 216 Nm (159 ft-lbs).
- Use a brass punch and 2-lb hammer to stake each new axle nut into the axle groove.
✅ After Repair
- ✅ Pump the brake pedal several times before driving. The pedal should feel firm.
- ✅ Drive slowly at first and listen for grinding, clicking, or humming.
- ✅ Confirm the ABS warning light turns off after moving.
- ✅ Recheck lug nut torque after 25-50 miles: Torque to 103 Nm (76 ft-lbs).
- ✅ Get a front wheel alignment after reinstalling the front knuckles.
- ✅ If the steering wheel is off-center or the car pulls, do not delay the alignment.
💰 DIY vs Shop Cost
Shop Cost: $1,200-$1,900 USD equivalent, depending on labor rate and parts quality
DIY Cost: $300-$650 USD equivalent for parts only, plus tool rental or press access
You Save: $700-$1,250 by doing it yourself!
Shop labor rates vary but typically run $100-$150/hour. This repair takes a shop approximately 5-7 hours.
🎯 Ready to get started?
HowToo makes it easy: same-day/2-day shipping on every part, plus all the tools and specialty tools you need! Check out the parts and tools sections below to add everything to your cart.
