








How to Replace All Wheel Bearings on a 2006-2012 Toyota RAV4 AWD (Engine: Inline 4 2.5L)
Step-by-step hub assembly guide with tools, parts, torque specs, and safety tips for 2006, 2007, 2008, 2009, 2010, 2011, 2012
How to Replace All Wheel Bearings on a 2006-2012 Toyota RAV4 AWD (Engine: Inline 4 2.5L)
Step-by-step hub assembly guide with tools, parts, torque specs, and safety tips for 2006, 2007, 2008, 2009, 2010, 2011, 2012


🔧 RAV4 - Wheel Bearing Replacement
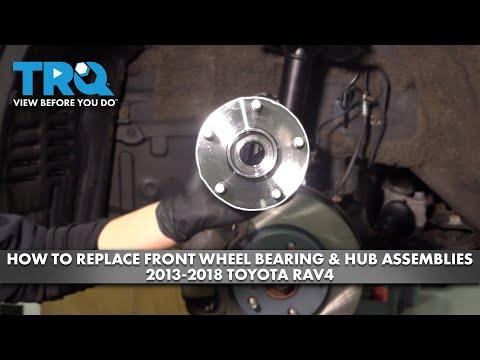
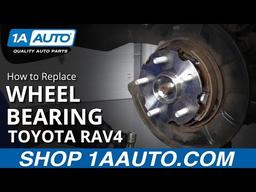
Replacing all wheel bearings on your RAV4 means replacing both front wheel bearing/hub assemblies and both rear wheel bearing/hub assemblies. On your RAV4, the bearings are serviced as bolt-on hub assemblies, so you do not need a hydraulic press.
This job requires lifting the vehicle safely, removing the brake assemblies, removing the axle nuts, unbolting each hub, and installing the new hubs with correct torque.
Difficulty Level: Advanced | Estimated Time: 5-8 hours
⚠️ Safety & Precautions
- ⚠️ Your RAV4 is a hybrid AWD. Do not touch orange high-voltage cables or hybrid components.
- ⚠️ Support the vehicle with jack stands. Never work under a vehicle supported only by a jack.
- ⚠️ Wear safety glasses and gloves. Rust, brake dust, and metal edges can injure you.
- ⚠️ Do not press the brake pedal while any brake caliper is removed.
- ⚠️ Hang brake calipers with wire or a caliper hanger. Do not let them hang by the rubber brake hose.
- ⚠️ The axle nuts are very tight and are one-time-use fasteners. Replace all four.
- ⚠️ The rear hubs on your RAV4 include wheel speed sensor wiring. Handle the wiring carefully to avoid ABS/AWD warning lights.
- ⚠️ Battery disconnect is not required for the mechanical bearing replacement, but keep the vehicle OFF and key away from the cabin.
🔧 Required Tools
You'll need the following tools for this repair:
- Floor jack rated 3-ton minimum
- Jack stands rated 3-ton minimum
- Wheel chocks
- 21mm lug nut socket
- 1/2-inch drive breaker bar
- 1/2-inch drive ratchet handle
- 1/2-inch drive torque wrench 50-250 ft-lbs
- 3/8-inch drive torque wrench 10-100 ft-lbs
- 30mm 12-point axle nut socket
- 14mm socket
- 17mm socket
- 19mm socket
- 10mm socket
- 12mm socket
- Ratchet extension 6-inch
- Flat-blade screwdriver medium
- Needle-nose pliers
- Dead blow hammer 2-lb
- Hub puller kit 5-lug (specialty)
- Slide hammer hub adapter (specialty)
- Wire brush
- Brake cleaner aerosol
- Caliper hanger hooks
- Anti-seize compound
- Paint marker
- Safety glasses
- Nitrile gloves
- Cut-resistant gloves
🔩 Required Parts
HowToo sells all the parts you need for this repair:
- Front wheel bearing and hub assembly - Qty: 2
- Rear wheel bearing and hub assembly - Qty: 2
- Front axle nut - Qty: 2
- Rear axle nut - Qty: 2
- Brake caliper bracket bolts - Qty: 8 recommended
- Hub mounting bolts - Qty: 16 recommended
- Brake cleaner aerosol - Qty: 2 cans
- Anti-seize compound - Qty: 1 tube
📋 Before You Begin
- 🚗 Park your RAV4 on a flat, solid surface.
- 🅿️ Shift to Park and apply the parking brake before loosening lug nuts.
- 🔑 Turn the vehicle OFF and keep the key fob away from the cabin.
- 🧱 Place wheel chocks at the wheels that stay on the ground while lifting one end.
- 🧰 A hub assembly is the bearing and wheel mounting flange built together as one bolt-on part.
- 🧰 A torque wrench tightens bolts to a measured force so parts are secure without being damaged.
- ⚠️ Work one corner at a time if you are new. This prevents mixing up parts.
🔨 Step-by-Step Instructions
Follow these steps in order:
Step 1: Loosen the wheel lug nuts
- Use a 21mm lug nut socket and 1/2-inch drive breaker bar to loosen each lug nut about 1/2 turn while the tires are still on the ground.
- Do not remove the lug nuts yet.
- Tip: Loosen before lifting.
Step 2: Lift and support your RAV4
- Use a floor jack rated 3-ton minimum at the proper Toyota lift point.
- Place jack stands rated 3-ton minimum under the pinch weld or subframe support points.
- Lower your RAV4 gently onto the jack stands.
- Shake the vehicle lightly by hand to confirm it is stable before removing wheels.
Step 3: Remove the wheels
- Use a 21mm lug nut socket and 1/2-inch drive ratchet handle to remove the lug nuts.
- Remove all four wheels and place them flat away from the work area.
Step 4: Unstake and loosen the axle nuts
- Use a flat-blade screwdriver medium to lift the staked portion of each axle nut from the axle shaft groove.
- Use a 30mm 12-point axle nut socket and 1/2-inch drive breaker bar to loosen each axle nut.
- If needed, have a helper press the brake pedal only while the caliper and rotor are still installed.
- Remove and discard the old axle nuts.
- Tip: Axle nuts are very tight.
Step 5: Remove the front brake calipers and rotors
- Start at one front corner.
- Use a 14mm socket and 3/8-inch drive ratchet handle to remove the brake caliper slide pin bolts if removing only the caliper.
- Use a 17mm socket and 1/2-inch drive breaker bar to remove the caliper bracket bolts.
- Lift the caliper and bracket off together.
- Hang the caliper with caliper hanger hooks.
- Pull the brake rotor off by hand.
- If the rotor is stuck, tap the rotor hat with a dead blow hammer 2-lb.
Step 6: Remove the front hub assembly
- Use a 10mm socket or 12mm socket to remove any wheel speed sensor wire brackets attached near the knuckle.
- Push the front axle shaft inward slightly by hand. If stuck, thread the old axle nut on a few turns and tap it with a dead blow hammer 2-lb.
- Use a 17mm socket, ratchet extension 6-inch, and 1/2-inch drive breaker bar to remove the four front hub mounting bolts from the back side of the steering knuckle.
- If the hub is rusted in place, attach a hub puller kit 5-lug (specialty) or slide hammer hub adapter (specialty) and remove the hub.
- Pull the hub assembly straight out of the knuckle.
Step 7: Clean the front hub mounting surface
- Use a wire brush to clean rust and dirt from the steering knuckle bore and mounting face.
- Use brake cleaner aerosol to wash away debris.
- Apply a very thin film of anti-seize compound to the knuckle bore only.
- Do not put anti-seize on bolt threads unless the replacement part instructions say to.
Step 8: Install the front hub assembly
- Slide the new front wheel bearing and hub assembly into the steering knuckle.
- Start all four hub bolts by hand.
- Use a 17mm socket, ratchet extension 6-inch, and 1/2-inch drive ratchet handle to snug the hub bolts evenly.
- Use a 1/2-inch drive torque wrench 50-250 ft-lbs with a 17mm socket to tighten the front hub mounting bolts to Torque to 96 Nm (71 ft-lbs).
- Reinstall any sensor wire brackets with a 10mm socket or 12mm socket and tighten snugly.
Step 9: Reinstall the front brake rotor and caliper
- Clean the brake rotor mounting surface with brake cleaner aerosol.
- Install the rotor by hand.
- Reinstall the caliper and bracket assembly.
- Use a 17mm socket and 3/8-inch drive torque wrench 10-100 ft-lbs to tighten the front caliper bracket bolts to Torque to 107 Nm (79 ft-lbs).
- If caliper slide pin bolts were removed, use a 14mm socket and 3/8-inch drive torque wrench 10-100 ft-lbs to tighten them to Torque to 34 Nm (25 ft-lbs).
Step 10: Repeat the front procedure on the other side
- Repeat Steps 5 through 9 on the other front wheel bearing.
- Use the same tools and torque values.
- Keep left and right parts separated until installed.
Step 11: Remove the rear brake calipers and rotors
- Move to one rear corner.
- Use a 14mm socket and 3/8-inch drive ratchet handle to remove the rear caliper slide pin bolts if removing only the caliper.
- Use a 17mm socket and 1/2-inch drive breaker bar to remove the rear caliper bracket bolts.
- Hang the caliper with caliper hanger hooks.
- Pull the rear rotor off by hand.
- If the rear rotor is stuck, make sure the parking brake is released, then tap the rotor hat with a dead blow hammer 2-lb.
Step 12: Disconnect rear hub sensor wiring
- Use a shop light to follow the rear hub wheel speed sensor wire from the hub to its connector.
- Use a small flat-blade screwdriver to release the connector lock tab.
- Use needle-nose pliers to release wiring clips from the bracket if needed.
- Do not pull on the wire itself.
Step 13: Remove the rear hub assembly
- Push the rear axle shaft inward slightly by hand. If stuck, thread the old axle nut on a few turns and tap it with a dead blow hammer 2-lb.
- Use a 17mm socket, ratchet extension 6-inch, and 1/2-inch drive breaker bar to remove the rear hub mounting bolts from the back side of the knuckle.
- If the hub is stuck from rust, use a hub puller kit 5-lug (specialty) or slide hammer hub adapter (specialty).
- Remove the rear hub assembly and feed the sensor wire out carefully.
Step 14: Clean the rear hub mounting surface
- Use a wire brush to clean the rear knuckle bore and mounting face.
- Use brake cleaner aerosol to remove brake dust and rust flakes.
- Apply a thin film of anti-seize compound to the knuckle bore only.
Step 15: Install the rear hub assembly
- Feed the sensor wire from the new rear wheel bearing and hub assembly through the same path as the original.
- Slide the rear hub into the knuckle.
- Start all hub bolts by hand.
- Use a 17mm socket, ratchet extension 6-inch, and 1/2-inch drive ratchet handle to snug the bolts evenly.
- Use a 1/2-inch drive torque wrench 50-250 ft-lbs with a 17mm socket to tighten the rear hub mounting bolts to Torque to 96 Nm (71 ft-lbs).
- Reconnect the wheel speed sensor connector until it clicks.
- Use needle-nose pliers to seat all sensor wire clips back into their brackets.
Step 16: Reinstall the rear brake rotor and caliper
- Clean the rear rotor mounting surface with brake cleaner aerosol.
- Install the rotor by hand.
- Reinstall the caliper and bracket assembly.
- Use a 17mm socket and 3/8-inch drive torque wrench 10-100 ft-lbs to tighten the rear caliper bracket bolts to Torque to 88 Nm (65 ft-lbs).
- If rear caliper slide pin bolts were removed, use a 14mm socket and 3/8-inch drive torque wrench 10-100 ft-lbs to tighten them to Torque to 34 Nm (25 ft-lbs).
Step 17: Repeat the rear procedure on the other side
- Repeat Steps 11 through 16 on the other rear wheel bearing.
- Use the same tools and torque values.
- Make sure both rear sensor wires are clipped securely away from moving parts.
Step 18: Install new axle nuts
- Install new front axle nut and rear axle nut on each axle by hand.
- Use a 30mm 12-point axle nut socket and 1/2-inch drive torque wrench 50-250 ft-lbs to tighten each axle nut to Torque to 216 Nm (159 ft-lbs).
- Use a flat-blade screwdriver medium or needle-nose pliers to stake each new axle nut into the axle groove.
- Staking means bending the nut edge into the axle groove so it cannot loosen.
Step 19: Reinstall the wheels
- Install each wheel by hand.
- Start all lug nuts by hand to prevent cross-threading.
- Use a 21mm lug nut socket and 1/2-inch drive ratchet handle to snug the lug nuts in a star pattern.
Step 20: Lower and torque the wheels
- Use the floor jack rated 3-ton minimum to lift your RAV4 slightly off the jack stands.
- Remove the jack stands rated 3-ton minimum.
- Lower your RAV4 until the tires just touch the ground.
- Use a 21mm lug nut socket and 1/2-inch drive torque wrench 50-250 ft-lbs to tighten the lug nuts in a star pattern to Torque to 103 Nm (76 ft-lbs).
- Lower your RAV4 fully to the ground.
✅ After Repair
- ✅ Pump the brake pedal several times before driving until it feels firm.
- ✅ Start your RAV4 and check for ABS, brake, traction, or AWD warning lights.
- ✅ Test drive slowly first. Listen for grinding, clicking, or rubbing.
- ✅ Drive at 20-40 mph and gently steer left and right to confirm bearing noise is gone.
- ✅ Recheck lug nut torque after 25-50 miles.
- ✅ If any ABS or AWD warning light appears, recheck the rear hub sensor connectors and wiring clips first.
- ✅ A wheel alignment is recommended if any suspension fasteners were loosened, but this hub-only procedure normally does not require alignment.
💰 DIY vs Shop Cost
Shop Cost: $1,600-$2,800 (parts + labor)
DIY Cost: $500-$1,000 (parts only)
You Save: $1,100-$1,800 by doing it yourself!
Shop labor rates vary but typically run $100-$150/hour. This repair takes a shop approximately 5-7 hours.
🎯 Ready to get started?
HowToo makes it easy: same-day/2-day shipping on every part, plus all the tools and specialty tools you need! Check out the parts and tools sections below to add everything to your cart.