

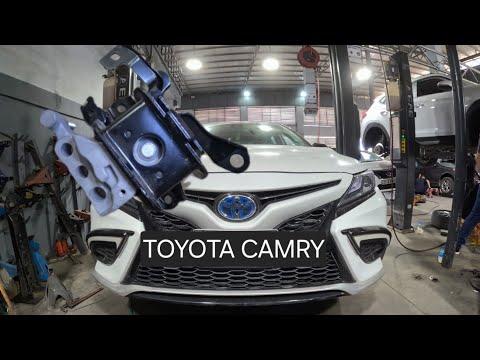



How to Replace All Engine Mounts on a 2018-2024 Toyota Camry 2.5L (Engine: Inline 4 2.5L)
Step-by-step guide covering tools, parts, torque specs, and essential safety tips for 2018, 2019, 2020, 2021, 2022, 2023, 2024
How to Replace All Engine Mounts on a 2018-2024 Toyota Camry 2.5L (Engine: Inline 4 2.5L)
Step-by-step guide covering tools, parts, torque specs, and essential safety tips for 2018, 2019, 2020, 2021, 2022, 2023, 2024


🔧 Camry - Engine Mount Replacement
This procedure covers replacement of the right engine mount, left transmission mount, front torque mount, and rear torque mount on your Camry. Each mount must be replaced one at a time while the powertrain is securely supported.
Difficulty Level: Advanced | Estimated Time: 6-9 hours
Assumption: This procedure covers all four factory powertrain mounts; access can vary slightly by production date.
⚠️ Safety & Precautions
- ⚠️ Never work beneath the vehicle unless it is supported by properly positioned jack stands.
- ⚠️ Use an engine support bar from above. Do not place a floor jack directly against the aluminum oil pan or transmission case.
- ⚠️ Replace only one mount at a time. Removing several mounts can let the engine and transmission shift unexpectedly.
- ⚠️ Keep fingers away from mount brackets while raising or lowering the powertrain.
- ⚠️ Allow the engine and exhaust system to cool completely before replacing the rear mount.
- ⚠️ Disconnect the negative battery terminal before removing the battery tray or working near the starter wiring.
- ⚠️ The rear mount has limited access and may require slight front-subframe lowering. Stop if the engine cannot be supported securely.
🔧 Required Tools
You'll need the following tools for this repair:
- 10mm socket
- 12mm socket
- 14mm socket
- 17mm socket
- 19mm socket
- 14mm combination wrench
- 17mm combination wrench
- 19mm combination wrench
- 3/8-inch drive ratchet
- 1/2-inch drive ratchet
- 1/2-inch drive breaker bar
- 3-inch socket extension
- 6-inch socket extension
- 12-inch socket extension
- 3/8-inch drive universal joint
- 10-80 Nm torque wrench
- 40-200 Nm torque wrench
- Engine support bar rated 500kg minimum (specialty)
- Hydraulic floor jack rated 2-ton minimum
- Jack stands rated 2-ton minimum
- Wheel chocks
- Plastic trim-clip removal tool
- Medium flat-blade screwdriver
- Paint marker
- Mechanic gloves
- Safety glasses
🔩 Required Parts
HowToo sells all the parts you need for this repair:
- Right engine mounting insulator - Qty: 1
- Left transmission mounting insulator - Qty: 1
- Front engine torque mount - Qty: 1
- Rear engine torque mount - Qty: 1
- Replacement mount locking nuts - Qty: As required
- Replacement subframe bolts - Qty: As required if the subframe is lowered
Use mounts specifically cataloged for the 2.5L FWD powertrain. Mounts for the V6 or hybrid powertrain are different.
📋 Before You Begin
- 📍 Park your Camry on level, solid ground. Select Park, apply the parking brake, and chock both rear wheels.
- 🔑 Switch the ignition off and keep the smart key away from the vehicle.
- 🔋 Open the trunk before disconnecting the battery. Use a 10mm socket to disconnect the negative battery terminal, then isolate the cable for at least 90 seconds.
- 🛠️ Install the engine support bar across the reinforced upper body edges. An engine support bar holds the powertrain from above using an adjustable chain or hook.
- 📏 Apply only enough tension to carry the engine's weight. Do not lift the vehicle with the support bar.
- 🧭 Mark each original mount position with a paint marker before loosening it.
🔨 Step-by-Step Instructions
Follow these steps in order:
Step 1: Raise and secure the vehicle
- Use the hydraulic floor jack at the front-center jacking point behind the engine under-cover area.
- Place the jack stands under the reinforced left and right front side supports, then lower the vehicle onto them.
- Gently shake the vehicle to confirm it is stable before going underneath.
- Keep the floor jack nearby as a secondary support, but do not rely on it alone.
Step 2: Remove the lower engine covers
- Wear safety glasses and use the 10mm socket to remove the under-cover screws.
- Use the plastic trim-clip removal tool to release the plastic retainers without breaking their center pins.
- Remove the front and center under-covers and arrange the fasteners by location.
- Photograph each fastener position before removal.
Step 3: Install and tension the engine support bar
- Position the 500kg engine support bar across the reinforced upper body edges according to its instructions.
- Connect its hook or chain to the factory engine lifting eye.
- Tighten the support-bar adjuster by hand until the chain is taut, then lift the engine only 2-3mm.
- Watch the radiator hoses, wiring, air-conditioning pipes, and exhaust flex section while adjusting the support.
Step 4: Replace the right engine mount
- Use the 10mm socket and plastic trim-clip removal tool to release the right-side intake duct and any wiring retainers obstructing the mount.
- Use the 14mm and 17mm sockets with the 3-inch or 6-inch extension to loosen the mount-to-body fasteners and center fastener.
- Adjust the engine support bar slightly until the center fastener slides out without binding.
- Remove the old mount, compare its locating pins and bracket shape with the replacement, and place the new mount in the marked position.
- Start every fastener by hand. Do not use the ratchet until several threads are engaged.
- Use the torque wrench to tighten M10 mount fasteners to 52 Nm (38 ft-lbs).
- Use the torque wrench to tighten M12 mount fasteners to 95 Nm (70 ft-lbs).
- Reattach the wiring retainers and intake duct with the 10mm socket.
Step 5: Remove the battery and battery tray
- Confirm the negative terminal remains disconnected.
- Use the 10mm socket to disconnect the positive battery terminal.
- Use the 10mm socket and 6-inch extension to remove the battery hold-down bracket.
- Lift the battery vertically while wearing gloves. Keep it upright.
- Use the 10mm and 12mm sockets to remove the air-cleaner inlet, battery tray, cable retainers, and brackets covering the left mount.
Step 6: Replace the left transmission mount
- Use the engine support bar adjuster to keep the transmission level before loosening the mount.
- Use the 14mm and 17mm sockets, extensions, and breaker bar to loosen the mount-to-body and mount-to-transmission fasteners.
- If a nut turns with its bolt, hold it with the matching 14mm or 17mm combination wrench.
- Raise or lower the support bar only a few millimeters until each fastener can be removed by hand.
- Remove the mount and install the replacement in the paint-marked position.
- Start all fasteners by hand, then tighten them evenly with the ratchet.
- Use the torque wrench to tighten M10 mount fasteners to 52 Nm (38 ft-lbs).
- Use the torque wrench to tighten M12 mount fasteners to 95 Nm (70 ft-lbs).
- Leave the battery tray and battery out until the remaining mounts are finished.
Step 7: Replace the front torque mount
- From underneath, identify the front torque mount between the powertrain and front subframe. A torque mount limits forward-and-back engine movement.
- Use the 17mm or 19mm socket and breaker bar to loosen the center through-bolt.
- Use the 14mm or 17mm socket to remove the mount-to-subframe fasteners.
- Adjust the engine support bar slightly until the through-bolt slides out freely.
- Install the new mount with its locating features matching the original orientation.
- Start all fasteners by hand and align the mount without using the bolts to force it into position.
- Use the torque wrench to tighten M10 mounting fasteners to 52 Nm (38 ft-lbs).
- Use the torque wrench to tighten the M12 through-bolt to 95 Nm (70 ft-lbs).
Step 8: Access the rear torque mount
- Allow the exhaust to cool completely before reaching behind the engine.
- Use the 14mm, 17mm, and 19mm sockets with the 12-inch extension and universal joint to access the rear mount fasteners.
- Use the paint marker to outline the subframe position before loosening any subframe bolt.
- If the mount cannot be removed at normal ride position, support the subframe with the hydraulic floor jack and a broad, stable contact surface.
- Use the 19mm socket and breaker bar to loosen only the rear subframe bolts enough to create working clearance. Do not remove the subframe or allow it to hang from the steering shaft, hoses, or wiring.
Step 9: Replace the rear torque mount
- Use the 17mm or 19mm socket and breaker bar to remove the rear mount through-bolt.
- Use the 14mm or 17mm socket, extensions, and universal joint to remove the mount bracket fasteners.
- Remove the old mount and install the replacement in the same direction.
- Start every fastener by hand before tightening.
- Use the torque wrench to tighten M10 mounting fasteners to 52 Nm (38 ft-lbs).
- Use the torque wrench to tighten the M12 through-bolt to 95 Nm (70 ft-lbs).
- If loosened, raise the subframe to the paint marks with the hydraulic floor jack and install new subframe bolts.
- Use the torque wrench to tighten the subframe bolts to the specification supplied with the replacement bolts. Toyota subframe fasteners may use a torque-plus-angle procedure and must not be guessed.
- Have a Toyota-capable workshop complete the subframe final torque and wheel alignment if the correct bolt-specific specification is unavailable.
Step 10: Settle the mounts
- Confirm all mount fasteners are installed and initially tightened.
- Use the engine support bar adjuster to lower the powertrain slowly until its full weight rests on the mounts.
- Check that no mount is twisted and that each locating pin remains seated.
- Recheck all accessible fasteners with the appropriate torque wrench.
- Remove the engine support bar only after all four mounts are secure.
Step 11: Reinstall the battery and intake components
- Use the 10mm and 12mm sockets to reinstall the battery tray, air-cleaner inlet, brackets, and cable retainers.
- Tighten small M6 battery-tray and intake fasteners to 10 Nm (89 in-lbs).
- Set the battery into its tray and use the 10mm socket to install the hold-down bracket.
- Tighten the hold-down nuts to 5 Nm (44 in-lbs). Do not crush the battery case.
- Connect the positive terminal first with the 10mm socket, then connect the negative terminal last.
- Tighten each battery terminal clamp to 5.4 Nm (48 in-lbs).
Step 12: Reinstall the lower covers
- Use the plastic trim-clip removal tool to prepare any reusable clips by extending their center pins.
- Position the under-covers and install the clips by hand.
- Use the 10mm socket to tighten the under-cover screws to 5 Nm (44 in-lbs).
- Use the hydraulic floor jack to raise the vehicle, remove the jack stands, and lower the vehicle completely.
✅ After Repair
- ✅ Switch the ignition on and reset the clock and preferred vehicle settings if necessary.
- ✅ Start the engine with the transmission in Park. Listen for knocking and watch for excessive engine movement.
- ✅ Hold the brake firmly and shift slowly through Reverse, Neutral, and Drive. A small movement is normal; a sharp clunk is not.
- ✅ Confirm the air intake, battery cables, hoses, wiring clips, and lower covers are secure.
- ✅ Take a short, low-speed test drive and listen during acceleration, braking, and gear changes.
- ✅ If the subframe was loosened, obtain a four-wheel alignment and steering-angle check before regular driving.
- ✅ Reinspect the mounts for contact marks, loose fasteners, or shifted brackets after the test drive.
💰 DIY vs Shop Cost
Shop Cost: ₹45,000-₹90,000 (parts + labor)
DIY Cost: ₹22,000-₹55,000 (parts only)
You Save: ₹23,000-₹35,000 by doing it yourself!
Panipat labor rates vary widely. Replacing all mounts typically takes a shop approximately 5-8 hours, with alignment charged separately if the subframe is disturbed.
🎯 Ready to get started?
HowToo makes it easy: same-day/2-day shipping on every part, plus all the tools and specialty tools you need! Check out the parts and tools sections below to add everything to your cart.