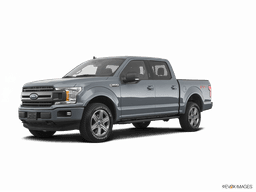









How to Replace a Rear LED Turn Signal on a 2015-2020 Ford F-150 Limited
Step-by-step taillamp assembly replacement with required tools, BLIS tips, and safety checks for 2015, 2016, 2017, 2018, 2019, 2020
How to Replace a Rear LED Turn Signal on a 2015-2020 Ford F-150 Limited
Step-by-step taillamp assembly replacement with required tools, BLIS tips, and safety checks for 2015, 2016, 2017, 2018, 2019, 2020


🔧 F-150 - Rear Turn Signal Lamp Replacement
This one isn’t a bulb job. Your F-150 Limited came with LED taillamps, so the rear turn signal is built into the sealed lamp assembly. If the LEDs have failed, replace the complete taillamp on the affected side rather than installing the bulb shown in the parts aisle. Ford’s brochure confirms LED taillamps on the Limited, and its owner’s manual identifies LED rear direction indicators as non-serviceable. ford.com)
Difficulty Level: Beginner | Estimated Time: 20-40 minutes
⚠️ Safety & Precautions
- ⚠️ Switch the ignition and all exterior lights off.
- ⚠️ Let the lamp cool before handling it.
- ⚠️ Support the assembly while unplugging it so it cannot scratch the paint.
- ⚠️ Do not pry between the lamp and painted bodywork with a screwdriver.
- ⚠️ Battery disconnection is not normally required.
🔧 Required Tools
You'll need the following tools for this repair:
- 8mm socket
- 1/4-inch drive ratchet
- 3-inch socket extension
- Plastic trim-removal tool
- Microfiber towel
- Nitrile gloves
- Safety glasses
🔩 Required Parts
HowToo sells all the parts you need for this repair:
- LED rear taillamp assembly for the affected side - Qty: 1
Important: Match the replacement to the left or right side and to your F-150’s BLIS configuration. BLIS means Blind Spot Information System, and its radar module is mounted behind the taillamp area. The loose miniature bulbs currently shown are not the correct repair for the factory LED taillamp.
📋 Before You Begin
- 📋 Park on level ground, shift into Park and apply the parking brake.
- 📋 Turn the ignition and exterior lamps off, then remove the key from the work area.
- 📋 Open the tailgate fully to expose the two taillamp retaining bolts.
- 📋 Place a microfiber towel below the lamp to protect the paint.
- 📋 No infotainment service mode or scan-tool command is required for ordinary lamp replacement.
🔨 Step-by-Step Instructions
Follow these steps in order:
Step 1: Remove the retaining bolts
- Use the 8mm socket, extension and ratchet to remove the two bolts along the inner edge of the taillamp opening.
- Keep the bolts somewhere safe. Tailgates are talented at hiding small hardware.
Step 2: Release the taillamp assembly
- Hold the lamp with both hands and pull it straight rearward, parallel with the side of the bed.
- Use the plastic trim-removal tool only if gentle assistance is needed at the lamp’s outer edge.
- Do not twist the assembly outward. That can break its alignment pins.
- Rock gently while pulling straight back.
Step 3: Disconnect the wiring
- Support the lamp with one hand.
- Press the electrical connector’s locking tab with your fingers and pull the connector straight out.
- If equipped with more than one connector, release each locking tab individually. Do not pull on the wires.
Step 4: Transfer attached equipment if required
- Compare the old and replacement assemblies before installation.
- If the replacement does not include an attached BLIS radar module or mounting hardware, transfer only the components specifically designed to be reused.
- Use the 8mm socket and ratchet for any matching fasteners, keeping each fastener in its original location.
- Do not open the sealed LED lamp housing. The internal turn-signal LEDs are not individually replaceable.
Step 5: Connect and test the replacement lamp
- Push each electrical connector into place until its locking tab clicks.
- Support the lamp away from the body while an assistant switches on the hazard flashers.
- Confirm that the rear turn signal, brake lamp, parking lamp and reverse lamp functions operate correctly.
- Switch the ignition and lights off again before installing the assembly.
Step 6: Install the taillamp assembly
- Align the lamp’s locating pins with their body grommets.
- Press the assembly straight forward using firm, even hand pressure.
- Confirm that the lamp sits flush with the bedside and tailgate opening.
Step 7: Install the retaining bolts
- Start both bolts by hand to prevent cross-threading.
- Use the 8mm socket and ratchet to tighten them evenly until seated.
- Ford’s owner instructions do not publish a service torque for these bolts. Use light hand pressure and do not crush the plastic mounting tabs.
✅ After Repair
- ✅ Close the tailgate carefully and check that it does not contact the lamp.
- ✅ Operate both turn signals, the hazard flashers, brake lamps, parking lamps and reverse lamps.
- ✅ Check the instrument cluster for a BLIS or cross-traffic system warning.
- ✅ If a BLIS warning remains after transferring or replacing its radar module, professional aiming or calibration may be required.
- ✅ After the next rain or wash, inspect the lamp for internal water buildup.
💰 DIY vs Shop Cost
Shop Cost: $500-$1,200, depending on lamp type and BLIS equipment
DIY Cost: $300-$900 for the complete LED assembly
You Save: Approximately $100-$300 by doing it yourself!
Shop labor rates typically run $100-$150/hour. This repair takes a shop approximately 0.3-0.7 hour, excluding any required BLIS calibration.
🎯 Ready to get started?
HowToo makes it easy: same-day/2-day shipping on every part, plus all the tools and specialty tools you need! Check out the parts and tools sections below to add everything to your cart. Make sure you choose the complete LED taillamp assembly, not a miniature replacement bulb.