


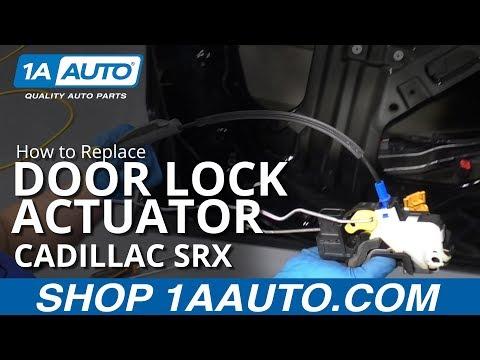






How to Replace a Rear Door Lock Actuator on a 2019-2021 Cadillac XT4
Step-by-step latch assembly replacement with tools, parts, torque specs, and safety tips for 2019, 2020, 2021
How to Replace a Rear Door Lock Actuator on a 2019-2021 Cadillac XT4
Step-by-step latch assembly replacement with tools, parts, torque specs, and safety tips for 2019, 2020, 2021


🔧 XT4 - Rear Door Lock Actuator Replacement
Replace the complete rear latch and actuator assembly. The job involves removing the interior door panel, peeling back the water shield, disconnecting the handle cables, and unbolting the latch.
Difficulty Level: Intermediate | Estimated Time: 1.5-2.5 hours
Assumption: These instructions cover either rear passenger door. Left and right actuators are different, and the listed replacements are for an XT4 without the anti-theft package.
⚠️ Safety & Precautions
- ⚠️ Lower the window before disconnecting the battery so you can protect and position the glass.
- ⚠️ Disconnect the negative battery cable before unplugging door wiring.
- ⚠️ Wait at least two minutes after disconnecting the battery before beginning work.
- ⚠️ Support the door panel while unplugging it. Pulling on the wiring can damage the connectors.
- ⚠️ Don’t tear the water shield. A poor seal can let rainwater enter the cabin.
- ⚠️ Wear gloves around the inner door structure because the stamped-metal edges can be sharp.
🔧 Required Tools
You'll need the following tools for this repair:
- 10mm socket
- 7mm socket
- Torx T30 socket
- 1/4-inch drive ratchet
- 3-inch socket extension
- Inch-pound torque wrench
- Plastic trim removal tool set
- Small flat-blade screwdriver
- 90-degree pick tool
- Needle-nose pliers
- Masking tape
- Butyl sealing tape
- Work gloves
- Safety glasses
🔩 Required Parts
HowToo sells all the parts you need for this repair:
- Dorman 937-055 integrated door lock actuator - Left rear door without anti-theft package - Qty: 1
- Dorman 937-056 integrated door lock actuator - Right rear door without anti-theft package - Qty: 1
- Replacement door-panel clips - Qty: As needed
- Butyl sealing tape - Qty: 1 roll
Buy only the actuator matching the affected side. The liftgate actuator shown separately in the parts list is not used for this repair. Left means the driver side on a U.S.-market XT4.
📋 Before You Begin
- 📋 Park your XT4 on level ground, shift into Park, and switch the ignition off.
- 📋 Lower the affected rear window completely.
- 📋 Open the liftgate and locate the battery beneath the rear cargo-floor access area.
- 📋 Use a 10mm socket to disconnect the negative battery terminal. Isolate the cable so it cannot spring back.
- 📋 Place masking tape around painted surfaces near the door trim and latch opening.
- 📋 Keep screws arranged by location. GM door-panel fasteners can look similar while having different lengths.
🔨 Step-by-Step Instructions
Follow these steps in order:
Step 1: Remove the inside handle trim
- Use a plastic trim removal tool to lift the small trim cover behind the interior door-release handle.
- Work from the provided notch. Don’t pry against the visible finished edge.
- Remove the exposed screw with the appropriate 7mm socket or Torx driver, depending on the installed fastener.
Step 2: Remove the armrest fastener
- Use a plastic trim removal tool to lift the rubber liner or trim cover inside the door-pull pocket.
- Use a 7mm socket to remove the concealed door-panel screw.
- Place the screw and cover together so they return to the same location.
Step 3: Release the door-panel clips
- Insert a plastic trim removal tool between the panel and door at the lower rear corner.
- Move around the bottom and sides, releasing one retaining clip at a time.
- Pull beside each clip instead of bending the panel from a distance.
- Cold plastic clips break easily, so work slowly.
Step 4: Lift off the door panel
- Grip the released panel with both hands and lift it straight upward from the window ledge.
- Support the panel close to the door. Don’t let it hang from its wiring.
- Use a small flat-blade screwdriver to release the electrical-connector locks, then unplug the window switch and courtesy-light connectors.
- Use needle-nose pliers or a pick tool to release the interior handle cable retainer.
- Rotate the cable out of its bracket and unhook the cable end from the handle.
Step 5: Remove the water shield
- Use a plastic trim tool to start separating the water shield from the black butyl adhesive.
- Peel back only the section needed to reach the latch and wiring.
- Keep the adhesive clean. Add fresh butyl sealing tape during assembly if it no longer feels sticky.
- Don’t use a knife near the shield or wiring harness.
Step 6: Disconnect the latch wiring
- Locate the electrical connector on the rear edge of the integrated latch assembly.
- Use a small flat-blade screwdriver to release its secondary lock if equipped.
- Press the connector tab and unplug it by the plastic housing, not the wires.
Step 7: Disconnect the exterior handle linkage
- Reach through the service opening and locate the exterior handle cable at the latch.
- Use a 90-degree pick tool to release the cable housing from its bracket.
- Rotate the cable end into alignment with its release slot, then unhook it from the latch lever.
- Photograph the original cable routing before removal. That little picture can save a lot of colorful vocabulary.
Step 8: Remove the old latch and actuator
- Support the latch through the inner service opening with one hand.
- Use a Torx T30 socket and ratchet to remove the three latch screws from the rear edge of the door.
- Guide the integrated latch and actuator assembly through the service opening.
- Don’t bend the handle cable or snag the wiring harness while removing it.
Step 9: Compare the replacement assembly
- Place the old and new assemblies beside each other.
- Confirm that the connector, mounting holes, cable brackets, and latch orientation match.
- Confirm that you have the left-rear or right-rear part required for the affected door.
- Transfer any reusable cable retainers not supplied with the replacement.
Step 10: Install the new actuator and latch
- Guide the new assembly into the door without forcing it against the window track.
- Start all three latch screws by hand to prevent cross-threading.
- Use the Torx T30 socket and torque wrench to tighten the latch screws evenly to 9 Nm (80 in-lbs).
- Don’t use an impact driver. These screws thread into a compact latch body.
Step 11: Reconnect the handle cable and wiring
- Hook the exterior handle cable end into the new latch lever.
- Press the cable housing firmly into its retaining bracket.
- Route the cable exactly as it was originally installed, with no sharp bends.
- Reconnect the electrical plug until its locking tab clicks.
- Pull gently on the connector to confirm it’s locked.
Step 12: Test the latch before closing the door
- Reconnect the negative battery terminal temporarily with a 10mm socket.
- Use a screwdriver shaft to rotate the latch claw into its closed position while keeping the door open.
- Operate the power lock and both door handles. The latch must lock, unlock, release, and return smoothly.
- Pull the inside handle to reopen the simulated latch before attempting to close the door.
- If the handle does not release it, disconnect the battery and correct the cable routing before continuing.
Step 13: Reseal the water shield
- Disconnect the negative battery cable again with a 10mm socket.
- Press the water shield firmly into its original adhesive channel.
- Use fresh butyl sealing tape wherever the original adhesive is dirty, stretched, or missing.
- Seal the entire lower and side edges. Water normally travels through the inside of the door and must stay outside the cabin.
Step 14: Reinstall the door panel
- Reconnect the interior handle cable and press its housing into the bracket.
- Reconnect every electrical connector until each lock clicks.
- Hang the top of the panel over the window ledge and confirm it sits evenly.
- Align the retaining clips with their holes, then press around the panel perimeter using your palm.
- Replace any clip that is bent, loose, or broken.
Step 15: Install the panel screws and trim
- Use the 7mm socket or appropriate Torx driver to install the handle and armrest fasteners.
- Tighten the small trim screws snugly to approximately 2.5 Nm (22 in-lbs).
- Press the handle trim cover and armrest liner back into place by hand.
- Reconnect the negative battery terminal with a 10mm socket and tighten securely without overtightening.
✅ After Repair
- ✅ Test locking and unlocking with the key fob, interior switch, and exterior handle.
- ✅ Test the inside handle with the child-safety lock switched off.
- ✅ Engage the child-safety lock and confirm the inside handle is disabled while the outside handle still works.
- ✅ Open and close the door several times before driving.
- ✅ Run the window fully down and up to confirm the glass and regulator do not contact the latch wiring.
- ✅ If automatic window operation is lost, close the window completely and hold the switch upward for several seconds to relearn it.
- ✅ Confirm the door-open warning disappears when the door is fully latched.
💰 DIY vs Shop Cost
Shop Cost: $325-$550 (parts + labor)
DIY Cost: $120-$165 (parts only)
You Save: $160-$430 by doing it yourself!
Shop labor rates vary but typically run $100-$150/hour. This repair takes a shop approximately 1.0-1.8 hours.
🎯 Ready to get started?
HowToo makes it easy: same-day/2-day shipping on every part, plus all the tools and specialty tools you need! Check out the parts and tools sections below to add everything to your cart.
