

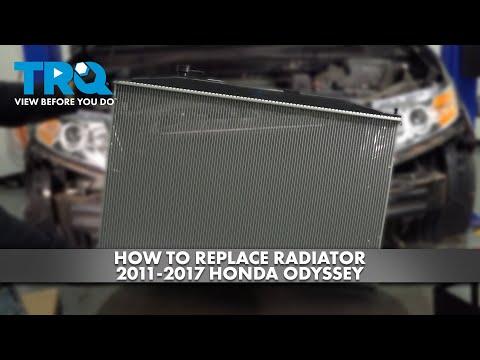







How to Replace a Radiator Hose on a 2018 Honda Odyssey
Step-by-step cooling system repair guide with tools, parts, bleeding tips, and safety checks
How to Replace a Radiator Hose on a 2018 Honda Odyssey
Step-by-step cooling system repair guide with tools, parts, bleeding tips, and safety checks


🔧 Odyssey - Radiator Hose Replacement
Replacing a radiator hose on your Odyssey means draining some coolant, removing the old hose, installing the new hose, and refilling/bleeding the cooling system. Radiator hoses carry hot coolant between the engine and radiator, so replacement is important if a hose is swollen, cracked, leaking, soft, or oil-soaked.
Difficulty Level: Beginner | Estimated Time: 1-2 hours
Assumption: This procedure covers the upper or lower radiator hose; the lower hose may require more access from underneath.
⚠️ Safety & Precautions
- ⚠️ Never open the radiator cap or coolant reservoir cap when the engine is hot; hot coolant can spray out and cause serious burns.
- ⚠️ Let your Odyssey cool for at least 2-3 hours before starting.
- ⚠️ Coolant is poisonous to people and pets; catch it in a drain pan and wipe spills immediately.
- ⚠️ Use jack stands if raising the front of the van; never work under a vehicle supported only by a jack.
- ⚠️ Battery disconnect is not normally required for radiator hose replacement on your Odyssey.
🔧 Required Tools
You'll need the following tools for this repair:
- Safety glasses
- Nitrile gloves
- Drain pan 2-gallon minimum
- Flat-blade screwdriver 6-inch
- Phillips #2 screwdriver
- 10mm socket
- 3/8-inch drive ratchet
- Long-reach hose clamp pliers (specialty)
- Slip-joint pliers 10-inch
- Trim clip removal tool
- Funnel spill-free coolant filling kit (specialty)
- Floor jack rated 3-ton minimum
- Jack stands rated 3-ton minimum
- Shop towels
- Plastic scraper
🔩 Required Parts
HowToo sells all the parts you need for this repair:
- Radiator hose - Qty: 1
- Radiator hose clamps - Qty: 2
- Honda-compatible premixed coolant - Qty: 1-2 gallons
📋 Before You Begin
- Park your Odyssey on level ground and set the parking brake.
- Make sure the engine is completely cool before touching any cooling system parts.
- If replacing the lower radiator hose, raise the front of the van with a floor jack rated 3-ton minimum and support it with jack stands rated 3-ton minimum.
- A hose clamp is the metal ring that squeezes the hose tight onto the radiator or engine fitting.
- A spill-free coolant filling kit is a funnel setup that helps remove trapped air from the cooling system while refilling.
🔨 Step-by-Step Instructions
Follow these steps in order:
Step 1: Let the Engine Cool
- Put on safety glasses and nitrile gloves.
- Touch the upper radiator hose carefully with your hand; it should feel cool, not warm or pressurized.
- Slowly loosen the coolant reservoir cap by hand only after the engine is fully cool.
- Cold engine only.
Step 2: Raise the Vehicle if Needed
- If replacing the upper radiator hose, you can usually work from above with the hood open.
- If replacing the lower radiator hose, use a floor jack rated 3-ton minimum to lift the front of your Odyssey.
- Place jack stands rated 3-ton minimum under the proper front support points before going underneath.
- Gently shake the vehicle by hand to confirm it is stable before working below it.
Step 3: Remove Lower Splash Shield Access if Needed
- Use a trim clip removal tool to remove plastic push clips from the lower splash shield if access is blocked.
- Use a 10mm socket and 3/8-inch drive ratchet to remove any 10mm fasteners holding the shield.
- Set the clips and fasteners aside in order so they go back in the same places.
Step 4: Drain Some Coolant
- Place a drain pan 2-gallon minimum under the radiator drain area.
- Use a flat-blade screwdriver 6-inch or your fingers, depending on access, to carefully open the radiator drain plug if accessible.
- Drain enough coolant so the hose level is below the fluid level; usually 1 gallon is enough for a hose replacement.
- If the drain plug is hard to access, leave it alone and expect more coolant to spill when the hose is removed.
- Close the radiator drain plug by hand snugly; do not overtighten plastic drain fittings.
- Catch every drop you can.
Step 5: Loosen the Hose Clamps
- Use long-reach hose clamp pliers (specialty) to squeeze the spring clamp tabs together.
- Slide the clamp several inches back onto the hose.
- If your replacement setup uses worm-gear clamps, use a flat-blade screwdriver 6-inch to loosen the clamp screw.
- Repeat this on both ends of the radiator hose.
Step 6: Remove the Old Radiator Hose
- Use your hands to twist the hose gently to break it loose from the radiator and engine fitting.
- If it will not move, use slip-joint pliers 10-inch to gently twist the hose end only; do not crush the plastic radiator neck.
- If the hose is stuck badly, use a plastic scraper to carefully loosen the rubber edge from the fitting.
- Pull the hose off and aim the open end into the drain pan 2-gallon minimum.
- Do not pry on plastic necks.
Step 7: Clean the Hose Fittings
- Use shop towels to wipe old coolant from the radiator neck and engine fitting.
- Use a plastic scraper to remove stuck rubber residue if needed.
- Check that both fittings are smooth, round, and not cracked.
- If the radiator neck is cracked, stop and replace the damaged component before installing the hose.
Step 8: Install the New Radiator Hose
- Compare the new radiator hose to the old hose to confirm the bends and length match.
- Slide one radiator hose clamp over each end of the new hose.
- Push the hose fully onto the radiator neck and engine fitting by hand.
- The hose should pass over the raised bead on each fitting; the bead is the small lip that keeps the hose from sliding off.
- Use long-reach hose clamp pliers (specialty) to position spring clamps behind the raised bead.
- If using worm-gear clamps, tighten with a flat-blade screwdriver 6-inch until snug; do not overtighten and cut the hose.
Step 9: Refill the Cooling System
- Install a funnel spill-free coolant filling kit (specialty) on the radiator filler neck or coolant reservoir fill point, depending on access.
- Pour in Honda-compatible premixed coolant slowly until the system stays full.
- Fill the coolant reservoir to the MAX line using the same coolant.
- Use shop towels to clean any spilled coolant from painted surfaces, belts, and hoses.
Step 10: Bleed Air from the Cooling System
- Start the engine and let it idle with the funnel spill-free coolant filling kit (specialty) installed.
- Set the cabin heater to full hot and the fan to low using the climate controls.
- Watch for air bubbles rising in the funnel as the engine warms up.
- Keep the coolant level in the funnel above the fill opening while air bubbles escape.
- When the radiator fans cycle on and the heater blows warm air, let the engine idle for a few more minutes.
- Shut the engine off and let it cool completely before removing the funnel and installing the cap.
Step 11: Reinstall Splash Shield if Removed
- Use a trim clip removal tool to line up and reinstall plastic push clips.
- Use a 10mm socket and 3/8-inch drive ratchet to reinstall any 10mm fasteners.
- Tighten splash shield fasteners snugly by hand; these are small fasteners and do not need heavy force.
Step 12: Lower the Vehicle
- If raised, use a floor jack rated 3-ton minimum to lift the van slightly off the jack stands.
- Remove the jack stands rated 3-ton minimum.
- Lower your Odyssey slowly and smoothly to the ground.
✅ After Repair
- Start the engine and check the new radiator hose ends for leaks.
- Watch the temperature gauge during the first test drive; it should stay in the normal range.
- After the engine fully cools, recheck the coolant reservoir level and top off with Honda-compatible premixed coolant if needed.
- Check again after 1-2 drive cycles because small air pockets can work their way out.
- Dispose of old coolant properly at a recycling center or auto parts store that accepts used coolant.
💰 DIY vs Shop Cost
Shop Cost: $180-$350 USD equivalent (parts + labor)
DIY Cost: $35-$95 USD equivalent (parts only)
You Save: $145-$255 USD equivalent by doing it yourself!
Shop labor rates vary but typically run $100-$150/hour. This repair takes a shop approximately 0.8-1.5 hours.
🎯 Ready to get started?
HowToo makes it easy: same-day/2-day shipping on every part, plus all the tools and specialty tools you need! Check out the parts and tools sections below to add everything to your cart.