







How to Replace a Radiator Hose on a 2011-2024 Ram 1500 5.7L HEMI (Engine: V8 5.7L)
Step-by-step DIY guide with tools, parts, coolant refill tips, and clamp torque specs for 2011, 2012, 2013, 2014, 2015, 2016, 2017, 2018, 2019, 2020, 2021, 2022, 2023, 2024
How to Replace a Radiator Hose on a 2011-2024 Ram 1500 5.7L HEMI (Engine: V8 5.7L)
Step-by-step DIY guide with tools, parts, coolant refill tips, and clamp torque specs for 2011, 2012, 2013, 2014, 2015, 2016, 2017, 2018, 2019, 2020, 2021, 2022, 2023, 2024


🔧 1500 - Radiator Hose Replacement
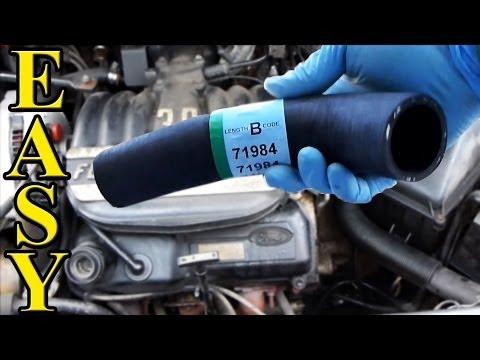
This repair replaces a leaking, swollen, cracked, or soft radiator hose on your 1500. The radiator hoses carry hot engine coolant between the engine and radiator, so the cooling system must be opened carefully and refilled without trapping air.
Difficulty Level: Beginner | Estimated Time: 1-2 hours
Assumption: This guide covers the upper or lower radiator hose on your 5.7L HEMI; replace the hose that is damaged.
⚠️ Safety & Precautions
- ⚠️ Only work on a completely cold engine. Hot coolant can cause severe burns.
- ⚠️ Do not remove the coolant pressure cap when the engine is hot.
- ⚠️ Coolant is poisonous to people and pets. Catch it in a drain pan and wipe spills right away.
- ⚠️ Disconnecting the battery is not normally required for this repair.
- ⚠️ If the lower hose is being replaced, you may need to work from underneath. Always support your 1500 with jack stands, never just a jack.
🔧 Required Tools
You'll need the following tools for this repair:
- Safety glasses
- Nitrile gloves
- Drain pan 2-gallon minimum
- Flat-blade screwdriver 1/4 inch
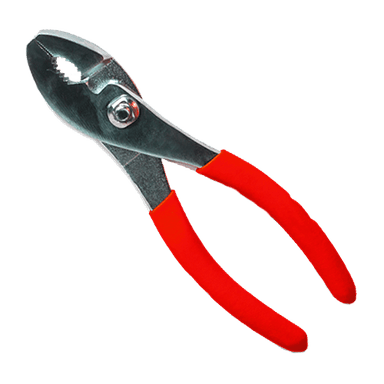
- Slip-joint pliers 10 inch
- Hose clamp pliers (specialty)
- Pick tool 90-degree (specialty)
- Funnel large-mouth
- Clean shop towels
- Floor jack rated 3-ton minimum
- Jack stands rated 3-ton minimum
- Wheel chocks
- Torque wrench inch-pound 1/4 inch drive
- 8mm socket
🔩 Required Parts
HowToo sells all the parts you need for this repair:
- Upper radiator hose - Qty: 1, if replacing upper hose
- Lower radiator hose - Qty: 1, if replacing lower hose
- Radiator hose clamps - Qty: 2 per hose, replace if weak, rusty, or damaged
- Mopar-compatible OAT coolant 50/50 premix - Qty: 1-2 gallons
- Distilled water - Qty: 1 gallon, only if using concentrate coolant
📋 Before You Begin
- 🅿️ Park your 1500 on level ground and let the engine cool fully.
- 🧱 Set the parking brake and place wheel chocks behind the rear wheels.
- 🧊 Confirm the upper radiator hose is cool and soft before opening the cooling system.
- ♻️ Place a drain pan under the radiator area before removing any hose.
- 📌 A hose clamp plier squeezes spring clamps evenly, making them easier and safer to move.
- 📌 A pick tool is a small hooked tool used to loosen a stuck hose without pulling hard on plastic radiator fittings.
🔨 Step-by-Step Instructions
Follow these steps in order:
Step 1: Relieve Cooling System Pressure
- Use your gloved hand to slowly turn the coolant pressure cap counterclockwise on the coolant reservoir.
- If you hear pressure escaping, stop and wait until it finishes before removing the cap.
- Set the cap aside on a clean shop towel.
Step 2: Position the Drain Pan
- Place the 2-gallon drain pan under the hose connection you are removing.
- For the upper hose, place the pan below the radiator inlet area.
- For the lower hose, place the pan below the lower radiator outlet area.
- Coolant spreads fast. Use a wide pan.
Step 3: Raise the Front Only If Replacing the Lower Hose
- If replacing the lower hose, use the 3-ton floor jack at the front frame lifting point.
- Set your 1500 securely onto 3-ton jack stands.
- Gently shake the truck by hand to confirm it is stable before going underneath.
- If replacing only the upper hose, skip this step.
Step 4: Move the Hose Clamps Back
- Use hose clamp pliers to squeeze the spring clamp tabs together.
- Slide the clamp several inches back onto the hose.
- If your hose has worm-gear screw clamps, use a 1/4 inch flat-blade screwdriver or 8mm socket to loosen them.
- Do this at both ends of the hose.
Step 5: Break the Hose Loose
- Use your hand to twist the hose gently at the radiator connection.
- If it is stuck, use the 90-degree pick tool between the hose and fitting to carefully loosen the seal.
- Do not pry hard against the radiator neck. It can crack.
- Twist first. Pull only after it moves.
Step 6: Remove the Old Hose
- Pull the hose straight off the radiator fitting by hand.
- Lower the hose end into the drain pan and let coolant drain out.
- Remove the other end from the engine-side fitting by hand.
- Use clean shop towels to wipe up any spilled coolant.
Step 7: Inspect the Hose Fittings
- Use a clean shop towel to wipe the radiator and engine-side hose fittings.
- Look for old rubber stuck to the fittings.
- Use the 90-degree pick tool gently if you need to remove stuck rubber pieces.
- Do not sand or gouge plastic fittings.
Step 8: Install the New Hose
- Slide the clamps onto the new radiator hose before installing it.
- Push the new hose fully onto the radiator fitting by hand.
- Push the other end fully onto the engine-side fitting by hand.
- Make sure the hose is not twisted, kinked, or rubbing the fan, belt, pulley, or sharp brackets.
Step 9: Position and Tighten the Clamps
- Use hose clamp pliers to move spring clamps back into their original positions behind the raised bead on each fitting.
- If using screw-style clamps, use the 8mm socket and inch-pound torque wrench.
- Tighten screw-style clamps only until snug unless the clamp maker provides a spec.
- Torque to 35-45 in-lbs for common worm-gear hose clamps if no clamp-specific spec is supplied.
- Do not over-tighten. Over-tightening can damage the radiator fitting.
Step 10: Refill the Cooling System
- Place the large-mouth funnel into the coolant reservoir opening.
- Add Mopar-compatible OAT 50/50 premix coolant slowly until the reservoir reaches the cold fill line.
- Squeeze the new hose gently by hand several times to help move trapped air.
- Reinstall the coolant pressure cap by hand until fully seated.
Step 11: Warm the Engine and Check for Leaks
- Start the engine and let it idle.
- Set the cabin heat to full hot using the climate controls.
- Watch the hose connections with safety glasses on.
- Check for drips at both hose ends.
- As the engine warms up, confirm the heater blows warm air.
Step 12: Final Coolant Level Check
- Turn the engine off and let it cool completely.
- Use gloves to remove the coolant pressure cap only when cold.
- Add Mopar-compatible OAT 50/50 premix coolant to the cold fill line if the level dropped.
- Reinstall the cap securely by hand.
✅ After Repair
- ✅ Road test your 1500 for 10-15 minutes while watching the temperature gauge.
- ✅ After the road test, park on level ground and check under the truck for coolant drips.
- ✅ Let the engine cool completely, then recheck the coolant level at the reservoir.
- ✅ Recheck the hose clamp positions after the first full heat cycle.
- ♻️ Take used coolant to an authorized recycling or service facility. Do not pour it on the ground or into drains.
💰 DIY vs Shop Cost
Shop Cost: $180-$350 (parts + labor)
DIY Cost: $35-$110 (parts only)
You Save: $145-$240 by doing it yourself!
Shop labor rates vary but typically run $100-$150/hour. This repair takes a shop approximately 0.8-1.5 hours.
🎯 Ready to get started?
HowToo makes it easy: same-day/2-day shipping on every part, plus all the tools and specialty tools you need! Check out the parts and tools sections below to add everything to your cart.